Packaging Tools
The Packaging Tools area allows you to create new projects from demo templates as well as open existing .packageinfo.json files. Packaging Projects allow you to create a file in OPV Format which includes all of the necessary components needed to distribute your application or install it on the target.
New Button - Opens the new project dialog where you can select from any demo / starter projects you have downloaded. Demo Projects are available in the Plugin Manager.
Open Button - Opens a packageinfo.json file for your project allowing you to change the inputs, output, and project attributes.
Save Button - Saves changes to the currently open package (visible only when a package is open).
Close Button - Closes the currently open package (visible only when a package is open).
Packaging Tab
The Packaging tab configures the core identity and outputs of your package.
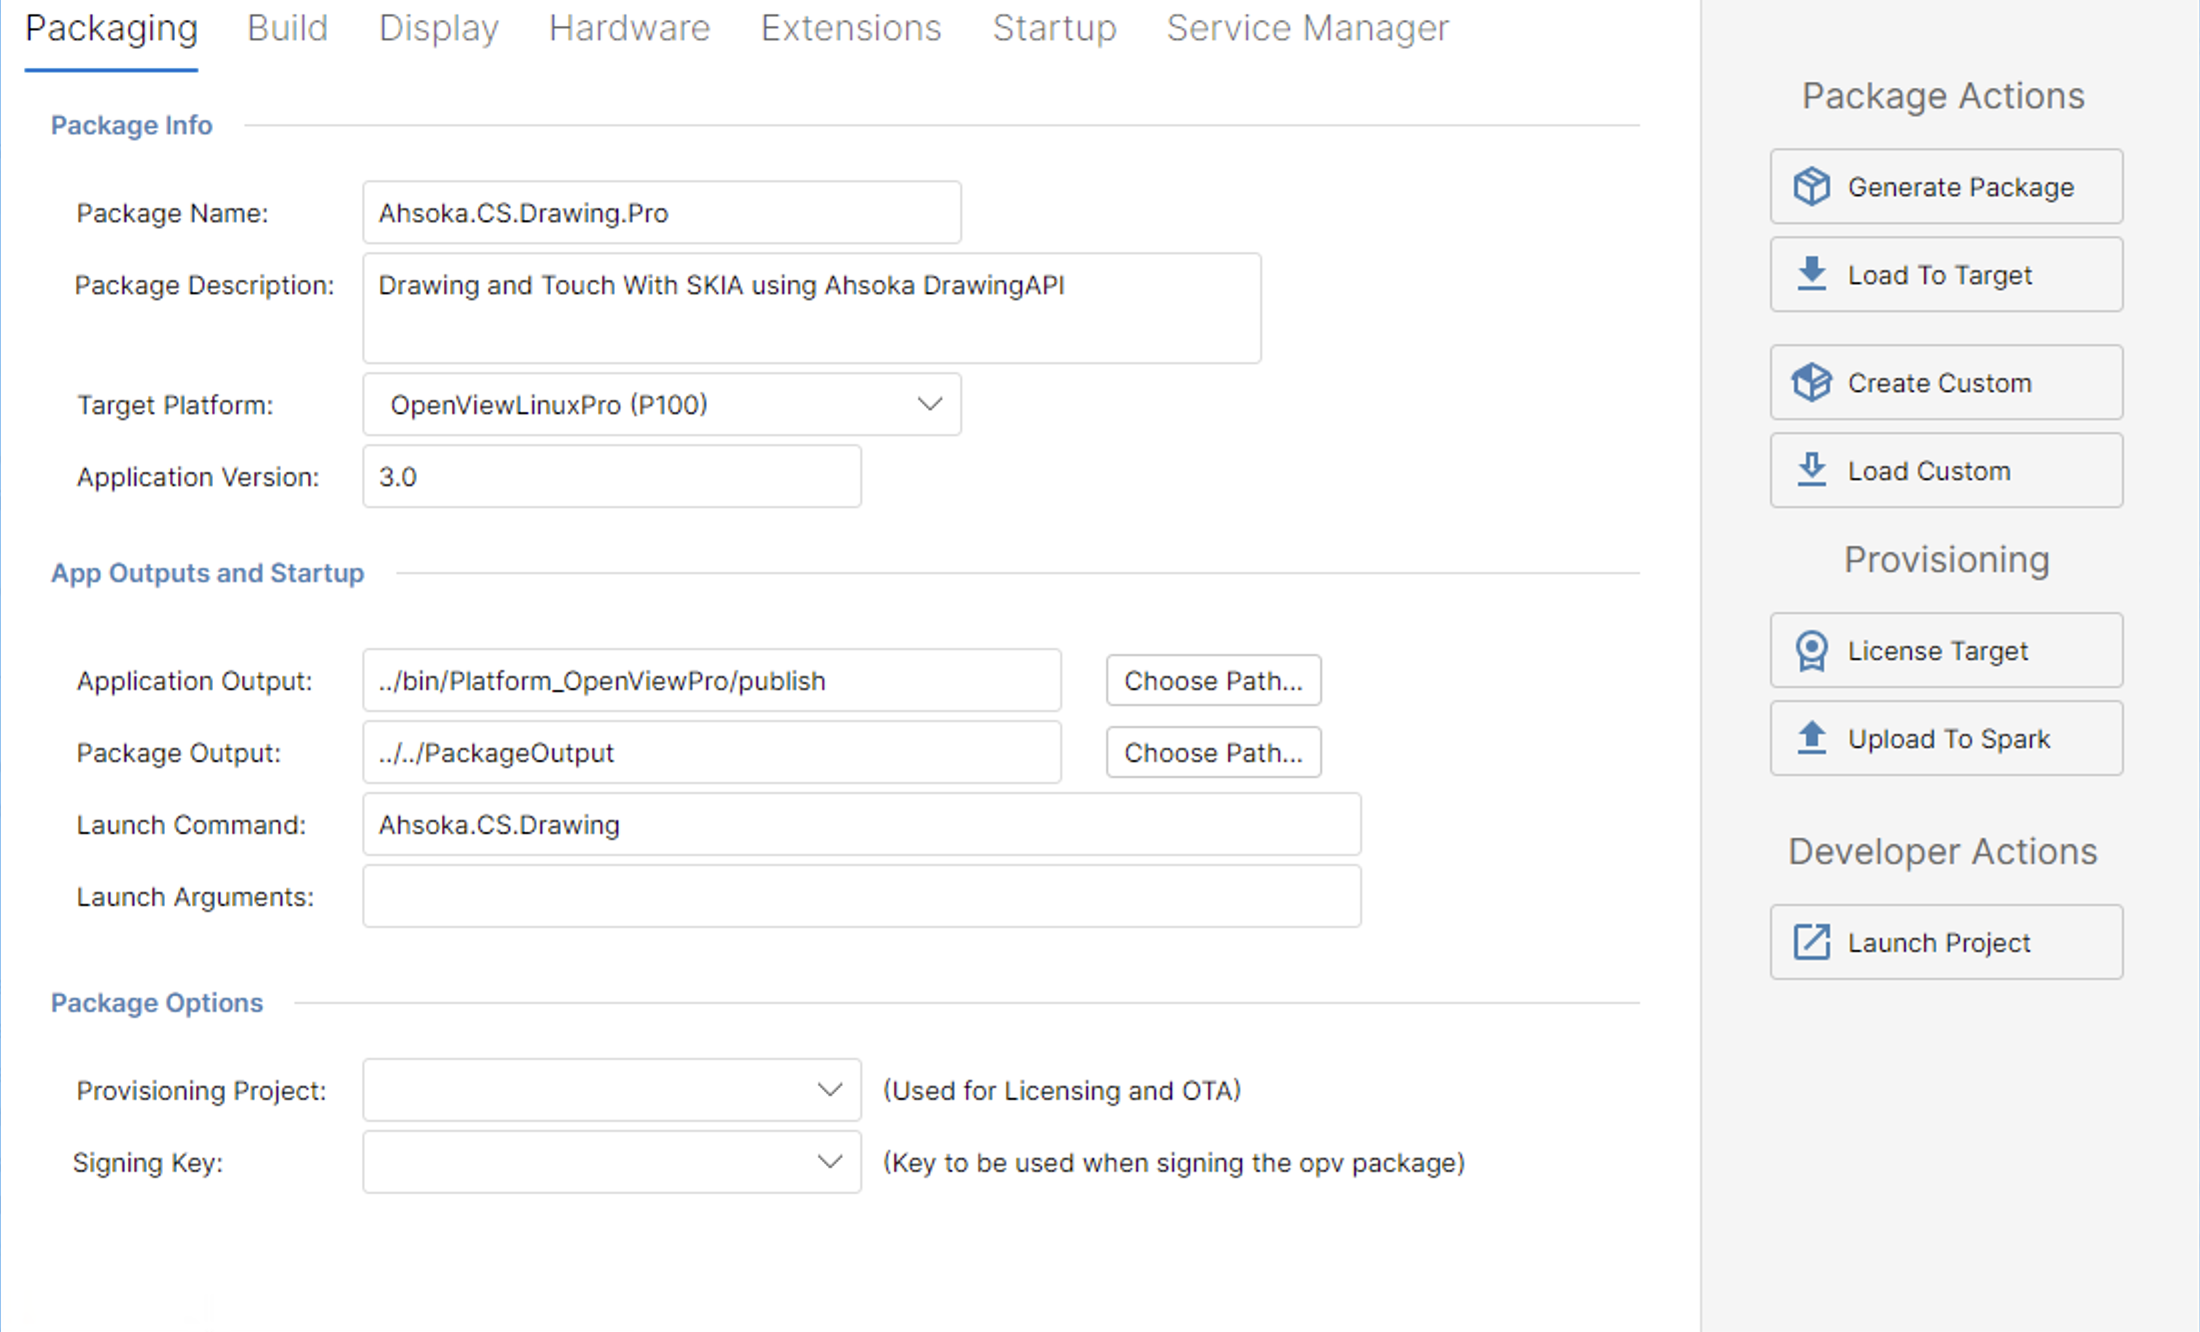
Package Info
Package Name - The name of your package. This name is also used by the Spark OTA feature when uploading your application.
Package Description - A short description of the package.
Target Platform - The Platform for your Application. This is a combination of the Platform Family (OS) and Platform Qualifier (Variant) and defines what dependency packages will be included in your resulting Package File.
Application Version - Allows you to define an Application Version to be reported to the system at runtime or when uploading to Spark.
App Outputs and Startup
Application Output - Specifies the path (relative to the package info file) where the application's output will be captured. This folder will be packaged and included in the OPV file.
Package Output - Specifies the path where the resulting OPV file will be saved after it is generated.
Launch Command - The command used to start your application on the target. Typically this is the name of your executable located in the Application Output folder.
Launch Arguments - Optional arguments passed to the launch command at startup.
Package Options
Provisioning Project - Associates this package with a Spark Project for Licensing and OTA. Select your project from the dropdown.
Signing Key - The key to be used when signing the OPV package.
Package Actions
Generate Package - Creates an OPV Package file from the selected packageinfo.json. Packages your application content along with dependencies based on the selected Application Type.
Load To Target - Loads the generated package to the connected display. The display must be running the Visual Installer (Ahsoka.InstallerUI). Use the Stop Application button in the status bar to return to the installer if your application is currently running.
Create Custom / Load Custom - Creates or loads a custom install package.
License Target - Licenses the connected display for this package. Requires an active connection and online access.
Upload To Spark - Uploads the OPV file to Spark in the most restrictive channel (Development), allowing you to begin testing on development devices.
Developer Actions
Launch Project - Opens the project in your configured IDE.
Build Tab
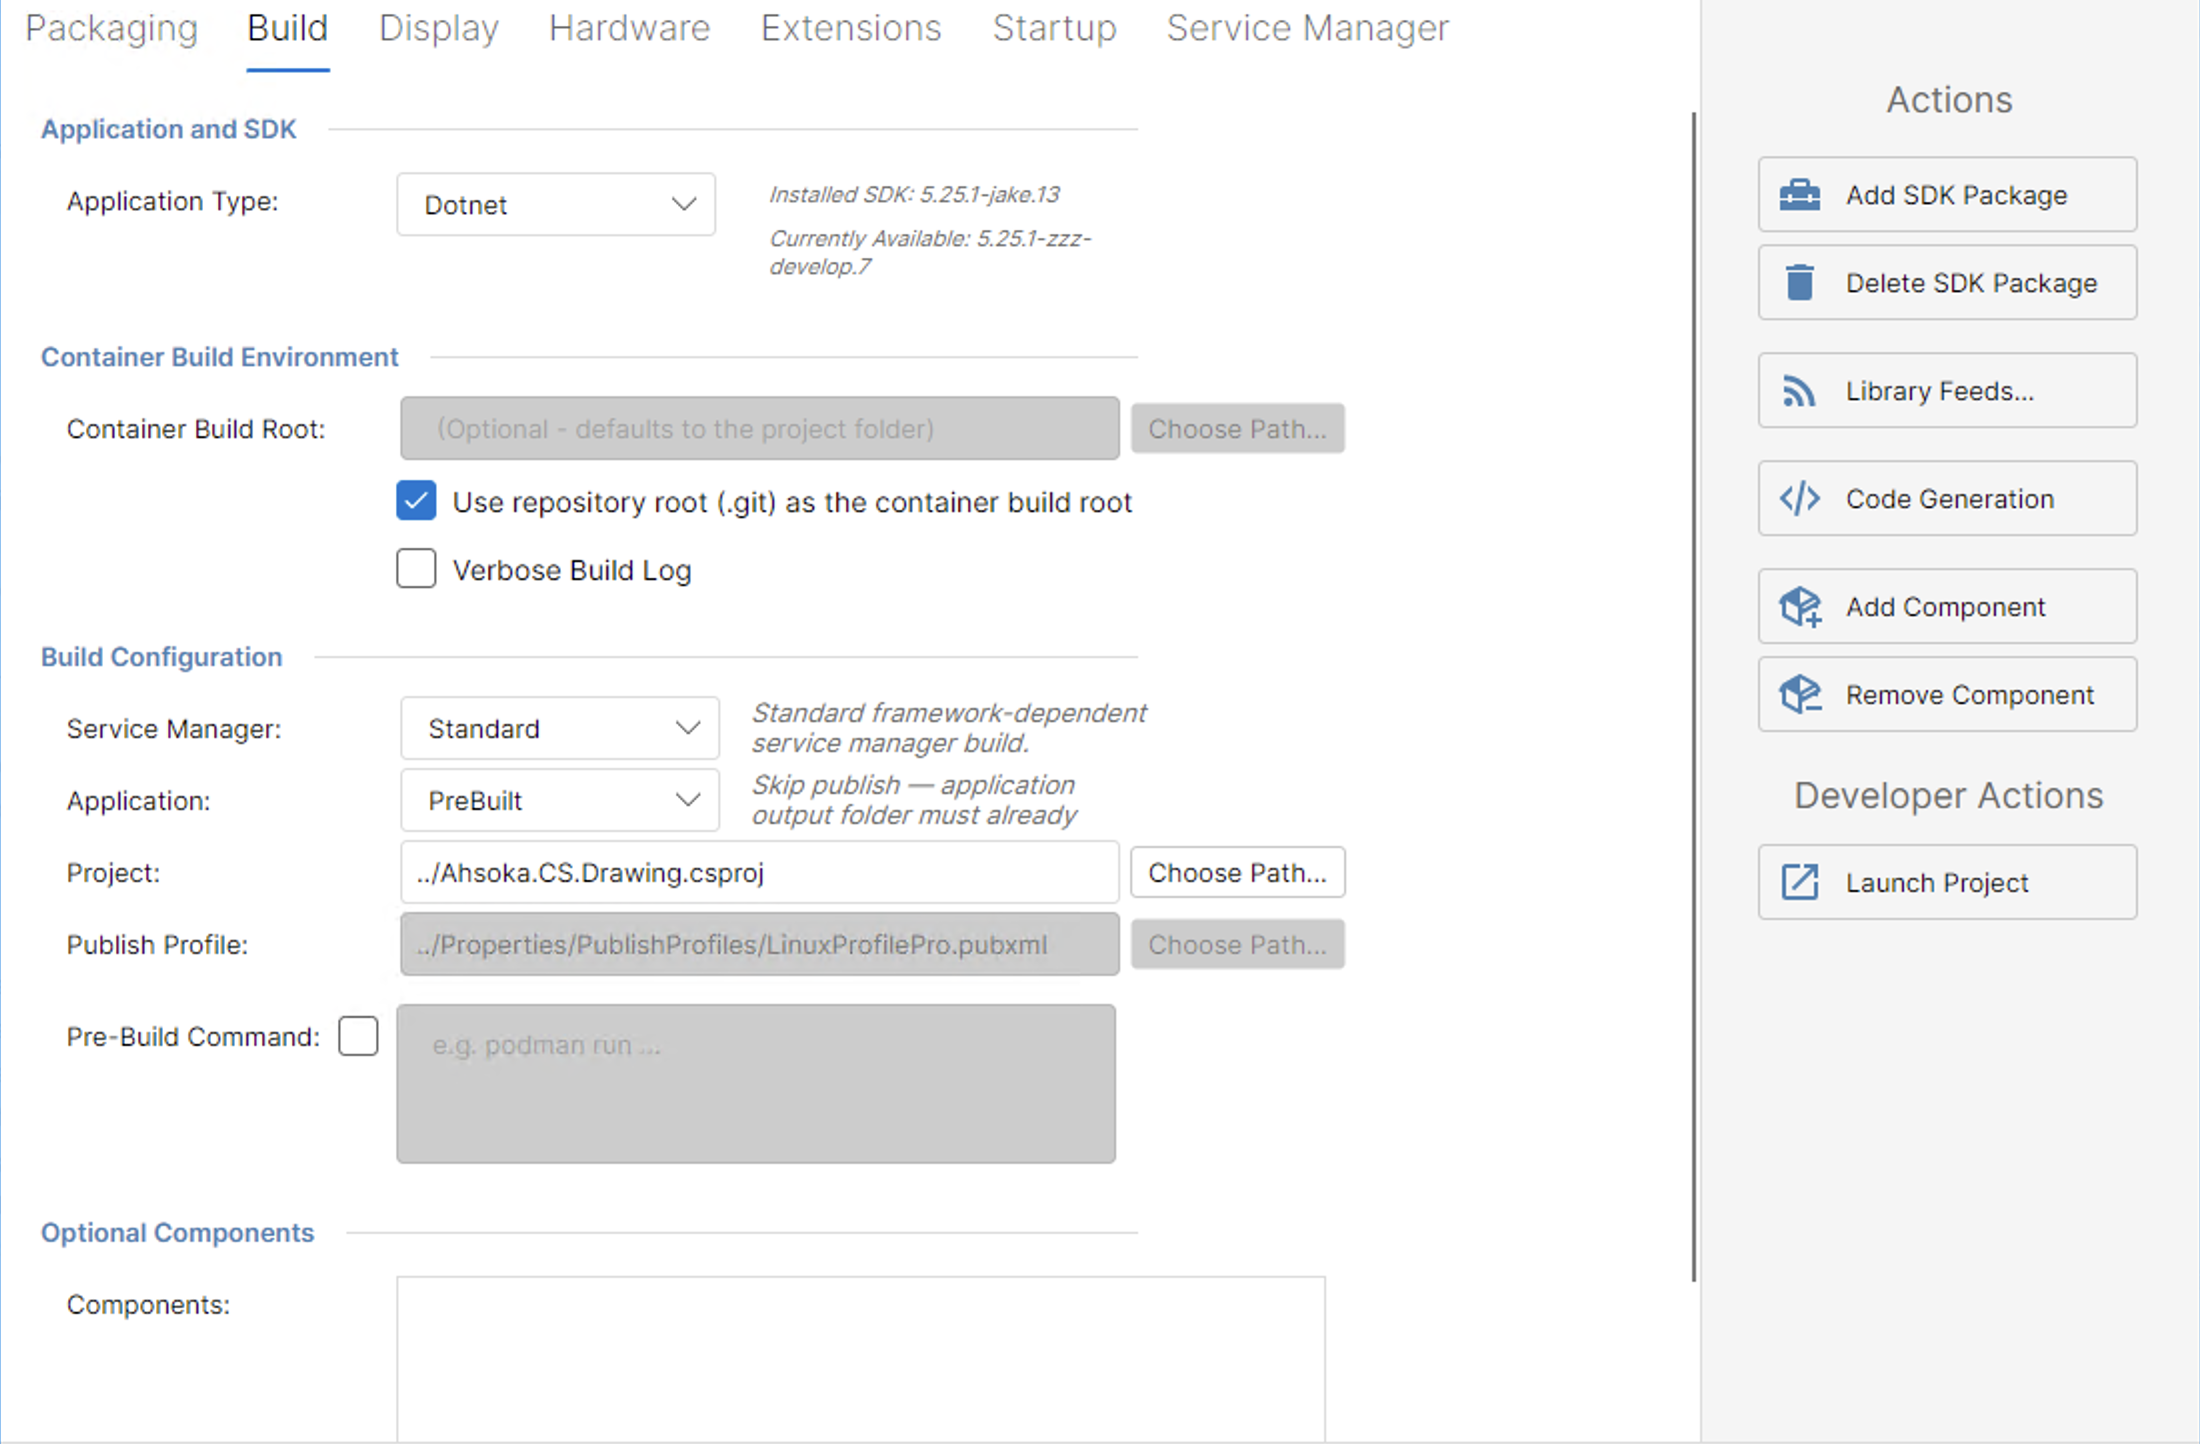
The Build tab configures how your application is compiled and built.
Application and SDK
Application Type - Selects the language / framework technology (e.g. Dotnet, C++, Container, Script). The fields shown below change based on the selected type. The currently installed SDK version and the latest available version are shown alongside this selector.
Container Build Environment
Container Build Root - Optional path to the root folder used for container builds. Defaults to the project folder.
Use repository root (.git) as the container build root - When checked, uses the git repository root as the container build root.
Verbose Build Log - When checked, enables verbose output during container builds.
Build Configuration — DotNet
Used when Application Type is set to Dotnet.
Service Manager - Selects how the Service Manager is compiled (e.g. Native via Docker / Podman).
Application - Selects how the application is compiled (e.g. AOT native publish via Docker / Podman).
Project - Path to the .csproj project file. The toolkit will execute a build of this project during the generate process.
Publish Profile - Path to a publish profile for the target platform (typically Linux/ARM or Linux/ARM64). The output of this profile should match your Application Output directory.
Pre-Build Command - An optional shell command to run before the build (e.g. podman run ...). Enable the checkbox to activate it.
Build Configuration — C++
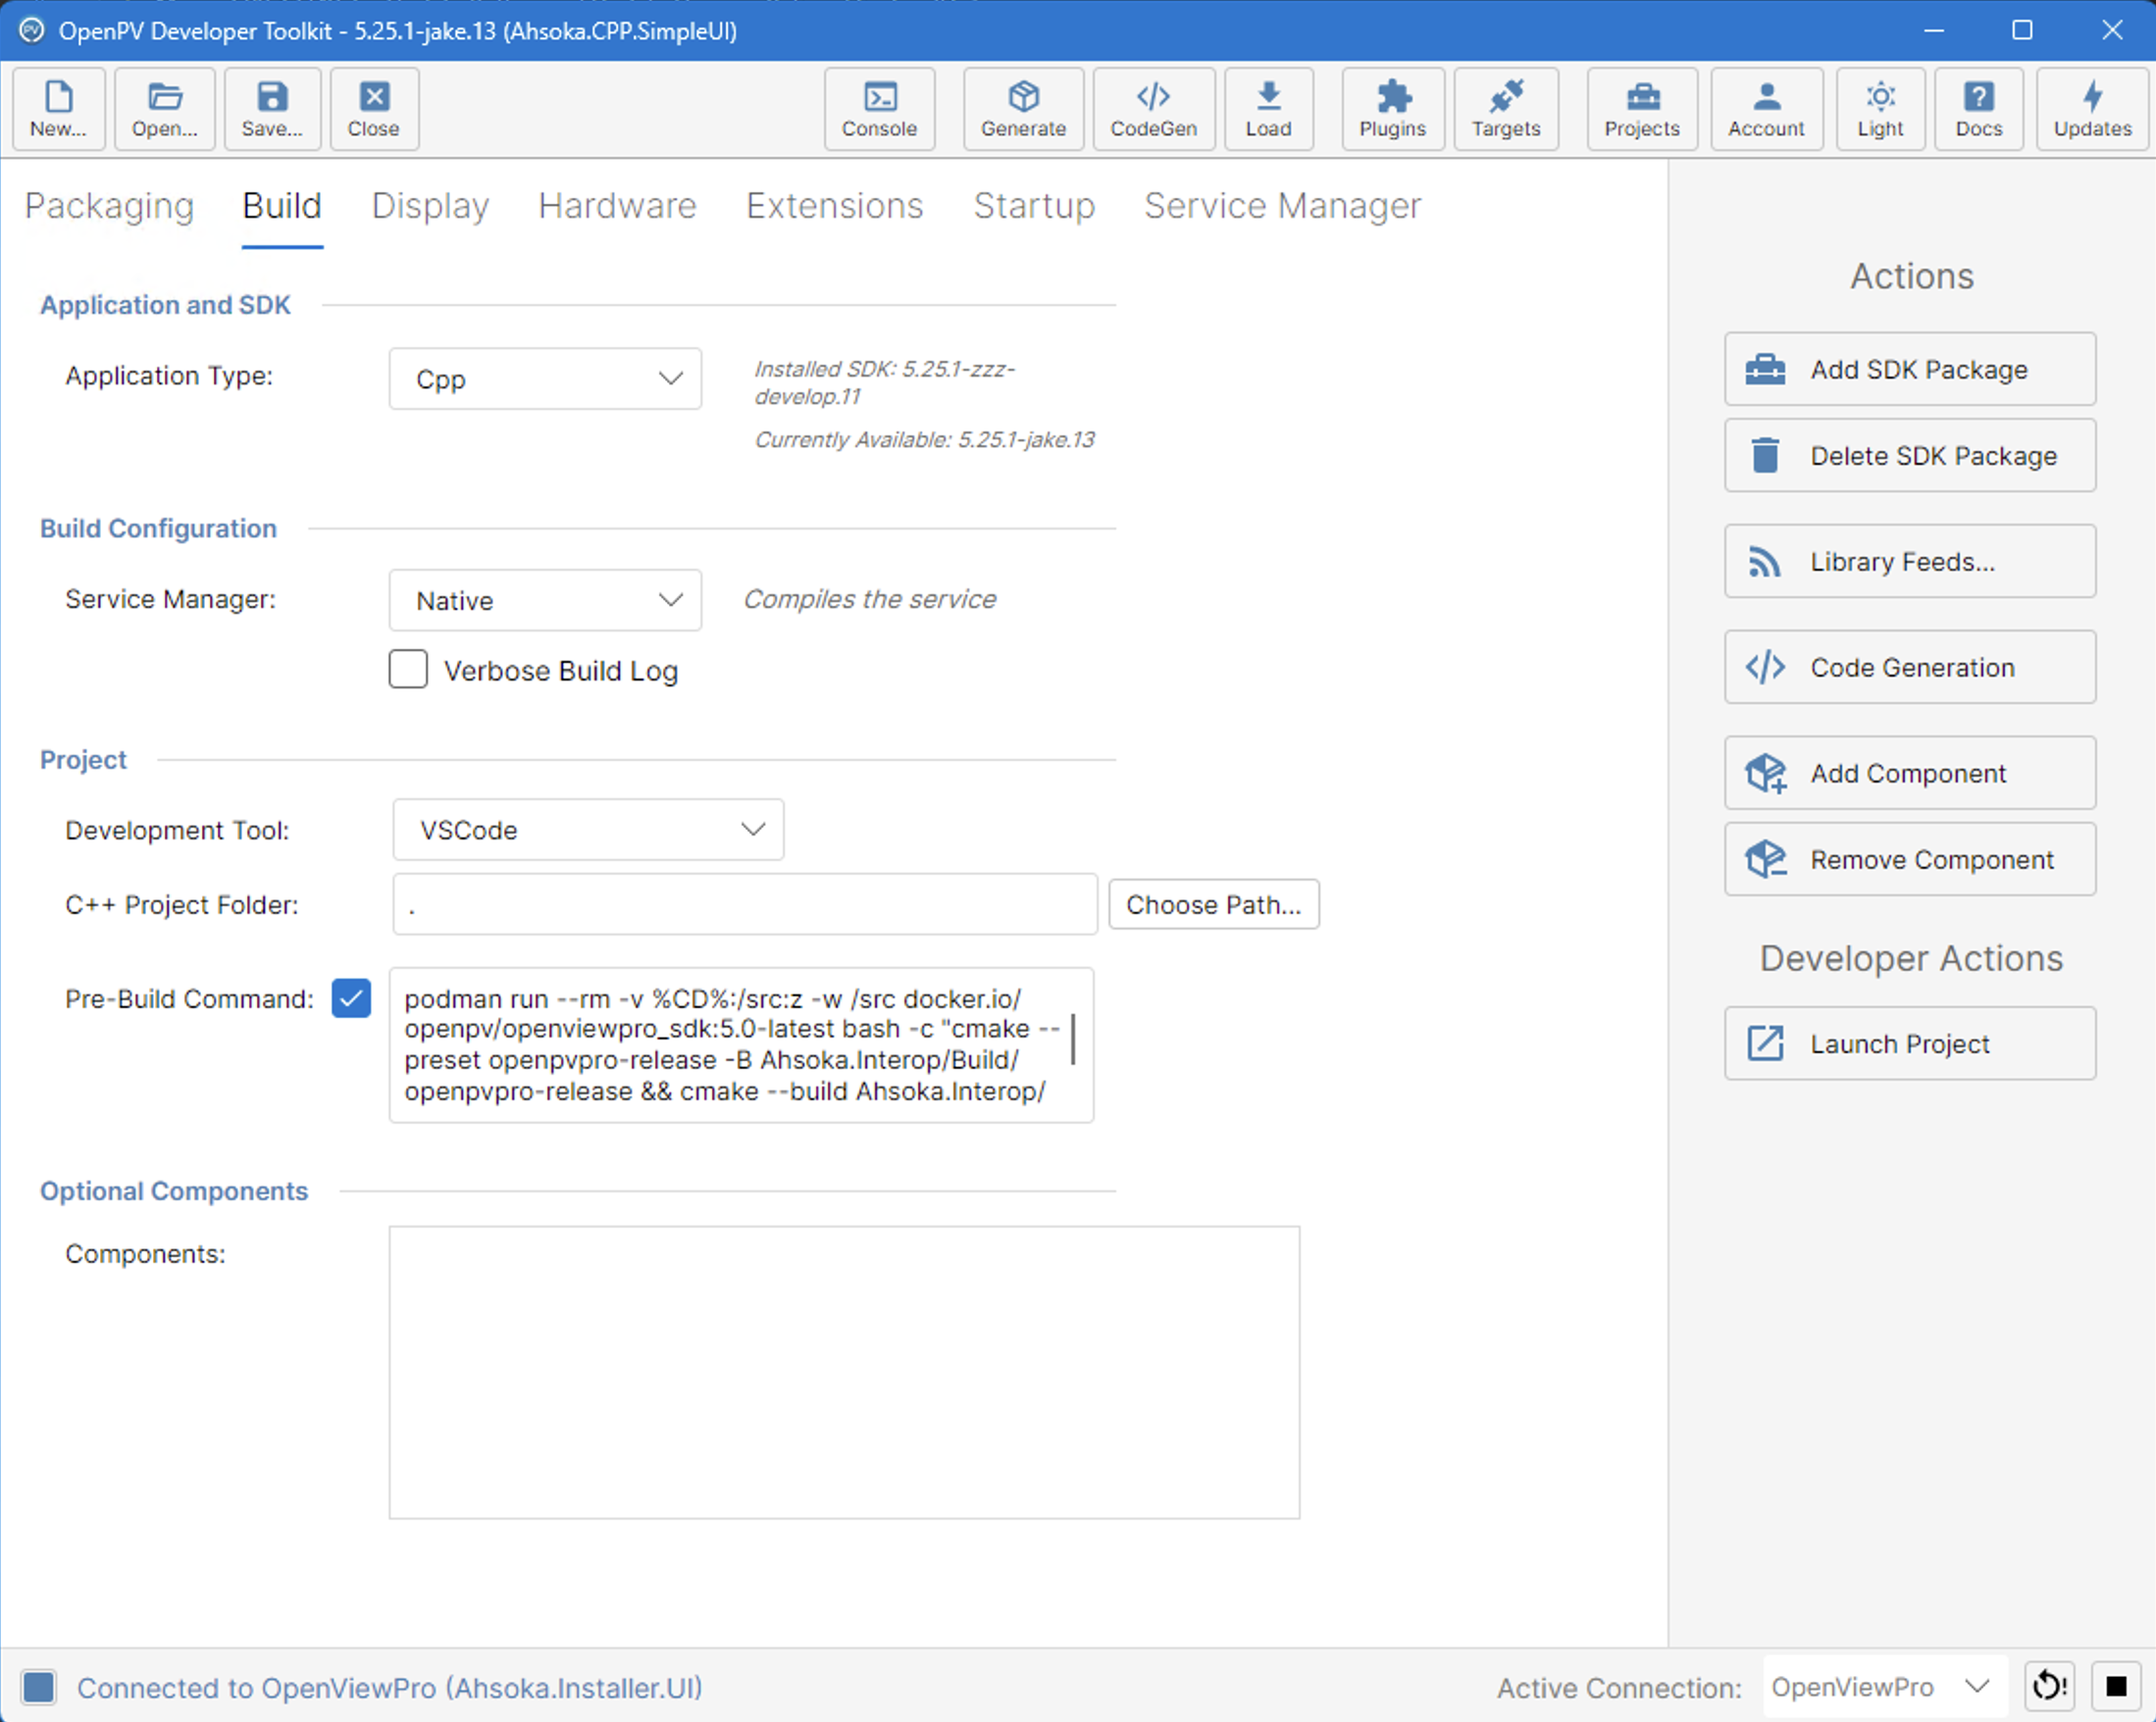
Used when Application Type is set to C++.
Service Manager - Selects how the Service Manager is compiled.
Development Tool - Selects the C++ development toolchain to use for building (e.g. QT Creator, VS Code).
C++ Project Folder - Path to the root folder of your C++ project.
Pre-Build Command - An optional shell command to run in the project directory before packaging. Enable the checkbox to activate it.
Build Configuration — Container
Used when Application Type is set to Container. Packages an existing container image rather than building from source.
Service Manager - Selects how the Service Manager is compiled.
Container to Package - Selects the local container image to include in the OPV package. The toolkit will capture the selected image and configure it for deployment to the target.
Pre-Build Command - An optional shell command to run before packaging. Enable the checkbox to activate it.
Build Configuration — Script
Used when Application Type is set to Script. Packages a script-based application with no compilation step.
Service Manager - Selects how the Service Manager is compiled.
Pre-Build Command - An optional shell command to run before packaging. Enable the checkbox to activate it.
Optional Components
Components - Lists optional BSP components included in the application package (e.g. Browser, QT Support, Podman). Use Add Component / Remove Component in the Actions panel to manage this list. Available for all application types.
Build Actions
Add SDK Package - Downloads and installs an SDK package for the selected platform.
Delete SDK Package - Removes the installed SDK package.
Library Feeds... - Manages NuGet feed sources used during build.
Code Generation - Runs any code generators included in the core or extensions.
Add Component / Remove Component - Adds or removes optional BSP components from the package.
Display Tab
The Display tab configures the screen layout, startup logo, and Layer Manager surfaces for each display screen.
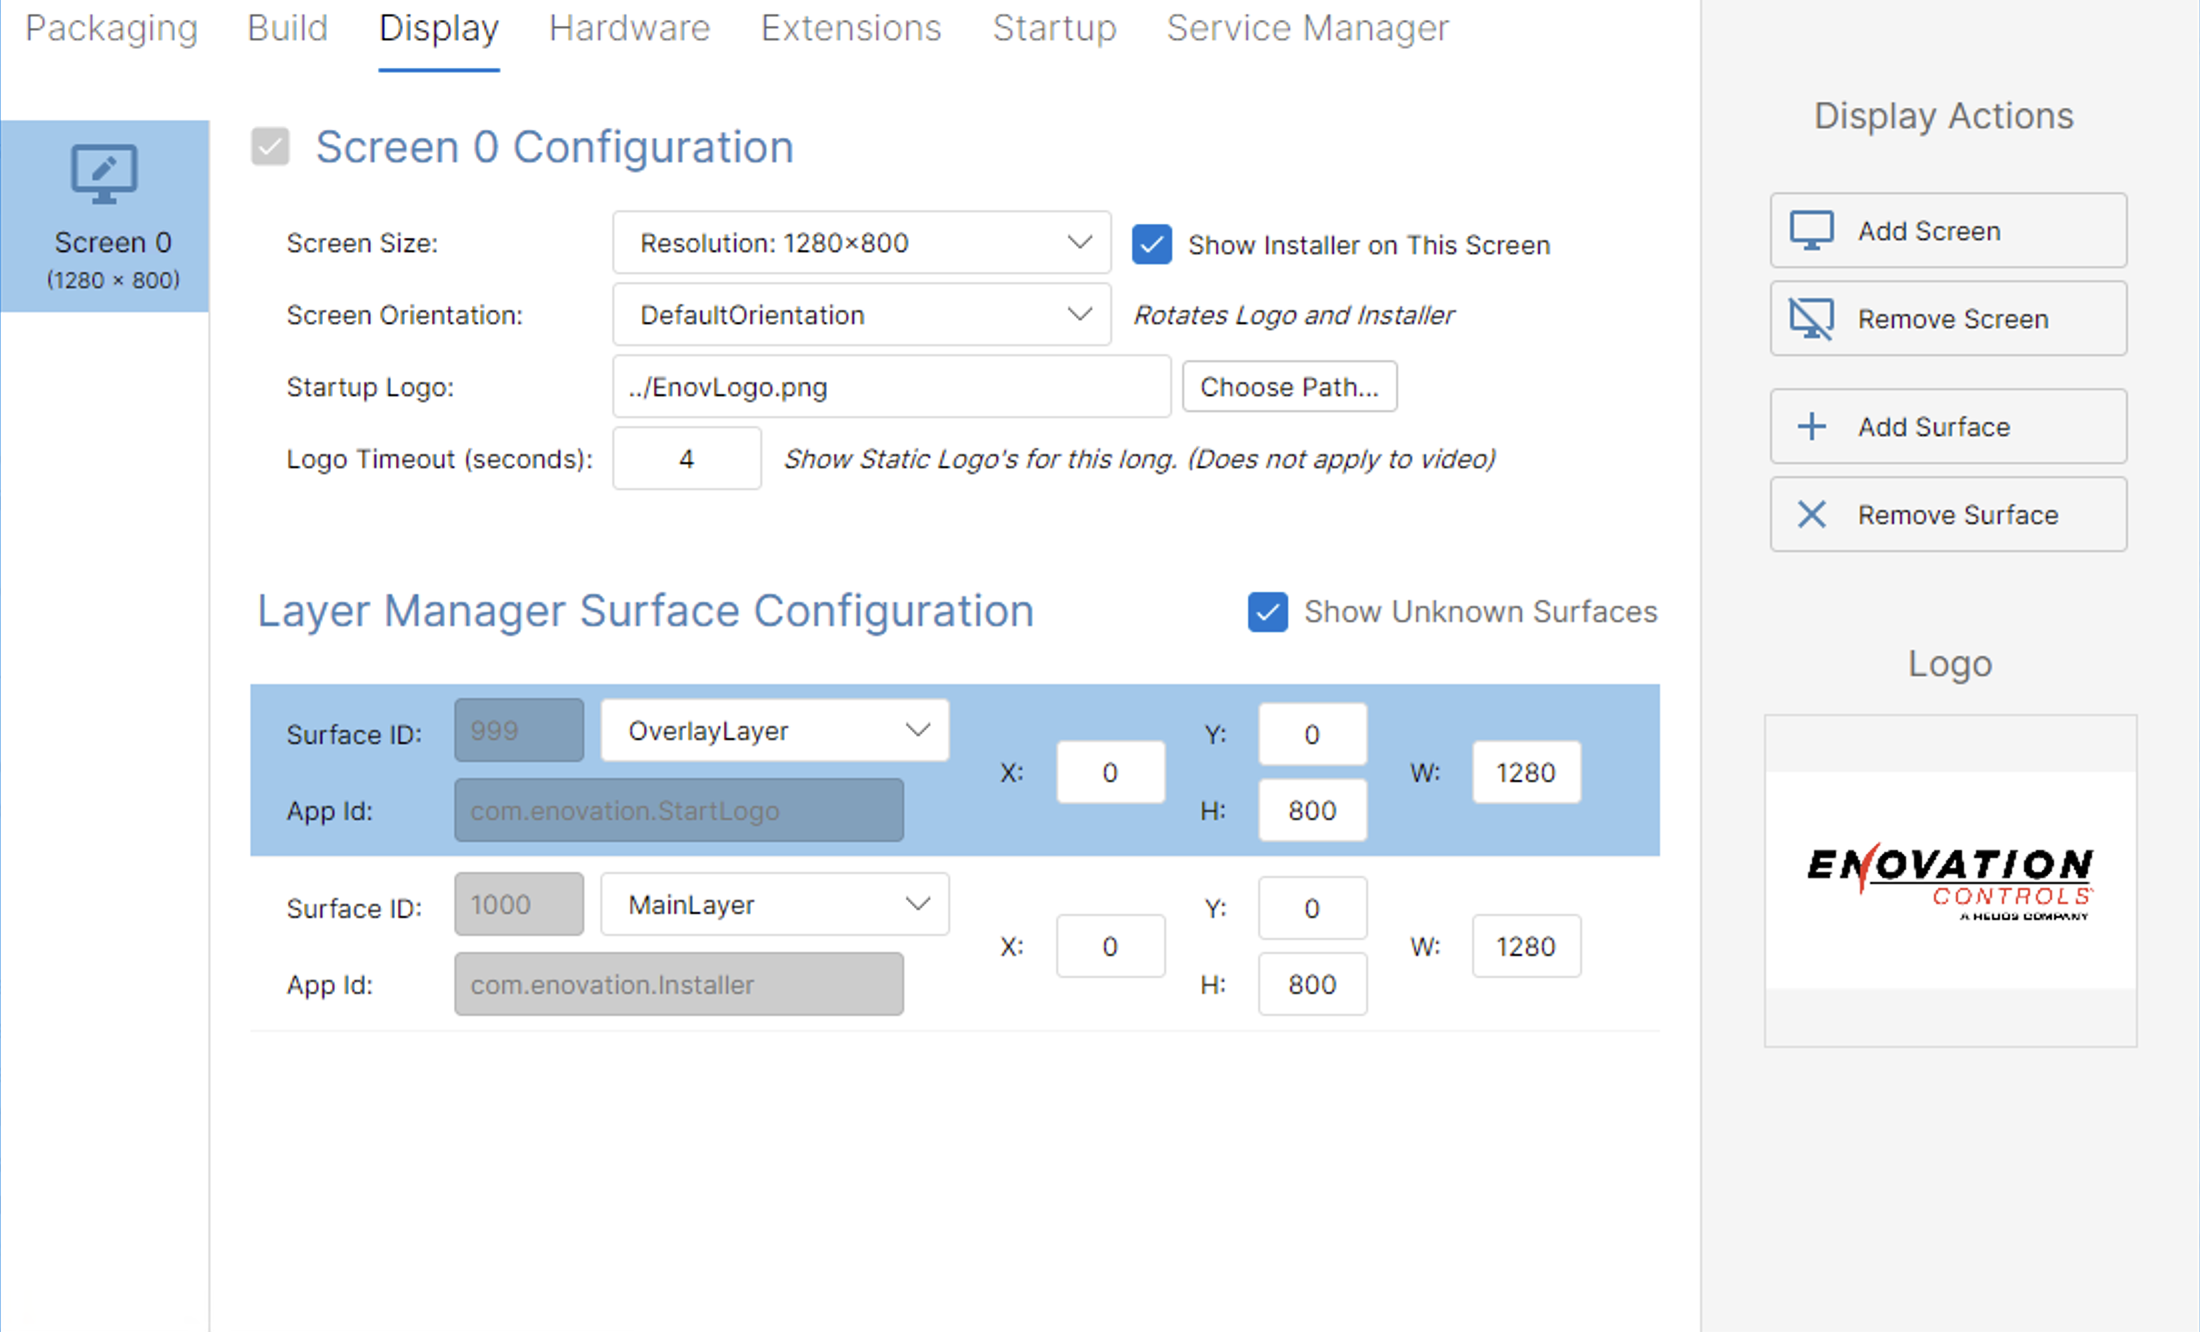
Each screen is listed in the left panel. Use Add Screen / Remove Screen in the Display Actions panel to manage multiple screens.
Screen Configuration
Screen Size - The resolution of the screen.
Show Installer on This Screen - When checked, the Visual Installer is shown on this screen.
Screen Orientation - The orientation of the screen. Also rotates the startup logo and installer.
Startup Logo - Path to the startup logo image shown at boot. Supports static images (PNG, JPG) as well as video files (MP4). A preview of the logo is shown in the Logo panel on the right.
Logo Timeout (seconds) - How long to display a static startup logo before transitioning. Does not apply to video logos.
Layer Manager Surface Configuration
Configures the Layer Manager surfaces for this screen. Each surface row defines:
Surface ID - Unique ID for the surface.
Layer Type - The role of the surface (e.g. OverlayLayer, MainLayer).
X / Y / W / H - Position and size of the surface on screen.
App Id - The application ID assigned to this surface.
Use Add Surface / Remove Surface in the Display Actions panel to manage surfaces.
Hardware Tab
Configures hardware-specific options for the target platform.
Extensions Tab
Manages OpenPV Extensions included in the application package. Extensions add optional capabilities (Bluetooth, CAN, Audio, etc.) to your application.
Startup Tab
Configures startup options for the application including which services autostart and their startup order.
Service Manager Tab
Configures services that run under Ahsoka.ServiceManager, including autostart settings, startup order, parallel startup options, and whether services are available locally only or also remotely.