Developing QT Applications with Qt Creator
OpenPV QT applications are built inside the OpenPV container, but Qt Creator runs natively on your host and drives the container through its Development Containers support. The container (openpv_custom, built locally by the Developer Toolkit, and the public openpv/openview_base) ships the QT6 libraries and the cross toolchains; Qt Creator just provides the IDE.
You do not need to install Qt itself or create a Qt account — the QT libraries live in the container. You only need the Qt Creator IDE.
Requirements
- A container engine — Podman is preferred in OpenPV 5 (Docker is also supported).
- The OpenPV build container. Build it from the Developer Toolkit's Plugins → OpenPV Build Container (select the toolchains you target), or pull
openpv/openview_base. - Qt Creator 20 or newer. Development Containers kit registration is only reliable from Qt Creator 20 onward — on 19 the kits often fail to register.
1. Install Qt Creator
macOS
Homebrew:
brew install --cask qt-creator
Or download the standalone package (no Qt account required) from the Qt release server: https://download.qt.io/official_releases/qtcreator/ — open the latest folder (e.g. 20.0/20.0.1/) and grab the macOS package.
Make sure your Podman machine is running: podman machine start.
Windows
Download the standalone Qt Creator (no Qt account required) from https://download.qt.io/official_releases/qtcreator/20.0/20.0.1/:
- Offline installer —
qt-creator-opensource-windows-x86_64-20.0.1.exe, or - Zero-install —
installer_source/windows_x64/qtcreator.7z; extract with 7-Zip and runbin\qtcreator.exe.
winget install TheQtCompanyLtd.QtCreatorcurrently installs version 19, which has the Dev Container kit issue noted above. Prefer 20+.
Linux / Ubuntu
sudo apt install qtcreator
If your distribution ships a version older than 20, download the standalone package from https://download.qt.io/official_releases/qtcreator/ instead.
2. Point Qt Creator at your container engine
Qt Creator's Development Containers support invokes the docker CLI by name. If you use Podman, make docker resolve to Podman.
macOS / Linux
A symlink is more reliable than a shell alias — Qt Creator launched from the GUI doesn't read your shell's alias:
sudo ln -sf "$(which podman)" /usr/local/bin/docker
WSL note. When you run the toolkit and Qt Creator inside WSL, a Windows-side
docker(for example/mnt/c/Users/<you>/bin/docker, or the one Docker Desktop's WSL integration adds) often leaks onto your LinuxPATH. That command cannot drive the Linux Podman engine, so Qt Creator's Check Docker step fails — typically with:The command " system df" could not be started. No executable specified.Create the symlink in
/usr/local/binas shown above: that directory precedes the/mnt/c/...entries onPATH, so the native shim wins. The OpenPV Developer Toolkit also creates this shim automatically the first time you Launch Project on a QT app (and prepends its location to the launched IDE'sPATH), so launching Qt Creator from the toolkit resolves it without the manual step.Podman 4.x note (Ubuntu 24.04 ships Podman 4.9.3). A bare
docker→podman symlink is enough on Podman 5+, but Podman 4.x prints capitalized JSON keys fromdocker events("Status"instead of Docker's"status"/"Action"). Qt Creator's Dev Container plugin never recognizes those, so the container is created and started but the IDE hangs forever at "Waiting for container to start." The toolkit's auto-generated shim is a small wrapper (not a plain symlink) that rewritesdocker eventsinto Docker's schema, so launching from the Developer Toolkit is the reliable path on Podman 4.x. If you must run Qt Creator standalone on Podman 4.x, either upgrade to Podman 5+ or replace the symlink with that wrapper (the toolkit writes it to the first writable dir onPATH, e.g./usr/local/bin/docker).
Windows
Podman spawns as podman.exe; Qt Creator looks for docker.exe specifically, so create a real docker.exe next to Podman (that folder is already on PATH). Podman is a drop-in for the docker CLI:
copy "%LOCALAPPDATA%\Programs\Podman\podman.exe" "%LOCALAPPDATA%\Programs\Podman\docker.exe"
Restart Qt Creator afterward so it picks up the new command. (If you use Docker Desktop instead of Podman, no shim is needed.)
3. Enable the Development Containers extension
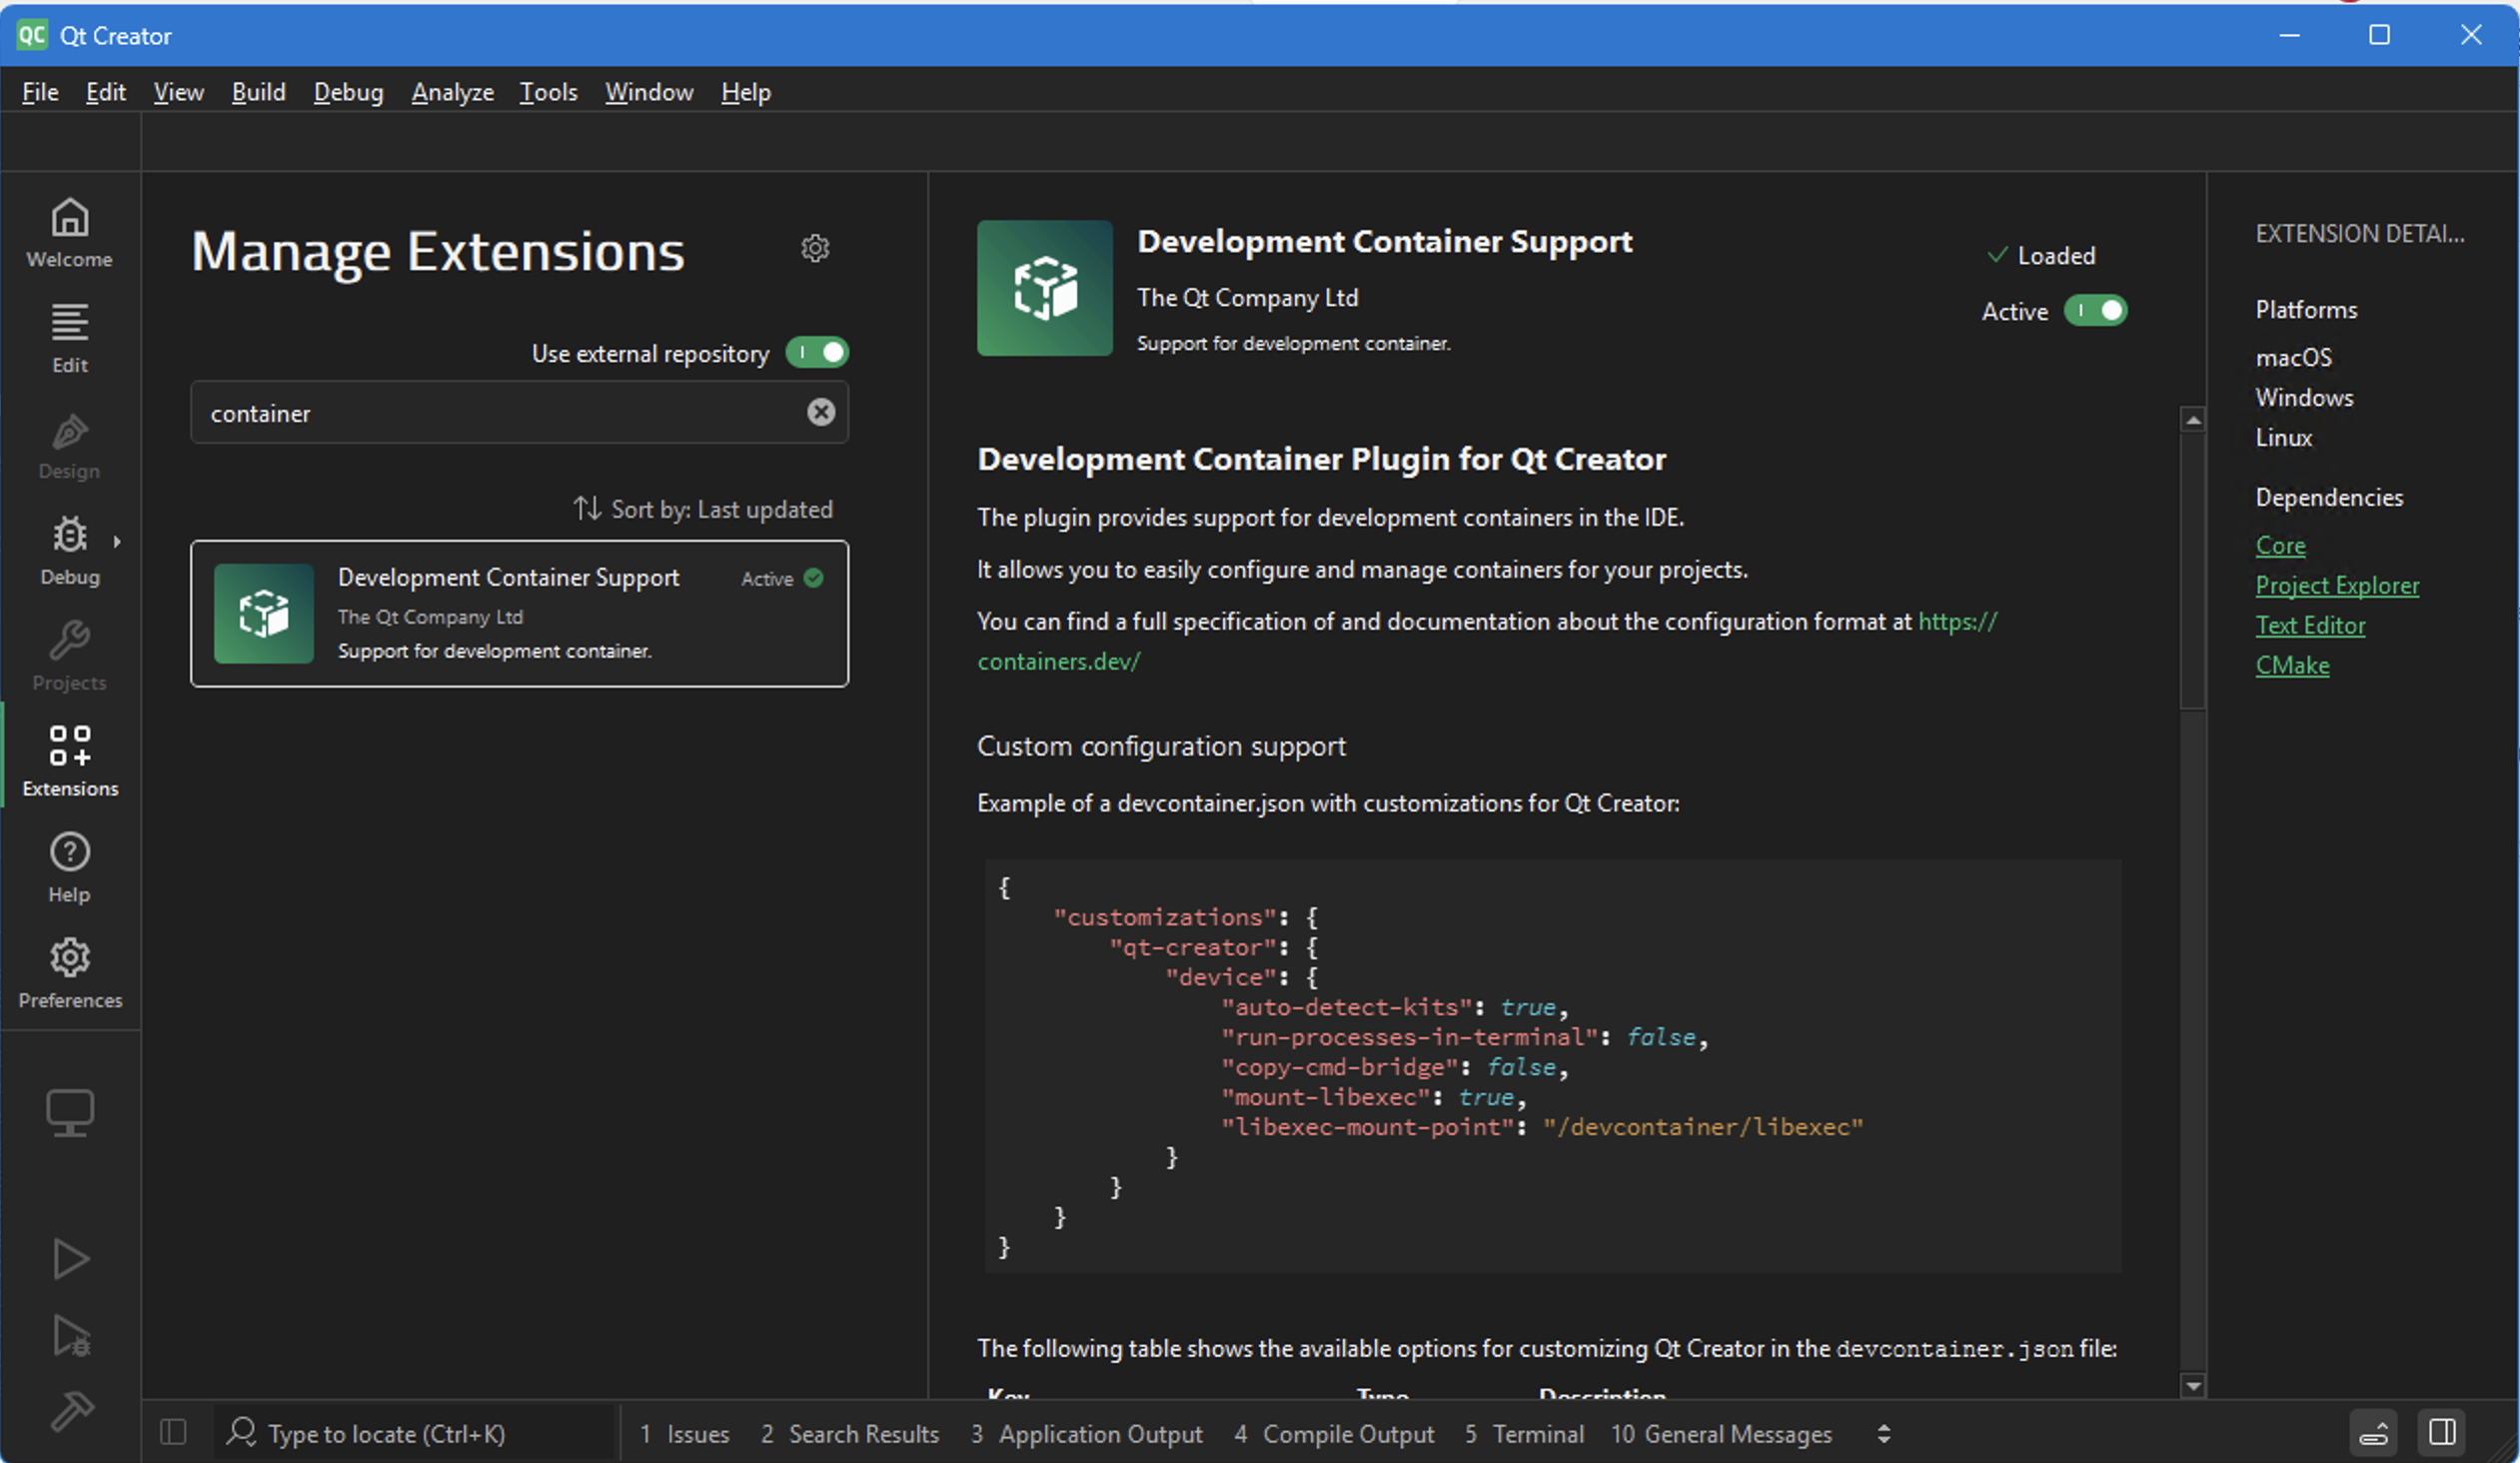
Qt Creator 20 includes Development Containers, but the plugin may be disabled by default:
- Help → About Plugins… (on macOS: Qt Creator → About Plugins…).
- Find Development Containers, tick its checkbox.
- Close the dialog and restart Qt Creator when prompted.
4. Open your project in the container
Either:
- From the OpenPV Developer Toolkit — on a QT project, click Launch Project. The toolkit opens the project folder in your host Qt Creator.
- Directly in Qt Creator — File → Open File or Project… and select the project's
CMakeLists.txt. The project folder must contain.devcontainer/devcontainer.json.
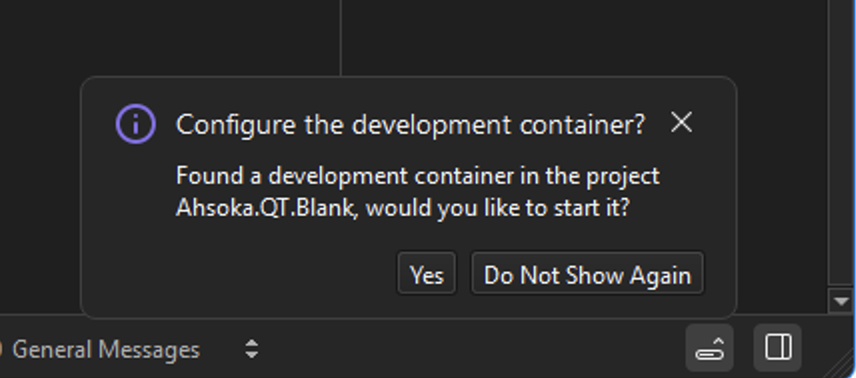
Qt Creator detects the .devcontainer/devcontainer.json and offers to start the development container — accept it. The first start builds the image from openpv_custom; watch the General Messages pane. When it succeeds you'll see it inspect the tools inside the container (paths beginning devcontainer://…/usr/bin/cmake, …/usr/bin/gdb, and Found kit: OpenPV QT).
5. Select the kits
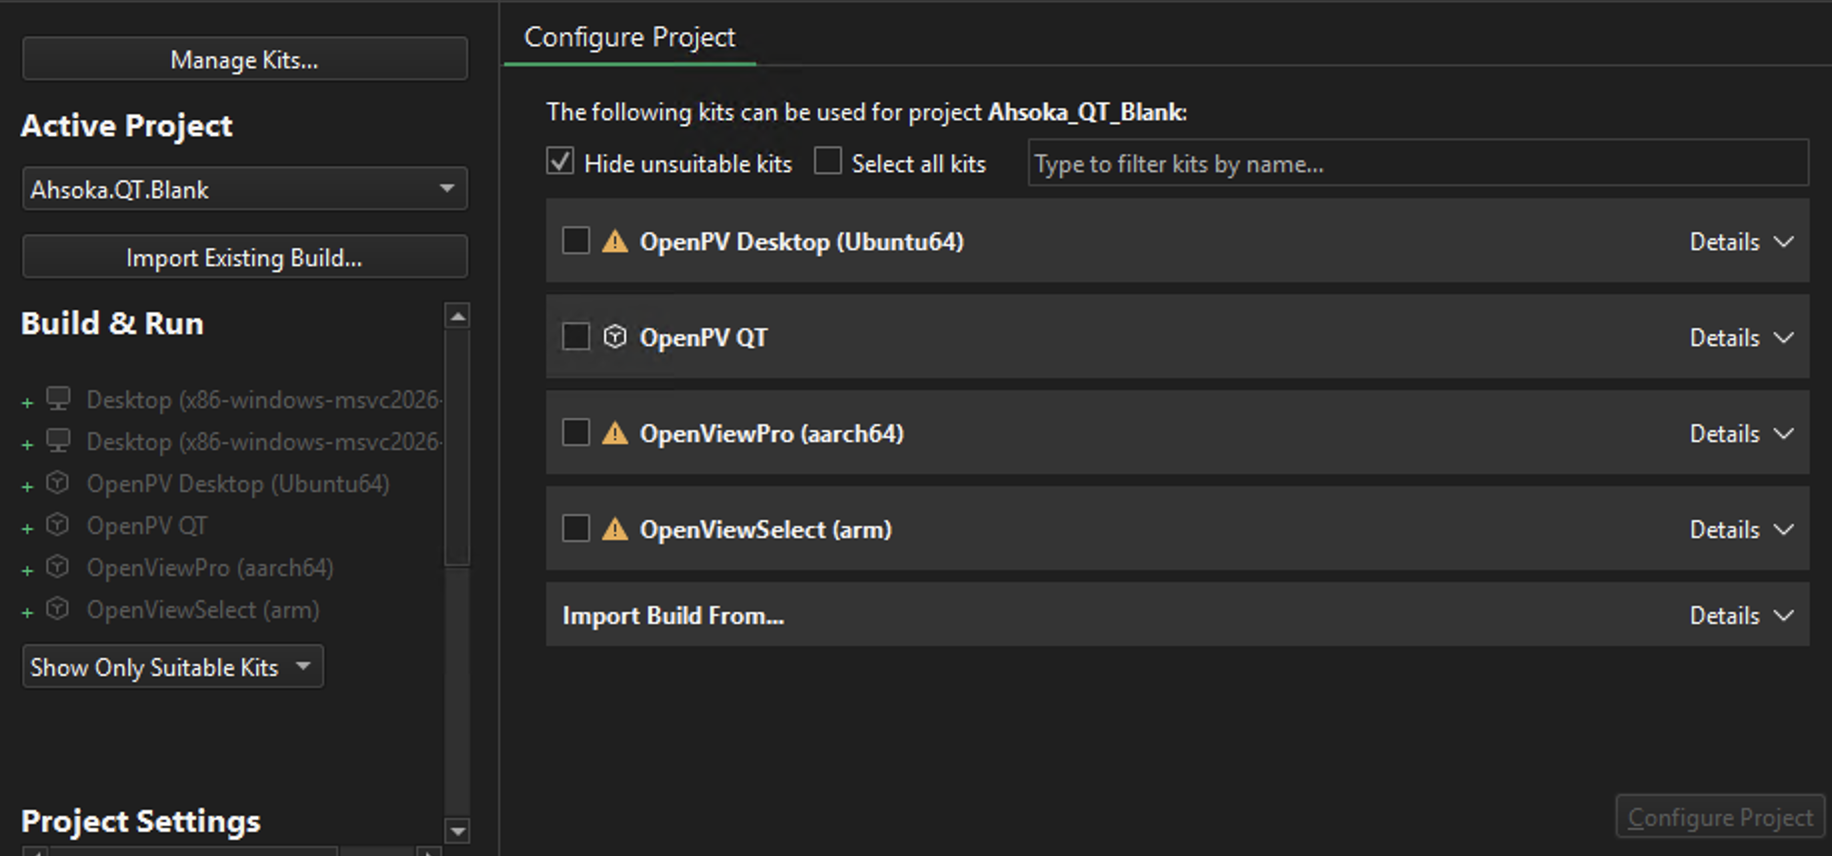
The OpenPV devcontainer.json registers one kit per target automatically when the container starts — you don't build them by hand:
| Kit | Target |
|---|---|
| OpenPV Desktop (Ubuntu64) | Native container build (desktop testing) |
| OpenViewPro (aarch64) | OpenView Pro / Flex |
| OpenViewSelect (arm) | OpenView Select |
- Open Projects mode (wrench icon, left sidebar).
- Under Build & Run the container kits appear with a container badge. Pick the kit for your target (e.g. OpenViewPro (aarch64)) and configure the project.
- You can review them under Preferences → Kits, listed under the container device.
Each cross kit selects its target via the AhsokaPlatform value, sources the matching OpenEmbedded SDK, and points CMake at the OE toolchain file — all defined in the kit, nothing to set by hand.
6. Build
Choose the target kit's build configuration and press Build (the hammer). The build runs inside the container against the cross toolchain. When it finishes, return to the OpenPV Developer Toolkit to Generate the package and Load To Display — see Building and Deploying a C++ Application and Packaging Tools.
Troubleshooting
| Symptom | Fix |
|---|---|
| "Could not find docker" / engine not detected | The Podman shim isn't resolving — recheck Step 2 and restart Qt Creator so it re-reads PATH. |
"Check Docker" fails with The command " system df" could not be started. No executable specified. |
No usable native docker is on Qt Creator's PATH — commonly (under WSL) a Windows-side docker on /mnt/c is shadowing it, or no shim exists at all. Create the Podman shim in /usr/local/bin (Step 2, WSL note) and restart Qt Creator, or launch from the OpenPV Developer Toolkit, which creates it for you. |
| Container is created and running, but Qt Creator sits forever at "Waiting for container to start" | Podman 4.x (e.g. Ubuntu 24.04's 4.9.3) emits capitalized docker events keys ("Status") that the Dev Container plugin doesn't match. Launch from the OpenPV Developer Toolkit (its docker shim is a wrapper that normalizes events), or upgrade to Podman 5+. See the Podman 4.x note in Step 2. |
| Kits don't appear at all | You're likely on Qt Creator 19 or older — Dev Container kit registration needs 20+. Confirm the Development Containers plugin is enabled (Step 3). |
| Kits appear but are marked invalid / unsuitable | The container didn't finish building, or the toolchain for that target wasn't included when you built openpv_custom. Rebuild the build container in the toolkit with the needed toolchain selected. |
| Build uses the wrong platform (e.g. Ubuntu64 instead of Pro) | Make sure you selected a container kit (OpenViewPro / OpenViewSelect / Desktop), not an auto-detected host kit. |
See also Development Containers for what the containers provide and how the Developer Toolkit builds them.