Build
Packaging Tools Requires: project open
Choose the SDK, Core library version and build settings for your app, and manage the project's package feeds.
The Build panel shows the project's application type and SDK, which OpenPV Core version it builds against, and how the Service Manager and your app are compiled. The actions on the right install or remove the SDK, manage the project's package feeds and run code generation.
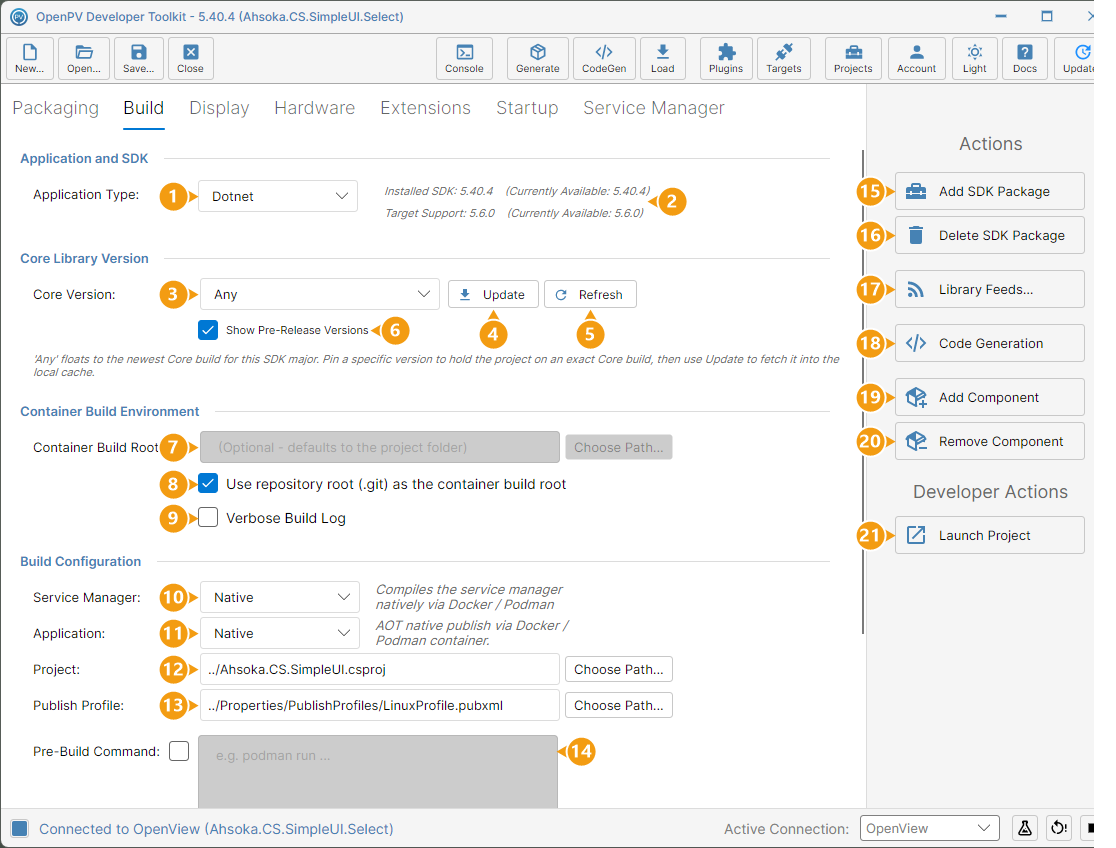
The Build panel is shown below, with each numbered item described in turn:
- Application Type — the kind of app the project packages, such as Dotnet. Changing it swaps the settings below, and clears Project and Publish Profile.
- Installed SDK and Target Support — the versions installed in the project, with the versions currently available in brackets. Shows No SDK Installed until you click Add SDK Package.
- Core Version — the OpenPV Core version the project builds against. Any uses the newest build for this major version; choosing a version holds the project on it.
- Update — downloads the selected Core version into the local NuGet cache.
- Refresh — asks the feeds again for the Core versions they offer.
- Show Pre-Release Versions — includes pre-release Core builds in the list. It's ticked each time the project opens.
- Container Build Root — the folder mounted into the build container. Leave it blank to use the project folder. Only editable when Use repository root (.git) is cleared.
- Use repository root (.git) as the container build root — mounts the nearest folder above the project that contains
.git, so project references elsewhere in the repository resolve. On by default. - Verbose Build Log — adds more detail to the build output.
- Service Manager — how the service manager is built: Standard, Optimized or Native.
- Application — how your app is built: PreBuilt, Standard, Optimized or Native.
- Project — your app's
.csprojfile. - Publish Profile — the
.pubxmlpublish profile used to publish your app. - Pre-Build Command — a command that runs in the project folder before your app is published.
- Add SDK Package — installs the OpenPV SDK into the project, or reinstalls it.
- Delete SDK Package — removes the SDK from the project.
- Library Feeds... — NuGet package feeds the project uses, as well as nuget.org.
- Code Generation — runs each extension's code generator. The same as CodeGen on the toolbar.
- Add Component — adds an optional platform component to the package, from the ones available for the project's platform.
- Remove Component — removes the component selected in Optional Components.
- Launch Project — opens the project in Visual Studio, or in VS Code if Visual Studio isn't installed. See Launch Project on the Packaging page.
Below Pre-Build Command, Optional Components lists the components that Add Component and Remove Component manage.
Pin a Core Library Version
-
Click Core Version and choose the version to build against — here, 5.40.5. It's written to the project's
Directory.Packages.propsright away, for both Ahsoka.Core and Ahsoka.Core.Drawing.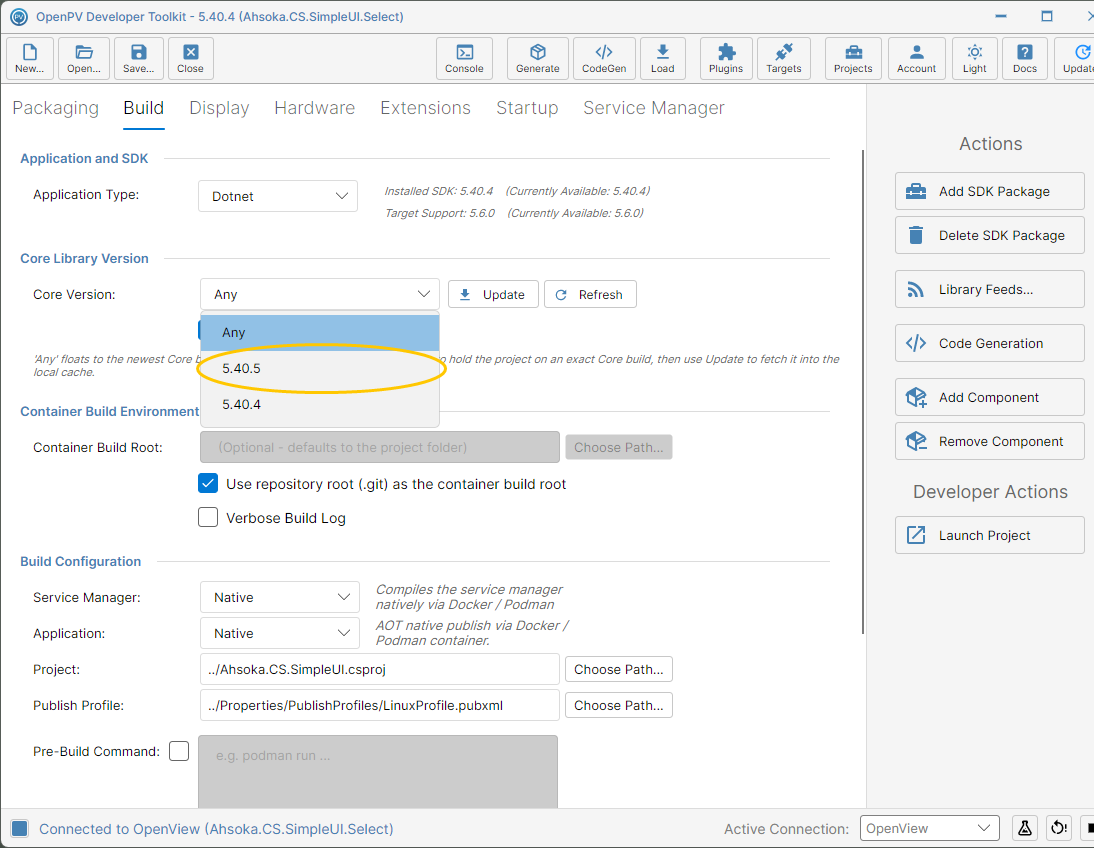
The Core Version choices -
Click Update to download that version into the local NuGet cache.
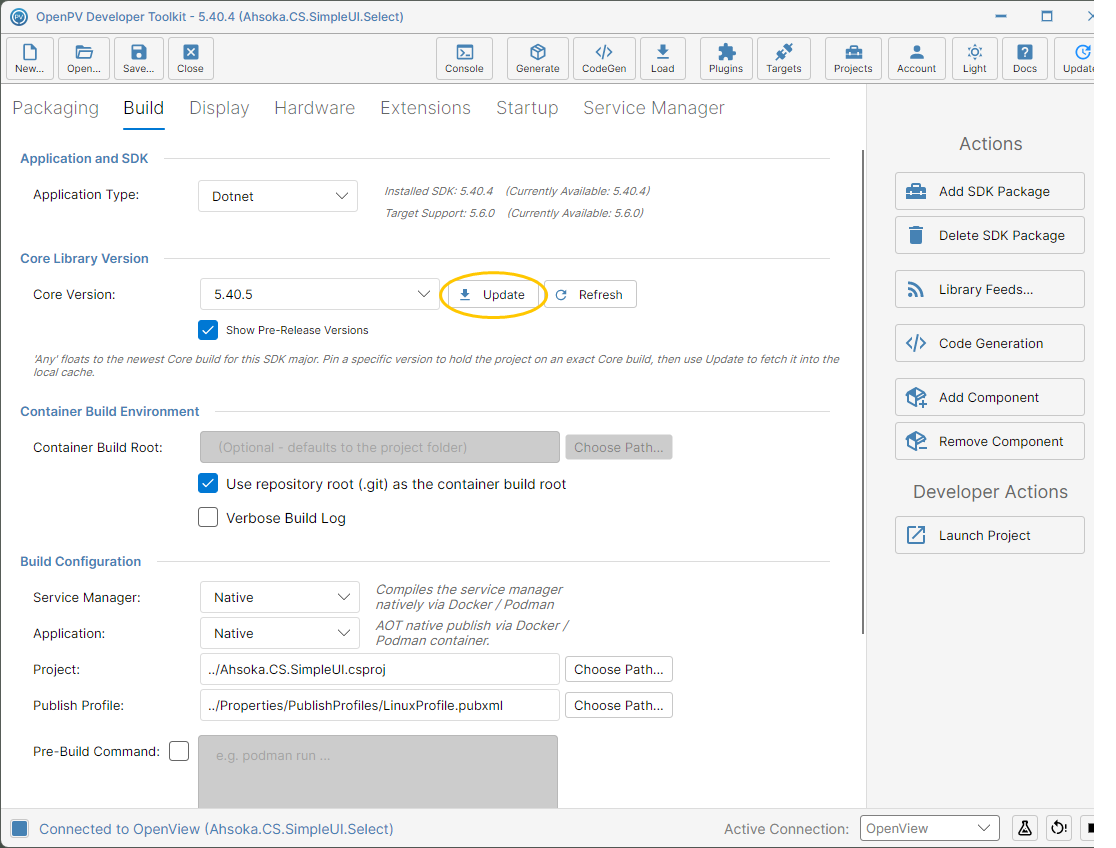
Core 5.40.5 selected, and the Update button -
The Console opens while it downloads, and closes when it's done. To see what happened, click Console on the toolbar — here, Core 5.40.5 downloaded to cache.
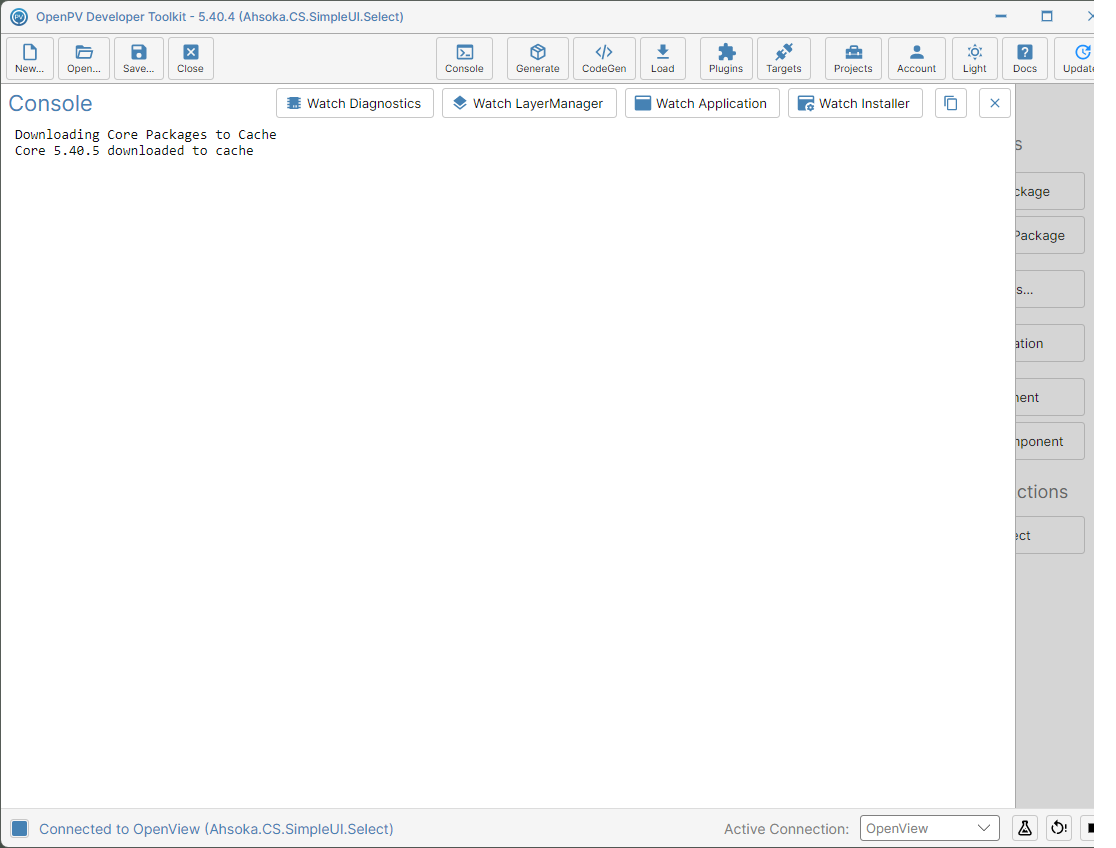
Core 5.40.5 downloaded to the cache
Choose How Your App Is Built
-
Click Service Manager and choose how the service manager is built: Standard uses the ready-made service manager, Optimized builds a trimmed one that includes your extensions, and Native compiles it to native code in the Docker / Podman container.
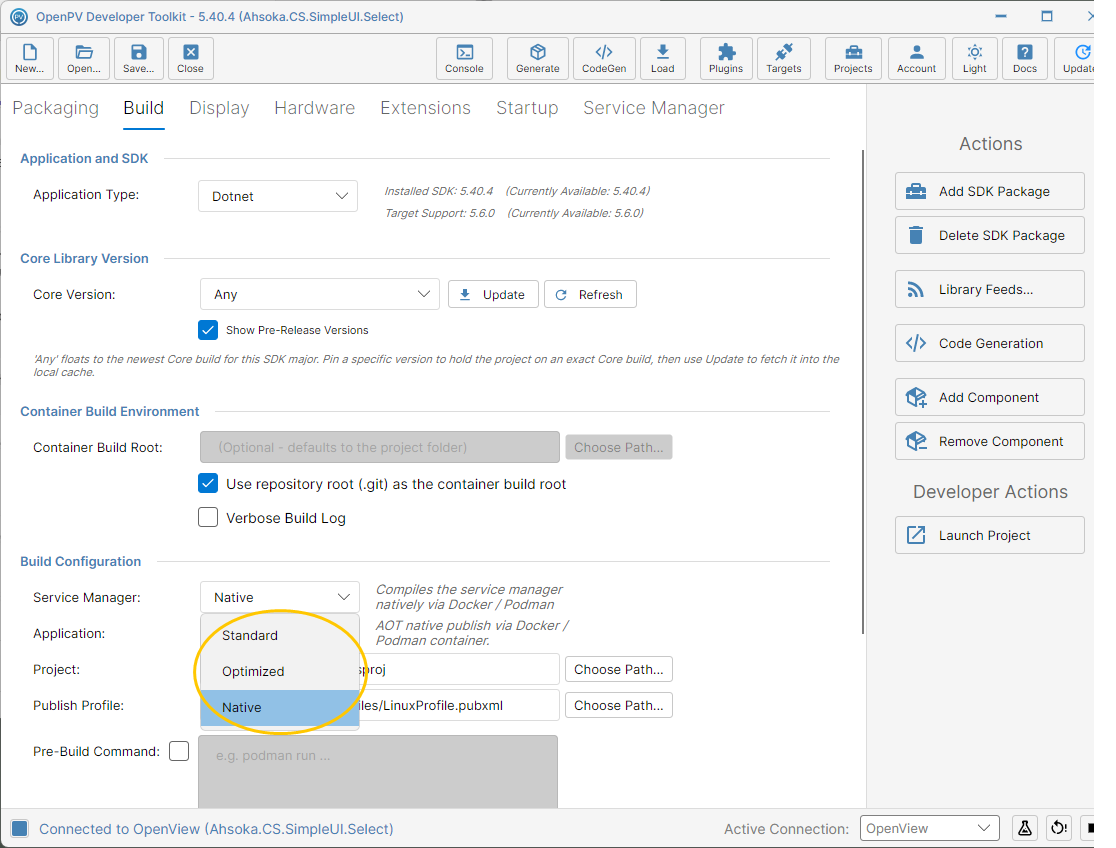
The Service Manager build choices -
Click Application and choose how your app is built: PreBuilt skips publishing and packages the files already in your app's output folder, Standard is a regular
dotnet publishwith no trimming, Optimized trims unused code for a smaller app that starts faster, and Native compiles it ahead of time into a native binary in the container, so the target doesn't need the .NET runtime.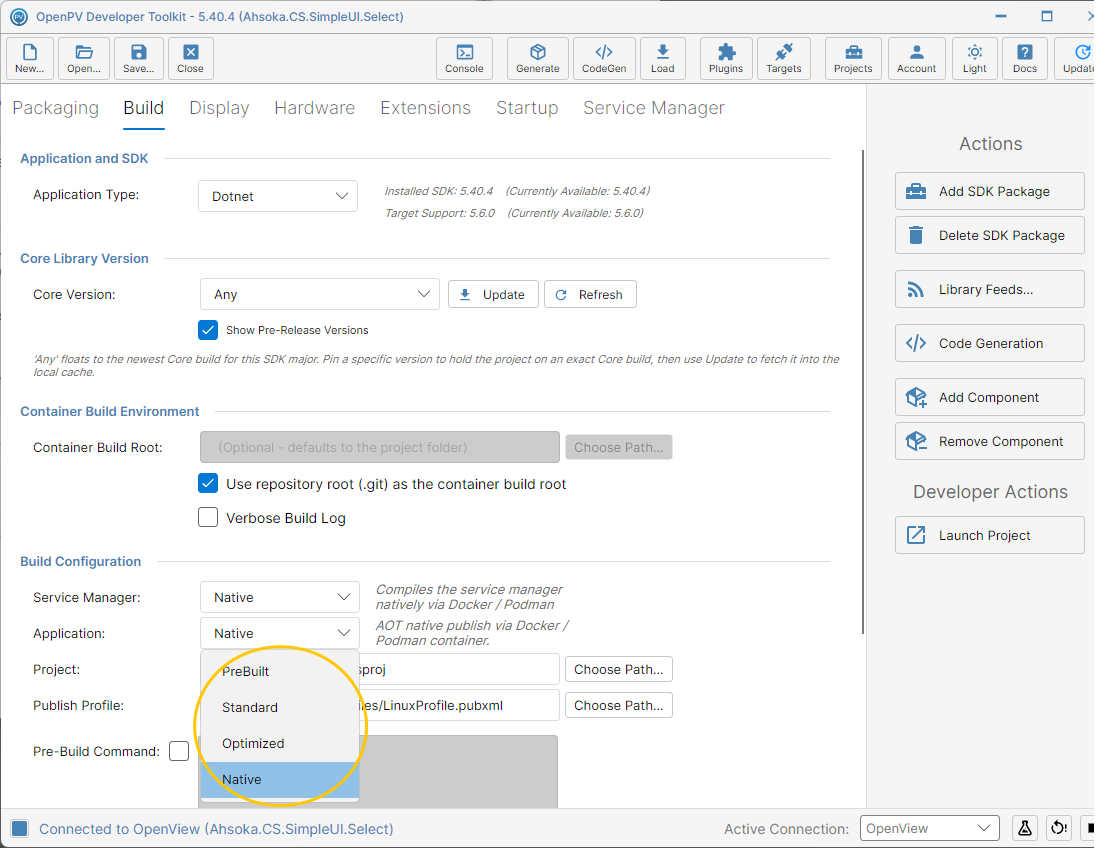
The Application build choices
Run a Command Before the Build
-
Tick Pre-Build Command to enable its box.
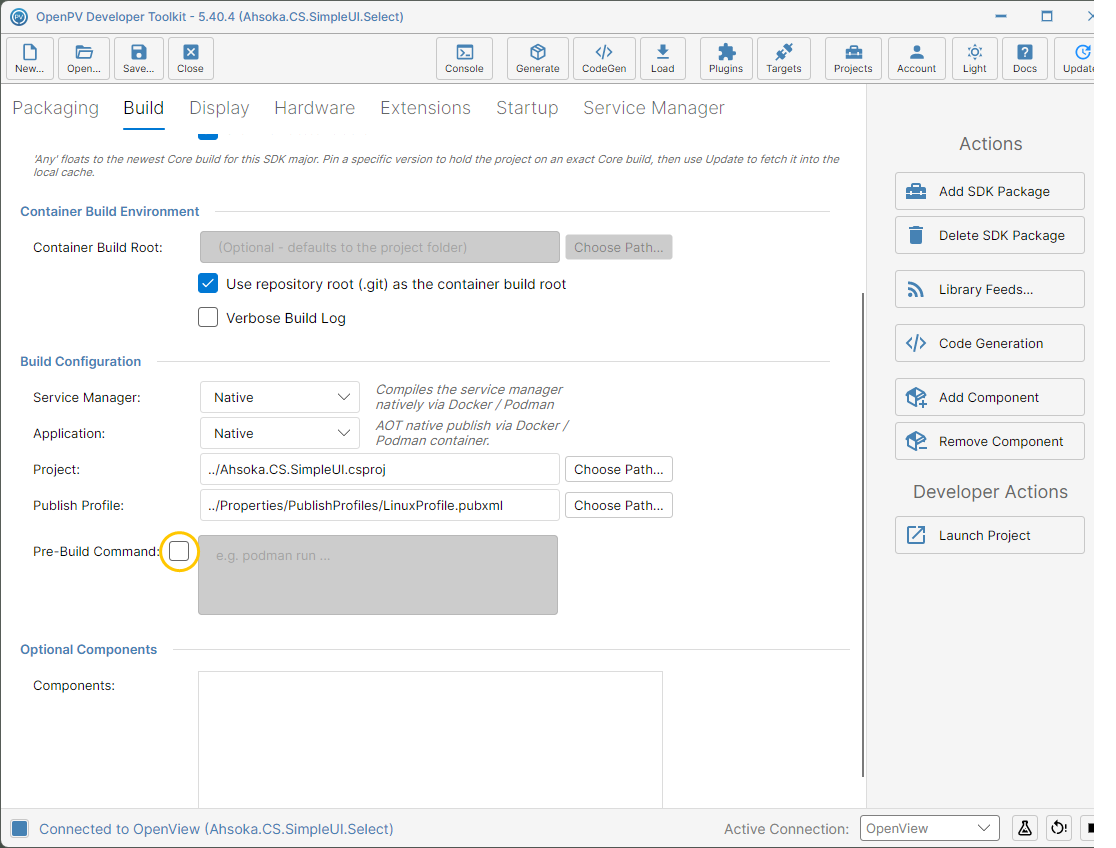
The Pre-Build Command checkbox -
Type the command — here,
dotnet tool restore. It runs in the project folder each time you Generate a package, before your app is published.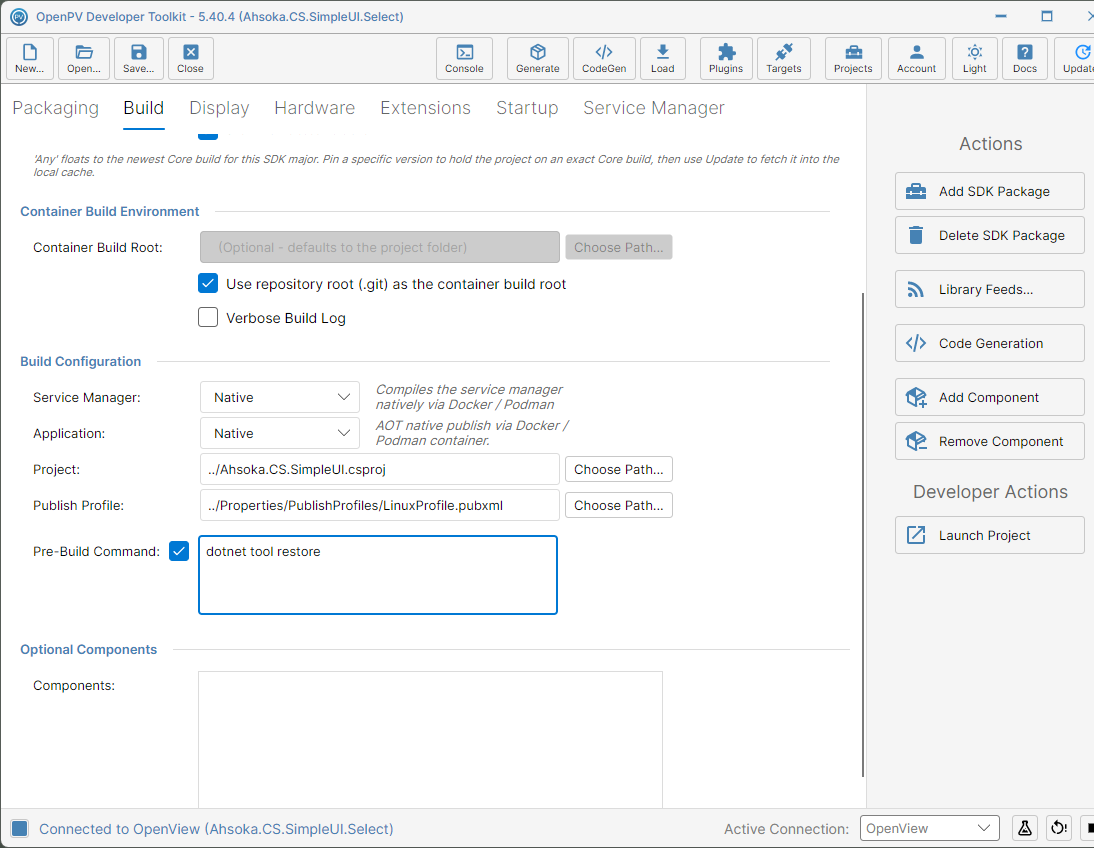
A pre-build command entered
Set the Container Build Root
-
By default, the container mounts your repository root. To choose the folder yourself, clear Use repository root (.git) as the container build root.
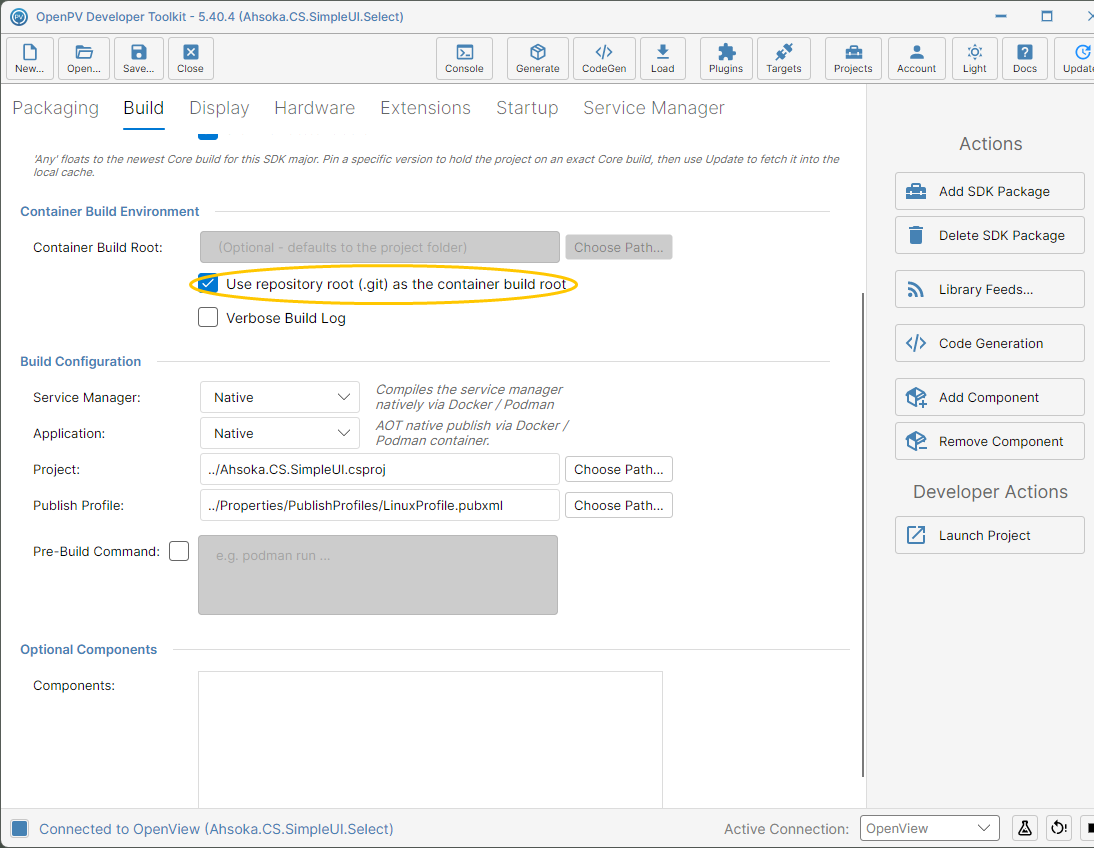
The Use repository root checkbox -
Container Build Root and its Choose Path... button are now enabled. Click Choose Path... and pick the folder, or leave it blank to use the project folder.
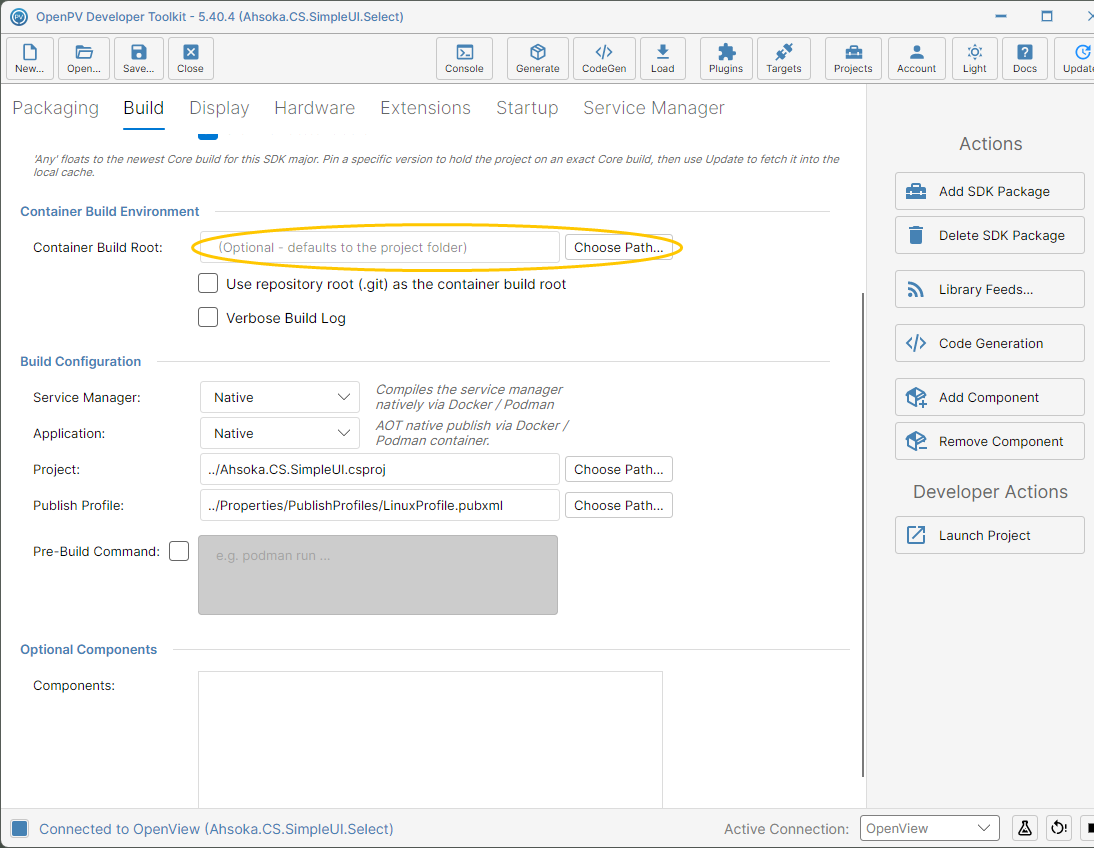
Container Build Root enabled
Delete the SDK Package
-
Click Delete SDK Package.
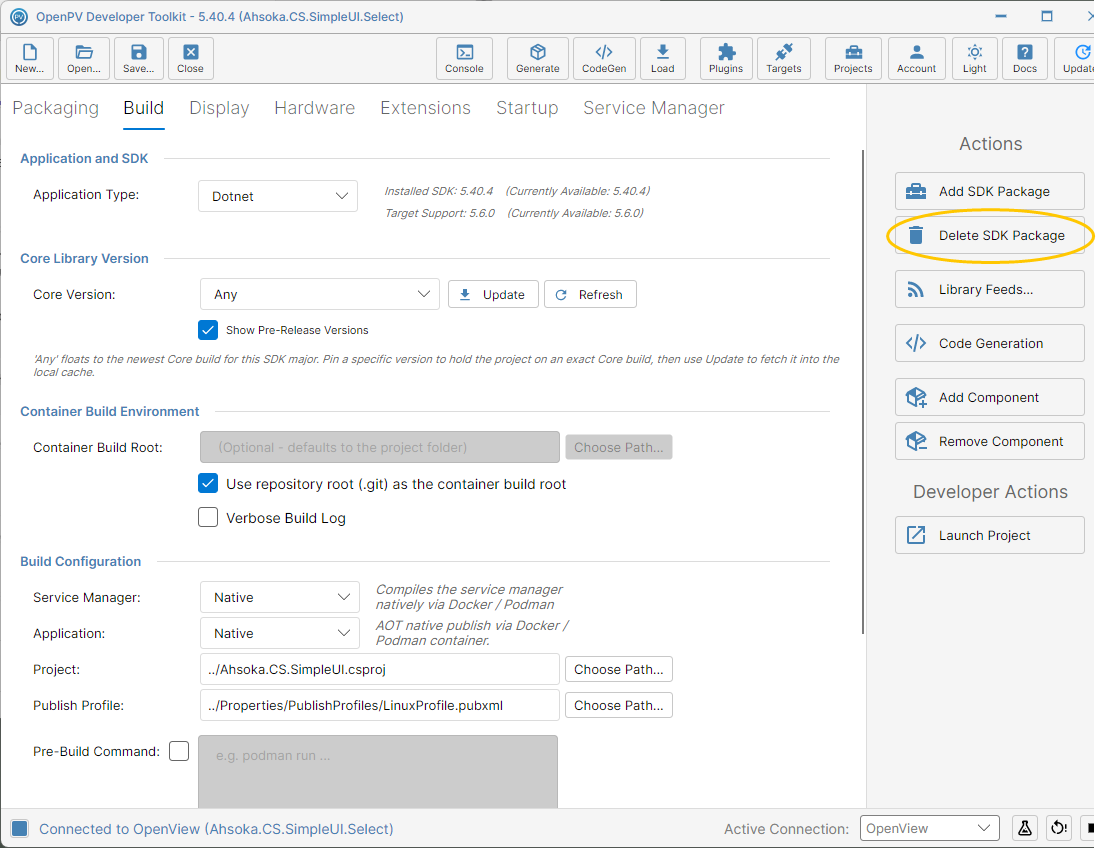
The Delete SDK Package button -
It's removed right away, with no confirmation. Application and SDK now shows No SDK Installed — OpenPV Services aren't available to your app until you add the SDK again.
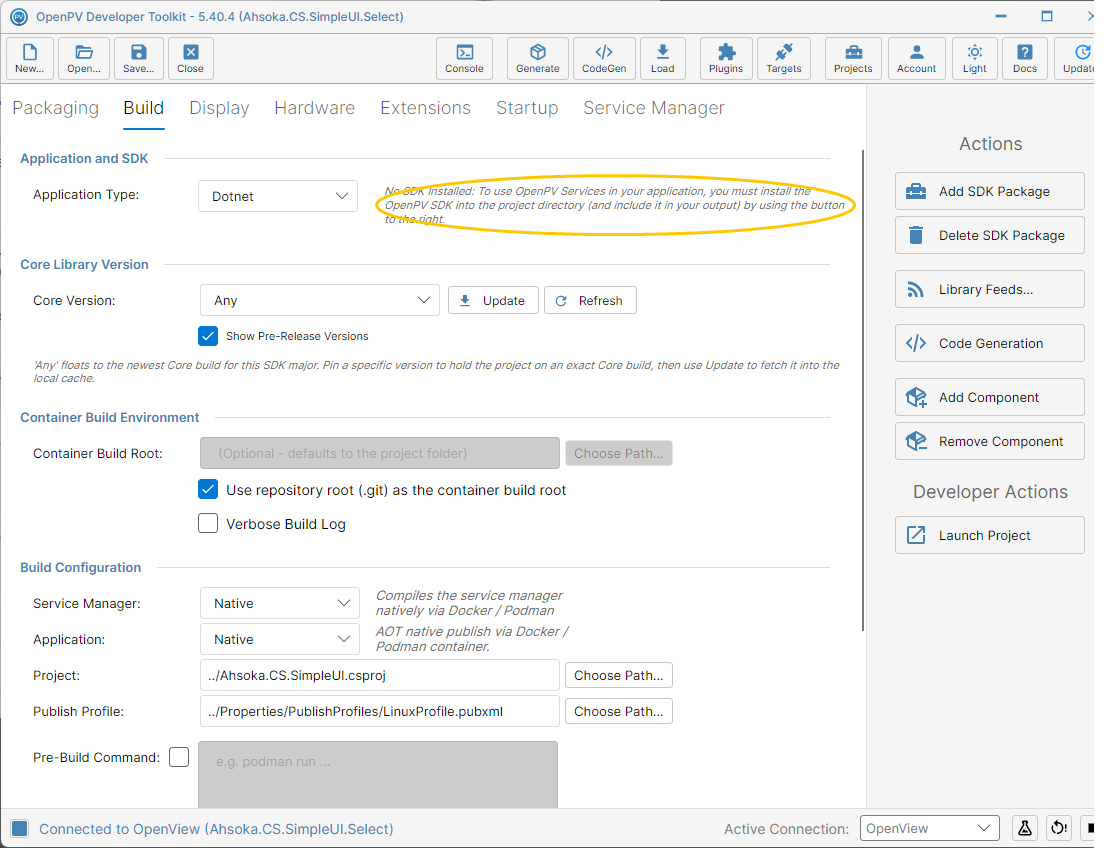
No SDK Installed, after deleting it
obj/.platform_support folder. Your code, Directory.Packages.props and NuGet.Config aren't changed.Add the SDK Package
-
Click Add SDK Package. It's safe to click when the SDK is already installed — it reinstalls it.
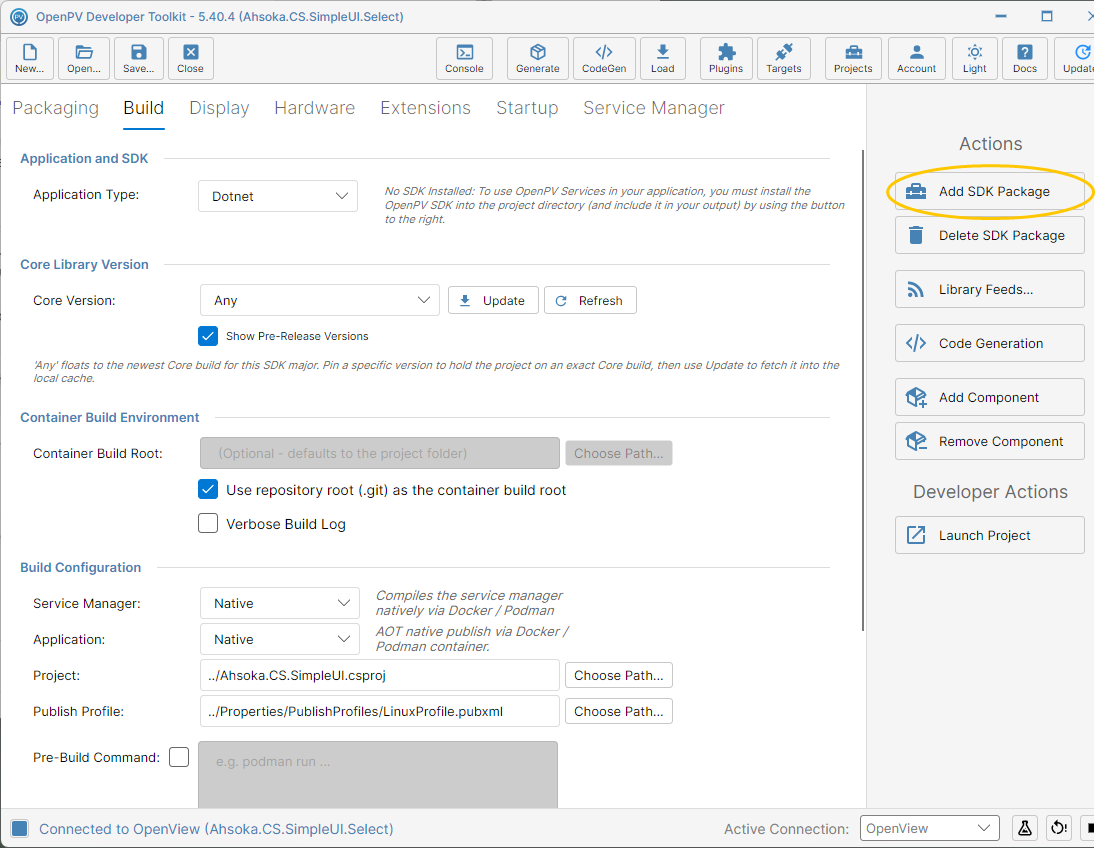
The Add SDK Package button -
The Console shows the install, ending with Install Completed, then closes.
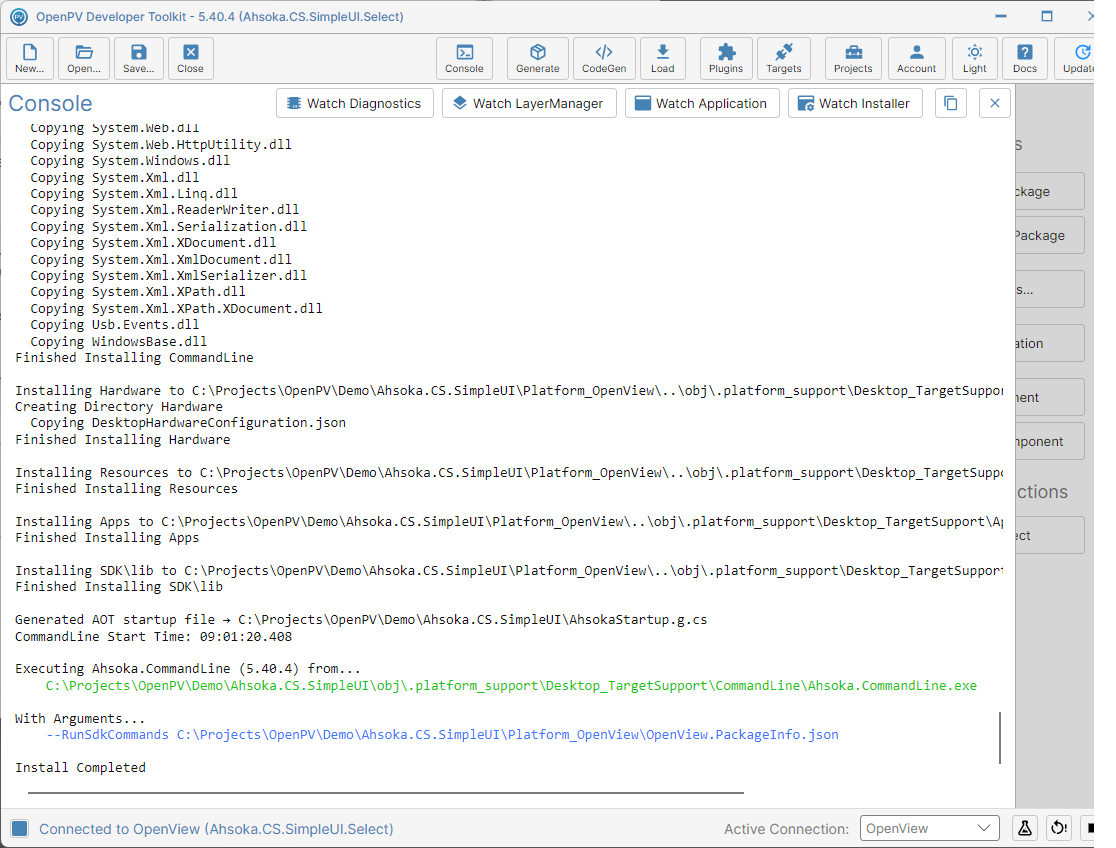
The SDK install, in the Console -
Installed SDK shows the version that was installed — here, 5.40.4.
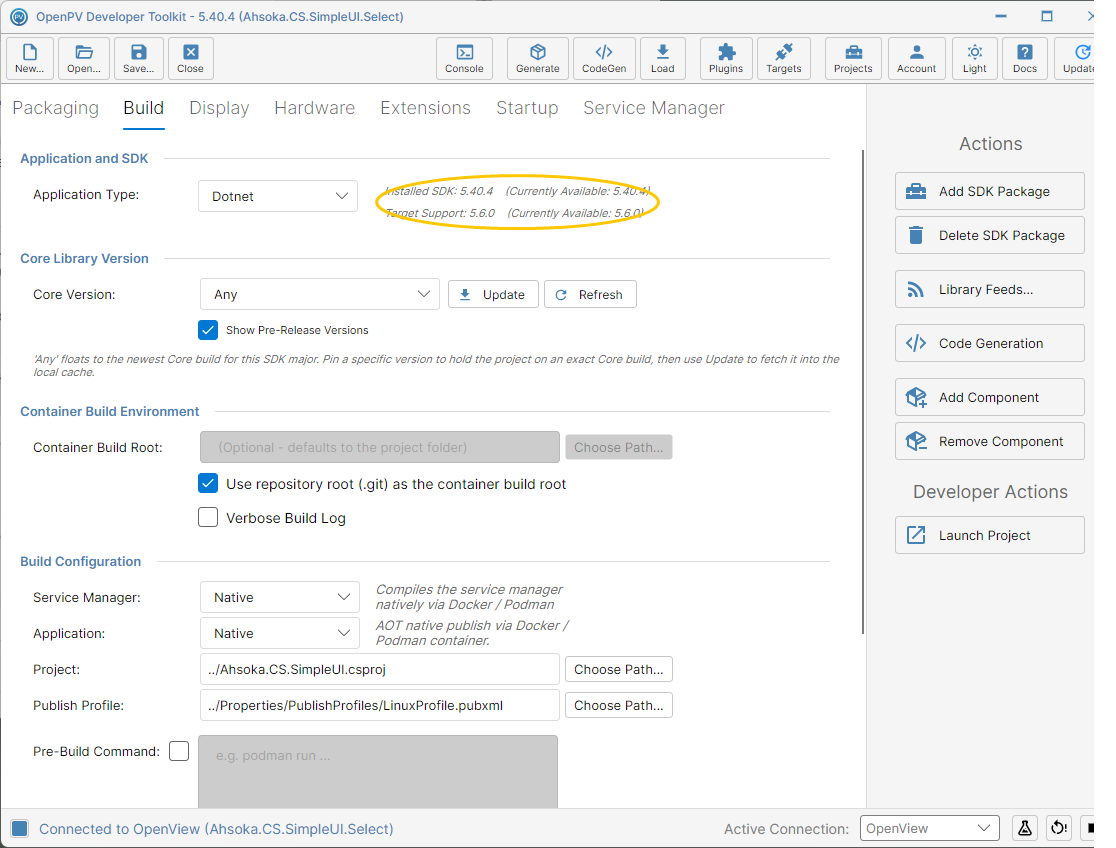
Installed SDK 5.40.4
AhsokaStartup.g.cs. It uses the project as last saved, so save first if you've just added extensions.Add a Library Feed
-
Click Library Feeds....
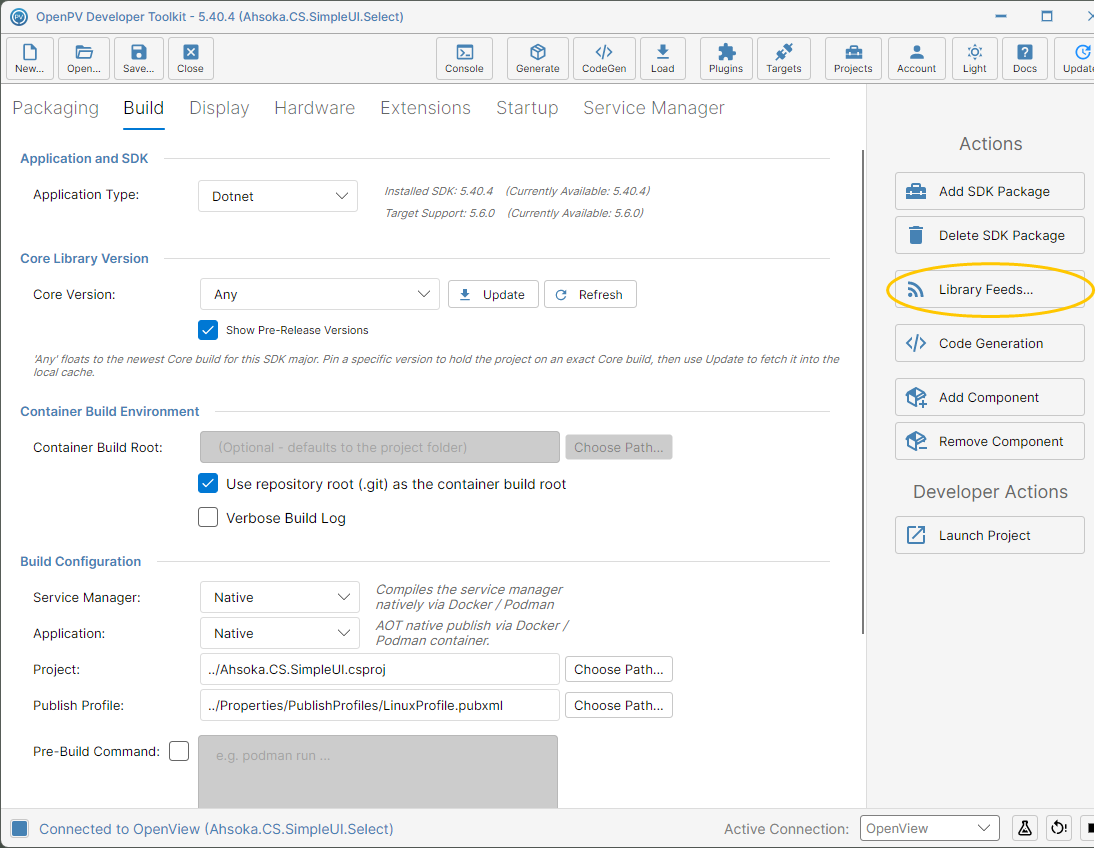
The Library Feeds button -
The dialog lists the project's own feeds. nuget.org is always searched, so it isn't listed. To add a hosted feed, click Add Remote Feed.
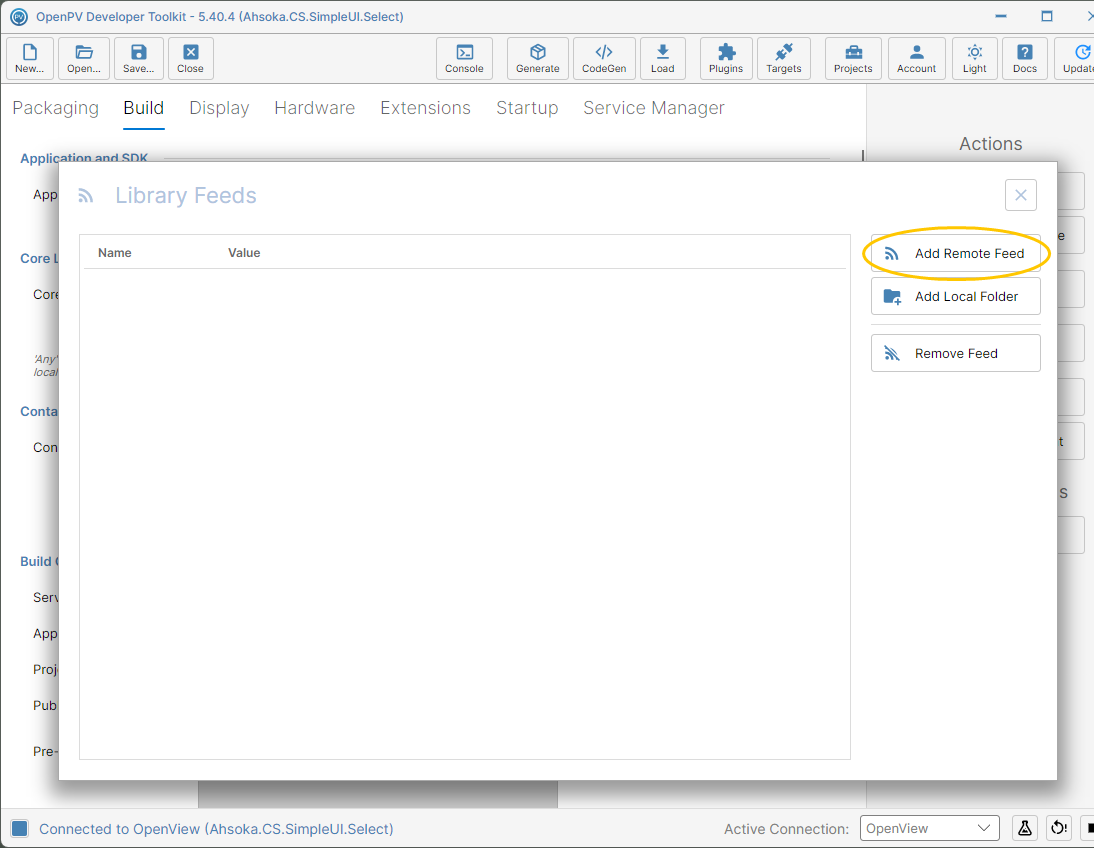
The Library Feeds dialog, with no feeds yet -
Replace Feed URL with the feed's NuGet v3 address — here, a sample,
https://pkgs.example.com/myfeed/v3/index.json. For a private feed, also enter a PAT (optional), a personal access token. Then click OK.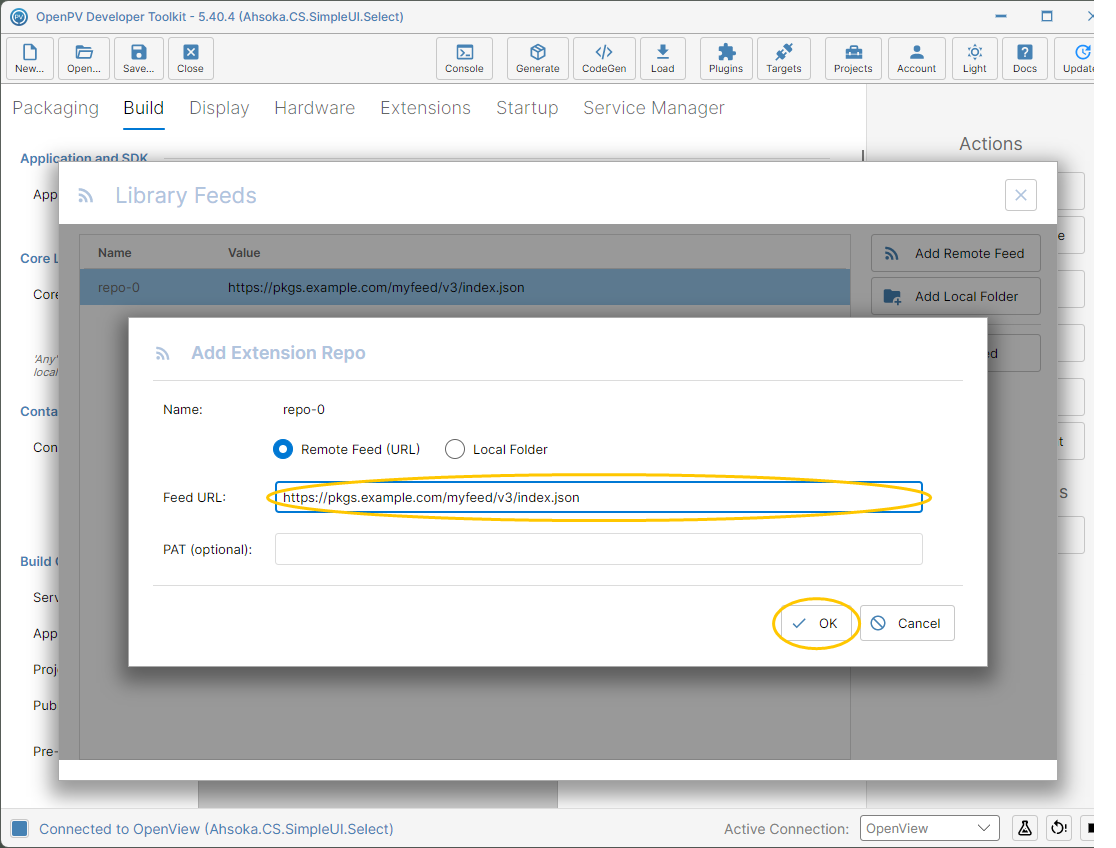
A sample remote feed URL entered -
The feed is added as repo-0. To use a folder of
.nupkgfiles instead, click Add Local Folder.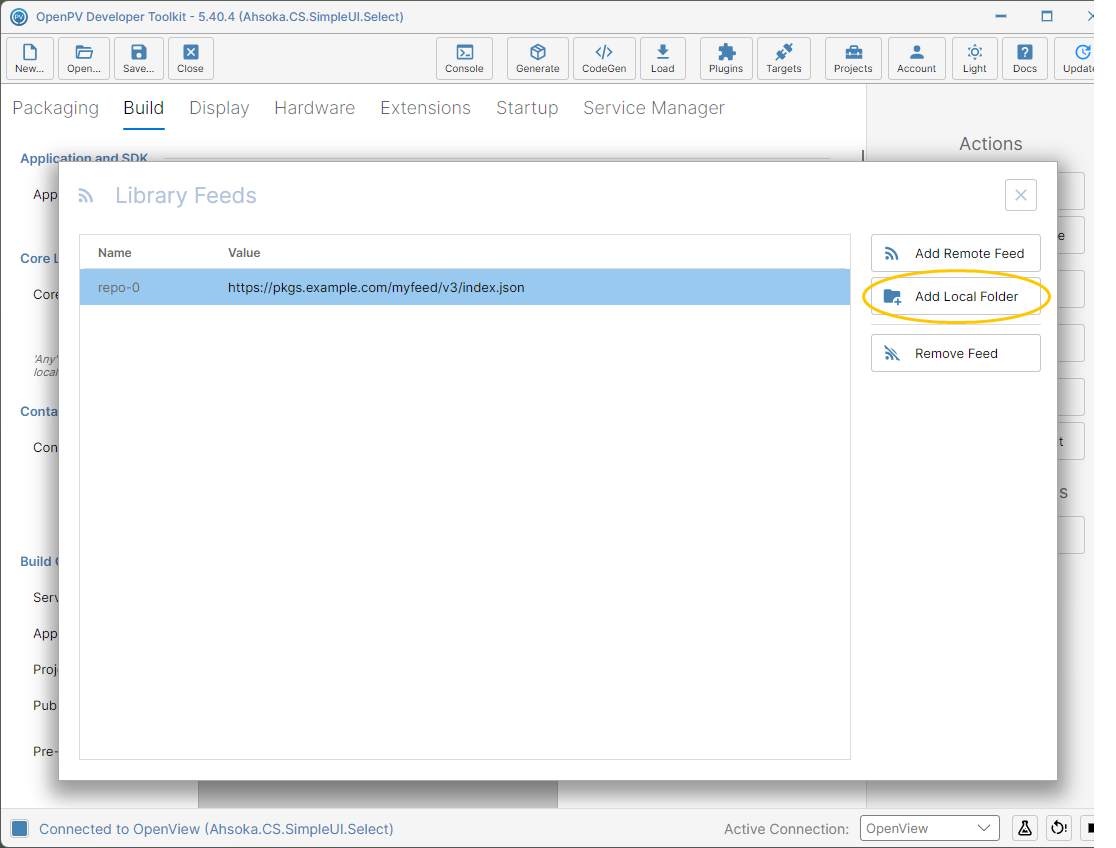
The remote feed added, and the Add Local Folder button -
Enter the folder in Folder Path, or click the folder button to browse for it — here, the
PackageOutputfolder next to the project, which holdsAhsoka.Core.5.40.5.nupkgandAhsoka.Core.Drawing.5.40.5.nupkg. Then click OK.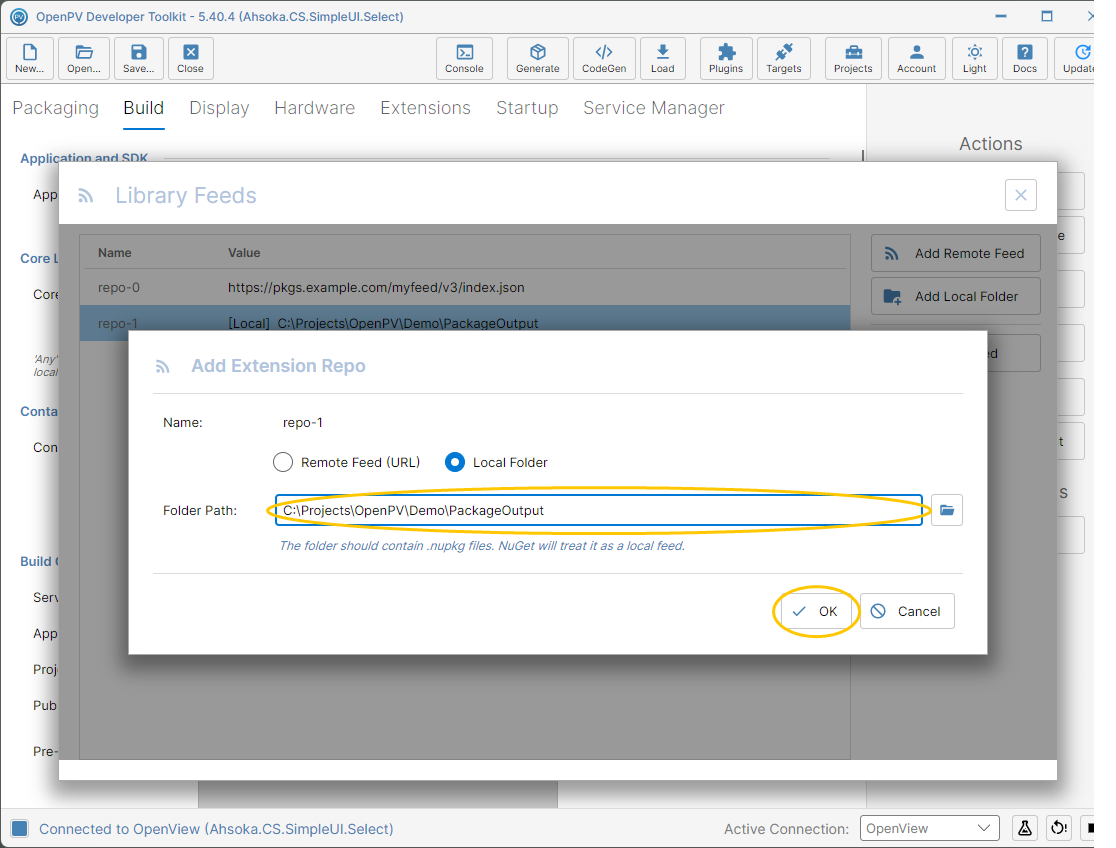
A local folder entered -
Both feeds are listed. A local folder is stored relative to the project — here,
../PackageOutput.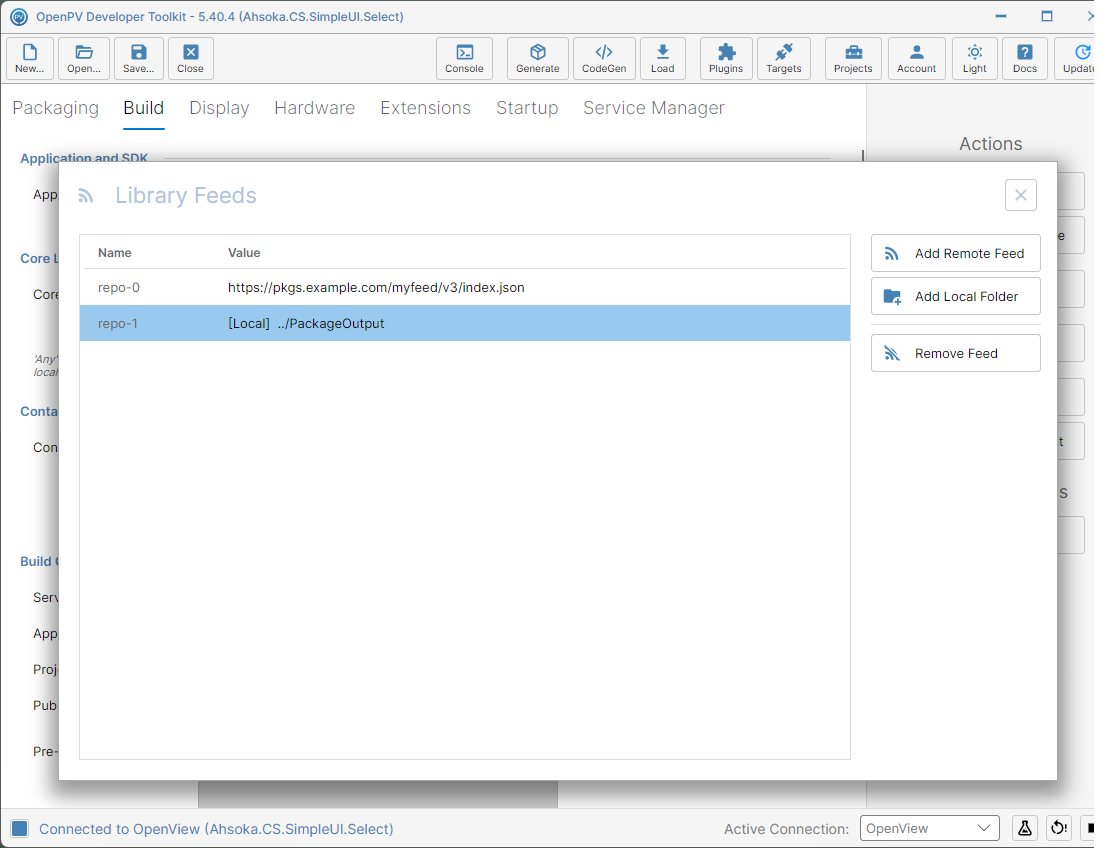
Both feeds in the list
NuGet.Config when you Save the project, so dotnet restore and your teammates use them too. Saving rewrites the whole file, so changes made to it by hand are lost.NuGet.Config as plain text. Don't commit it to a shared repository.Ahsoka.Core.5.40.5.nupkg. When your PC is offline, only local folders are used, so you can still build without internet access.Remove a Library Feed
-
In Library Feeds, select the feed — here, the sample repo-0 — and click Remove Feed.
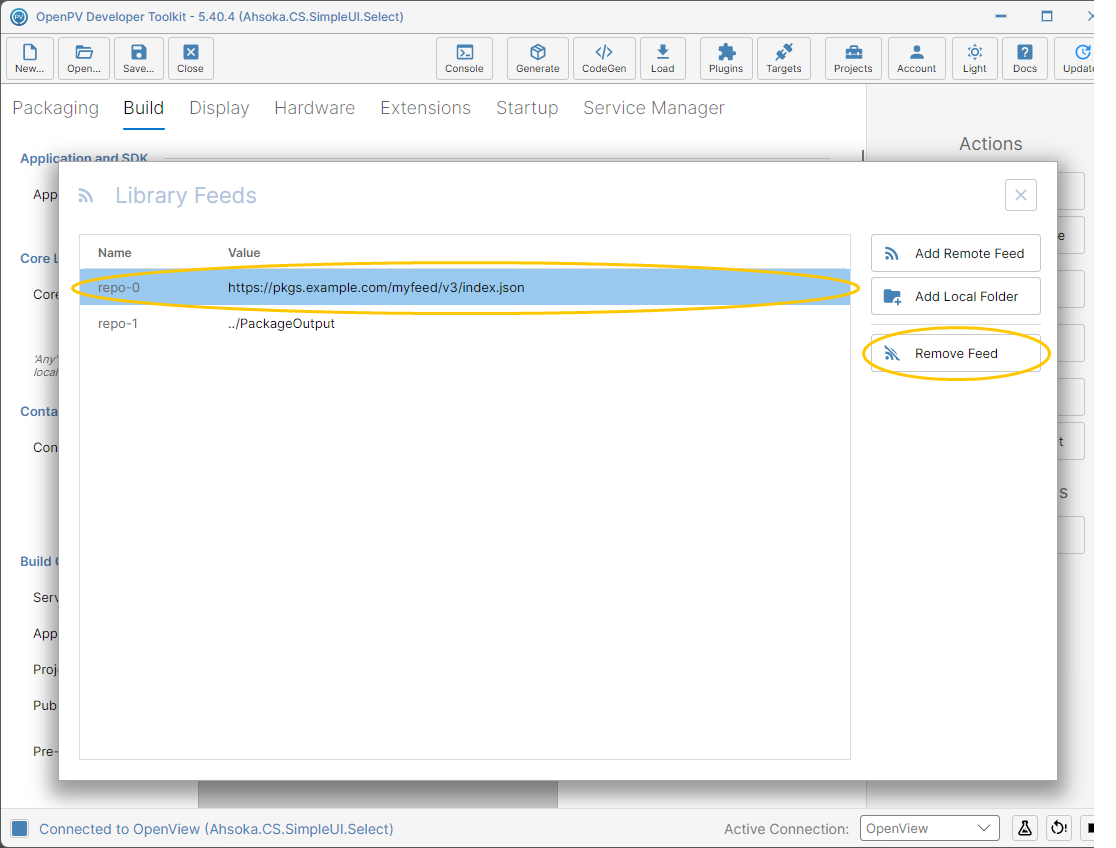
The sample feed selected, and the Remove Feed button -
It's removed right away, with no confirmation. Save the project to remove it from
NuGet.Configas well.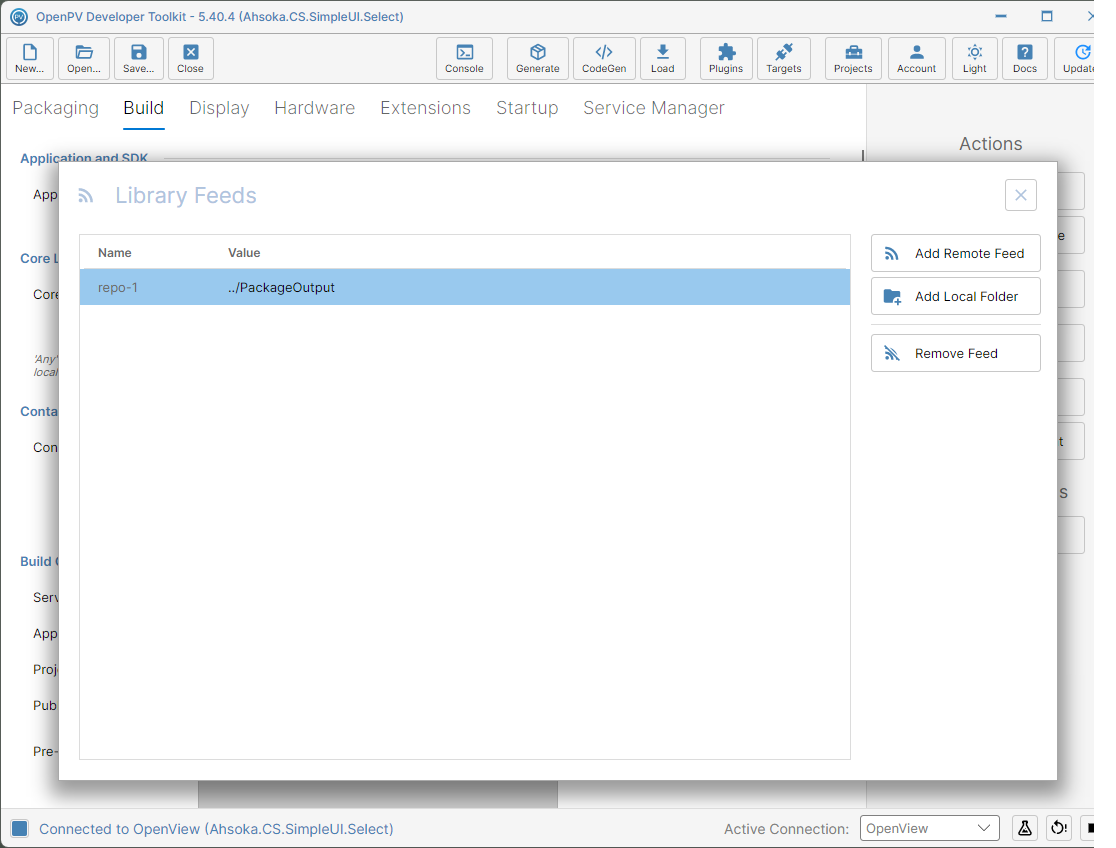
The feed list after removing the sample feed
Run Code Generation
-
Click Code Generation. There's no confirmation — it saves the project first.
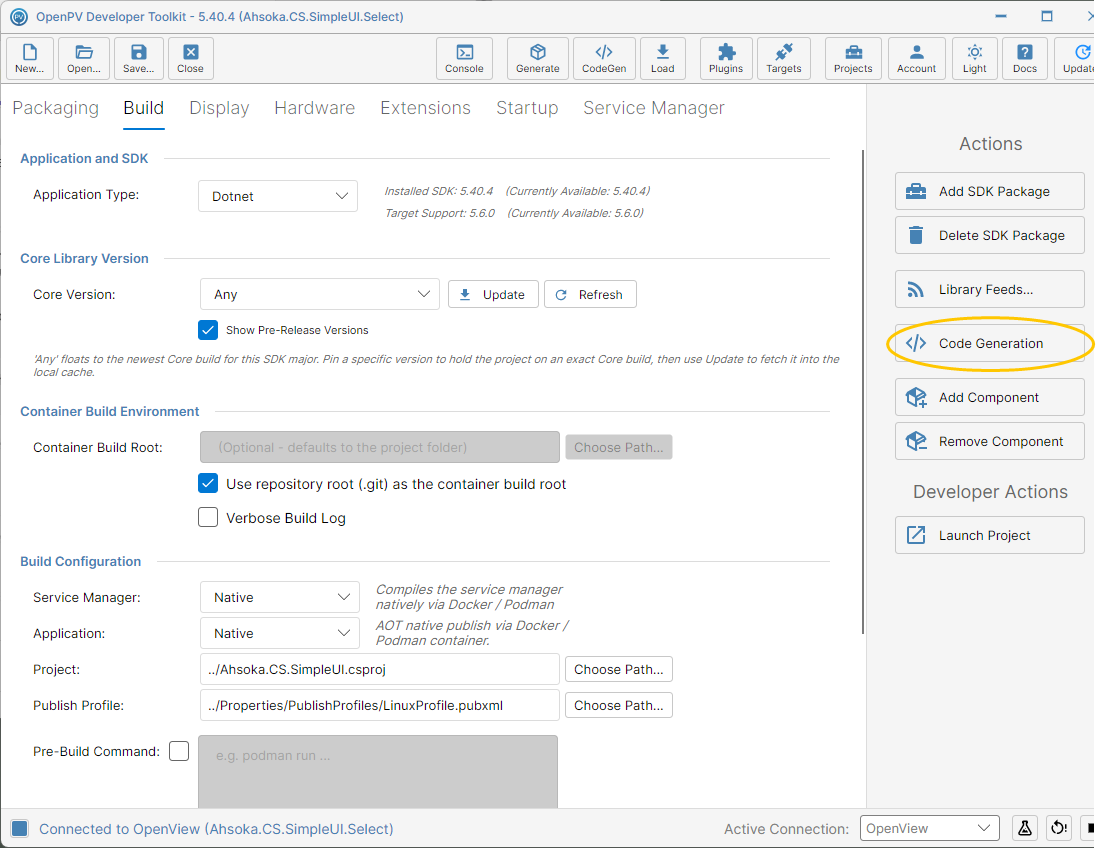
The Code Generation button -
The Console runs each extension's code generator, ends with Generators Completed, then closes. To review it, click Console on the toolbar. This project has no extensions, so there's nothing to generate.
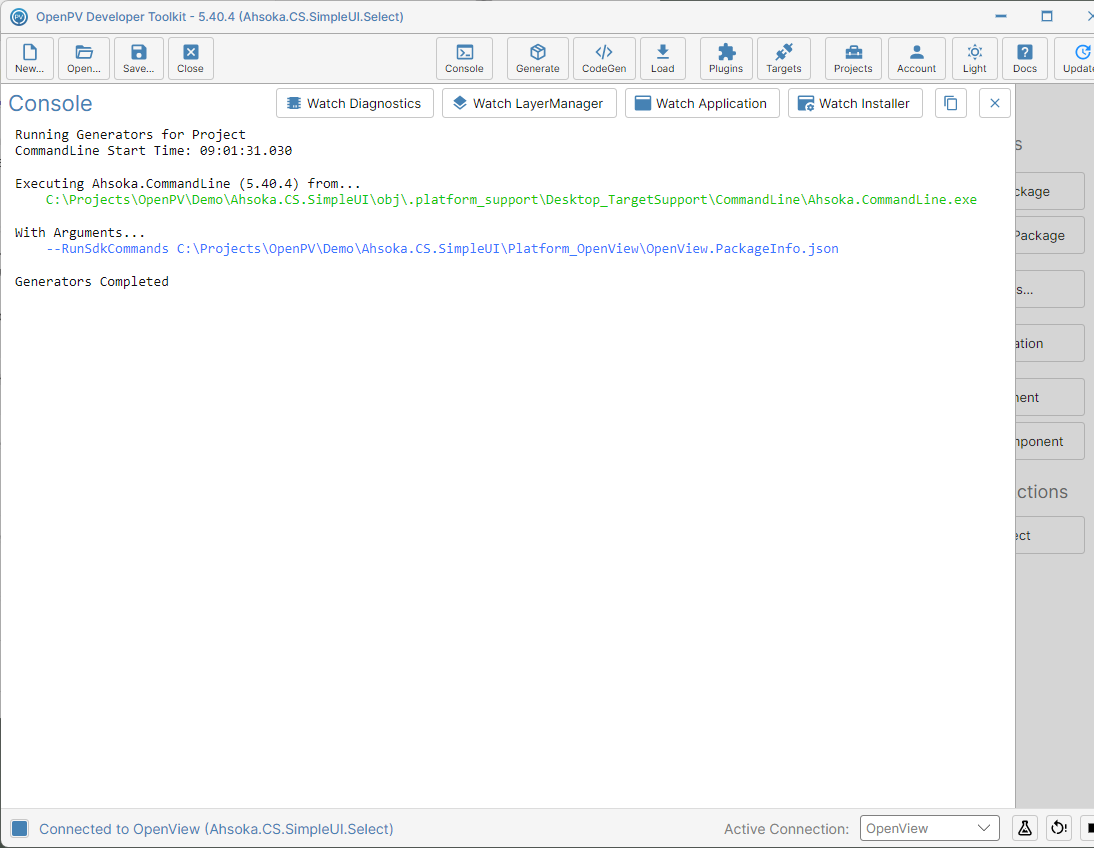
Code generation finished, in the Console
Add an Optional Component
-
Click Add Component.
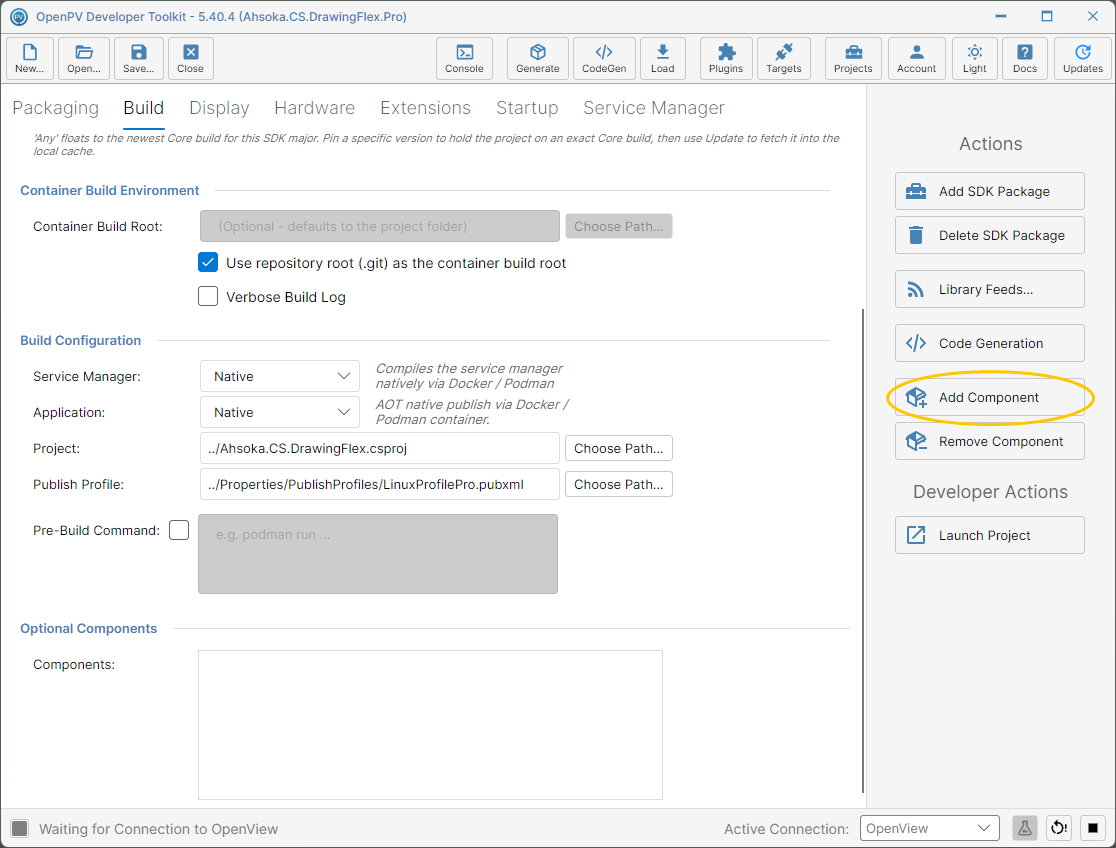
The Add Component button -
Available Optional BSP Components lists the components for the project's platform. Select one — here, hlio-image-openviewpro-docker_ipks.zip on an OpenViewLinuxPro project — and click Add Component.
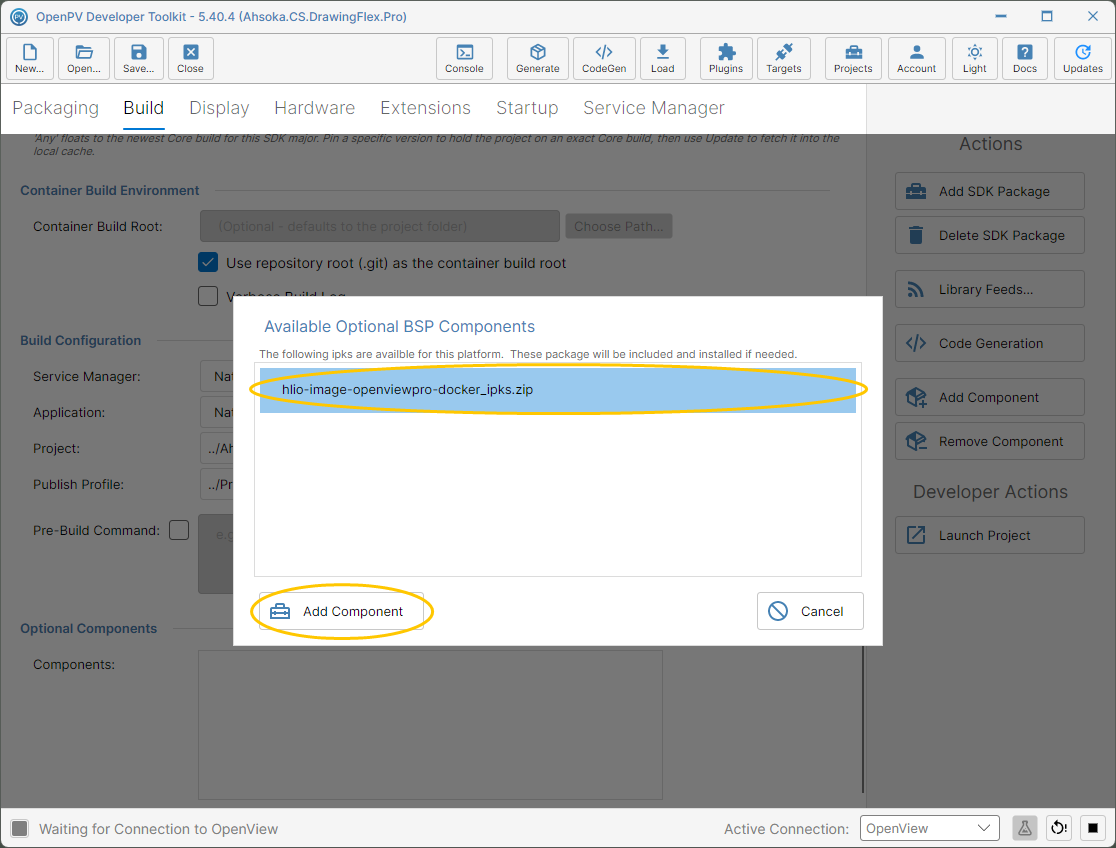
A component selected in Available Optional BSP Components -
It's added to Optional Components. When you Generate a package, it's included and installed on the target if needed.
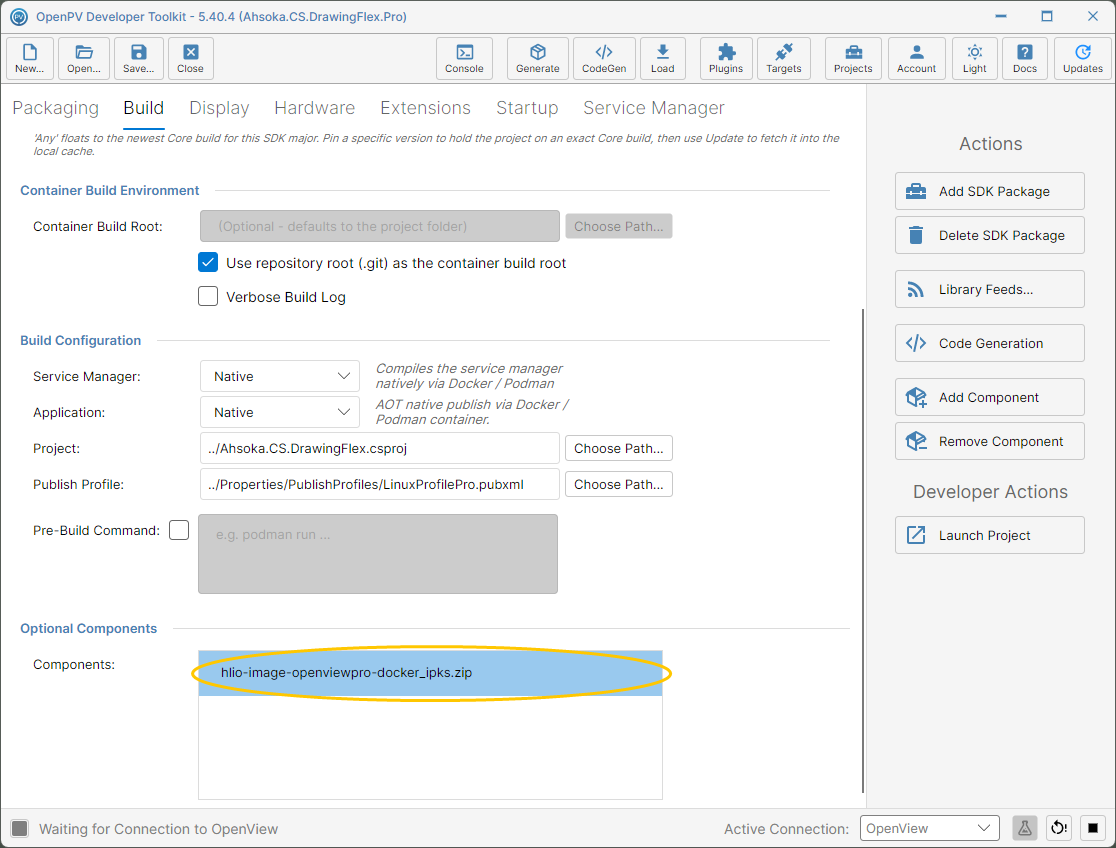
The component in the Optional Components list
Remove an Optional Component
-
In Optional Components, select the component and click Remove Component.
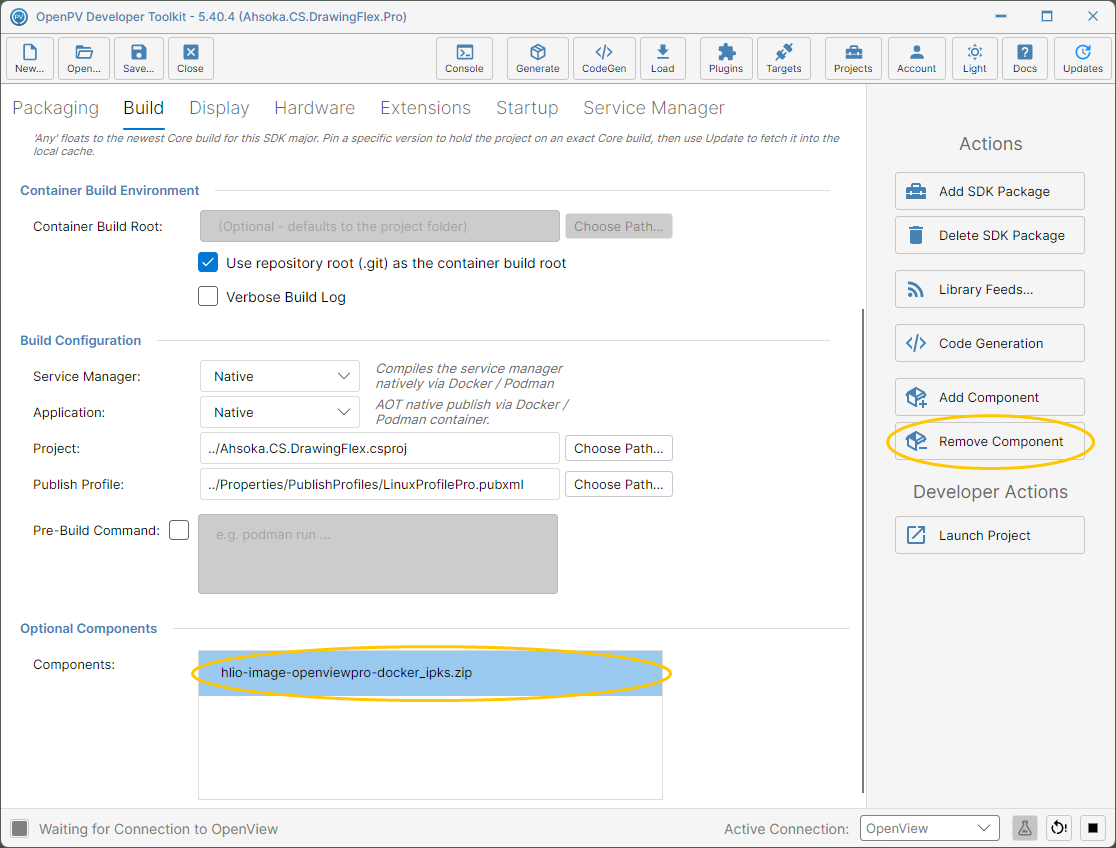
The component selected, and the Remove Component button -
It's removed right away, with no confirmation.
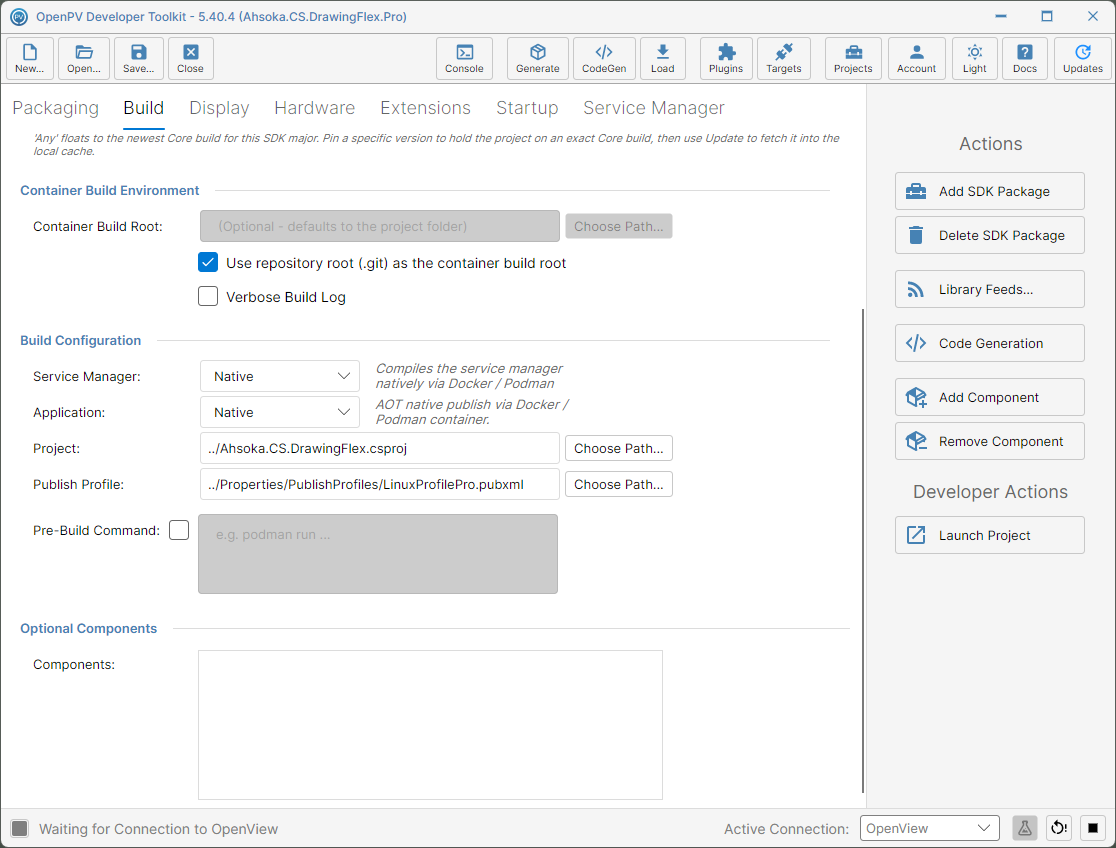
Optional Components after removing the component