Targets
Utilities Requires: signed in
Manage the connections used to communicate with your devices.
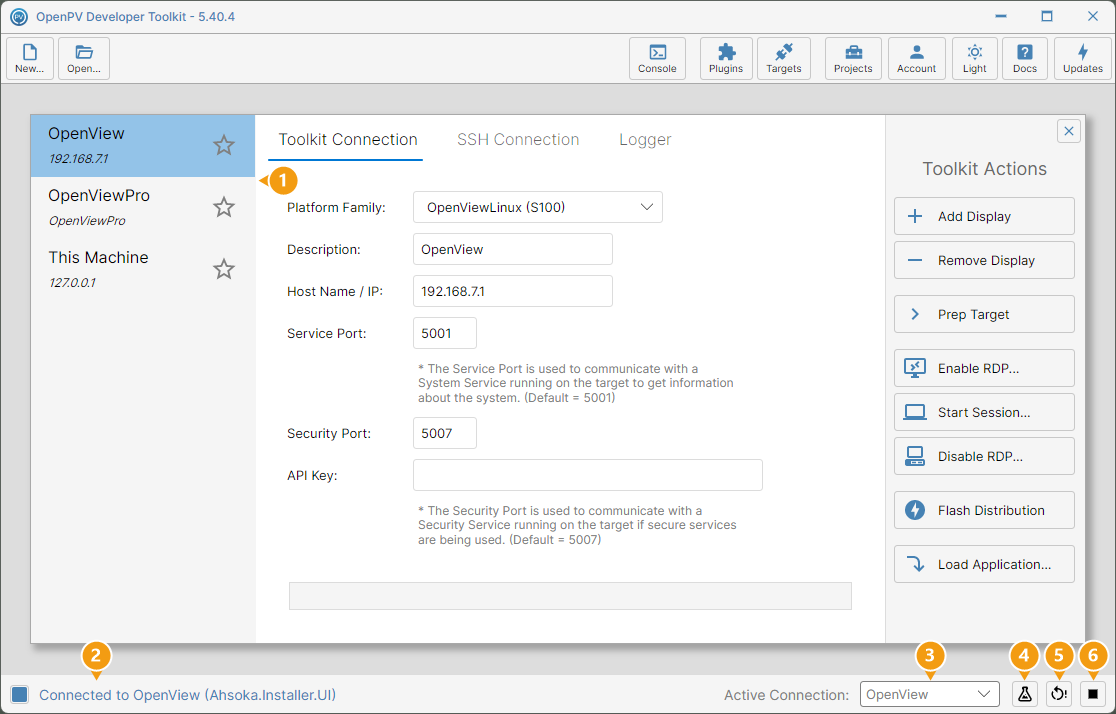
Once a connection is added, its details are split across three tabs — Toolkit Connection, SSH Connection, and Logger. The default Targets panel is shown below, with each numbered item described in turn:
- Connection list — every device connection you've configured (here OpenView, OpenViewPro, and This Machine), each showing its name and host.
- Connection status — a colored square (tooltip: Click to Show Details) plus text showing whether the toolkit is currently connected to the Active Connection's device (e.g. Connected to OpenView (Ahsoka.Installer.UI), or Waiting for Connection to... if not).
- Active Connection — the dropdown selecting which configured connection the status indicator (and the rest of the panel) refers to.
- Test Runner (flask icon) — runs the test suite against the Active Connection's device.
- Reboot Display (circular arrow icon) — reboots the Active Connection's device.
- Stop Application (square icon) — stops the application currently running on the Active Connection's device.
Add Display
-
Click Add Display. A new connection is added to the list right away — no dialog — selected and pre-filled with defaults (Desktop (Windows), description New Item, host 127.0.0.1).
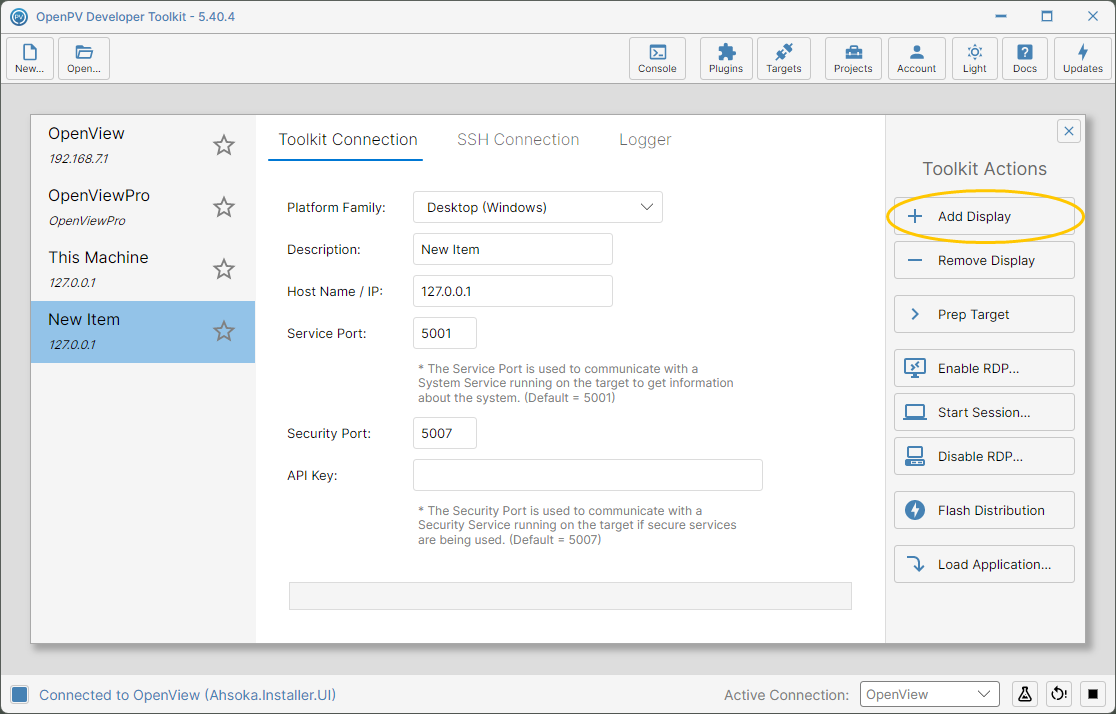
A new connection added with default values -
Click Platform Family and choose the display model — here, OpenViewLinux (S70).
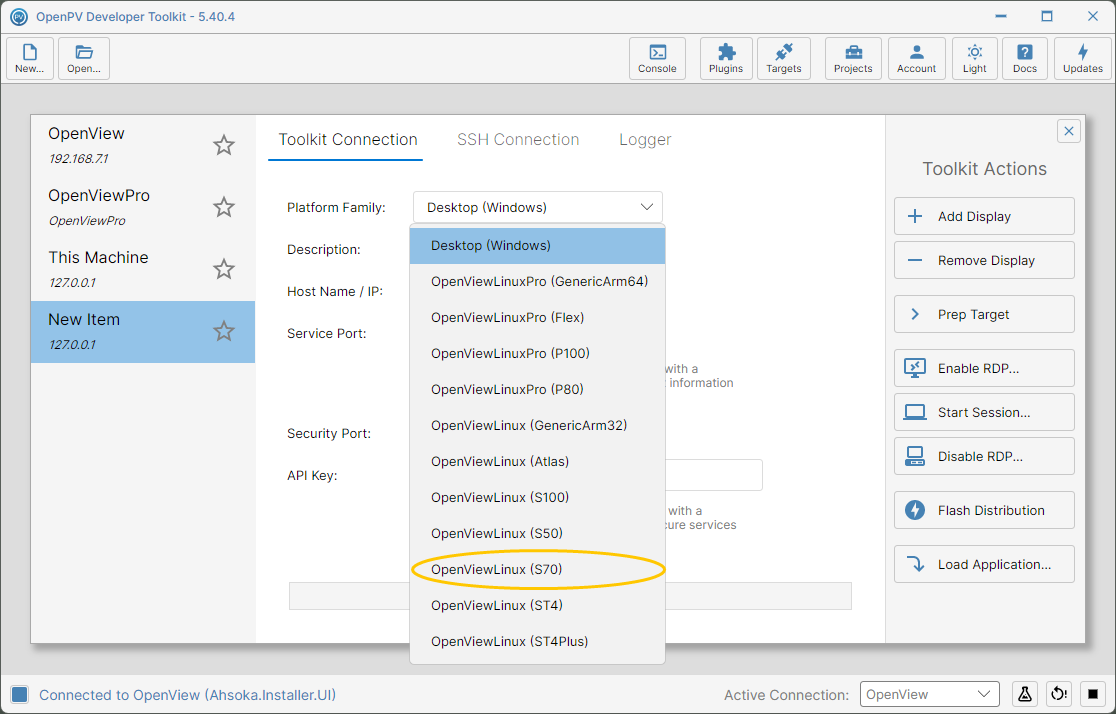
The Platform Family dropdown, with every supported display model -
Update Description and Host Name / IP to match the device — here, OpenView Demo at 192.168.7.2. Changes save automatically, and the connection list updates to match as you type.
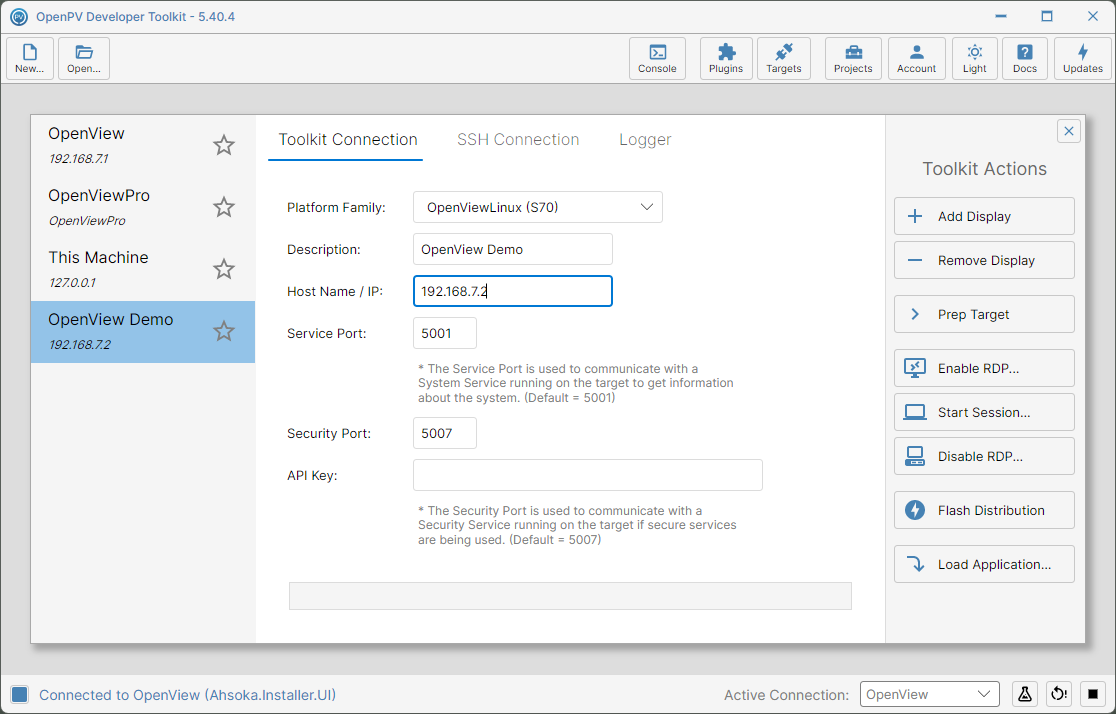
The new connection fully configured as OpenView Demo
Remove Display
-
With a connection selected, click Remove Display. A confirmation dialog asks you to confirm.
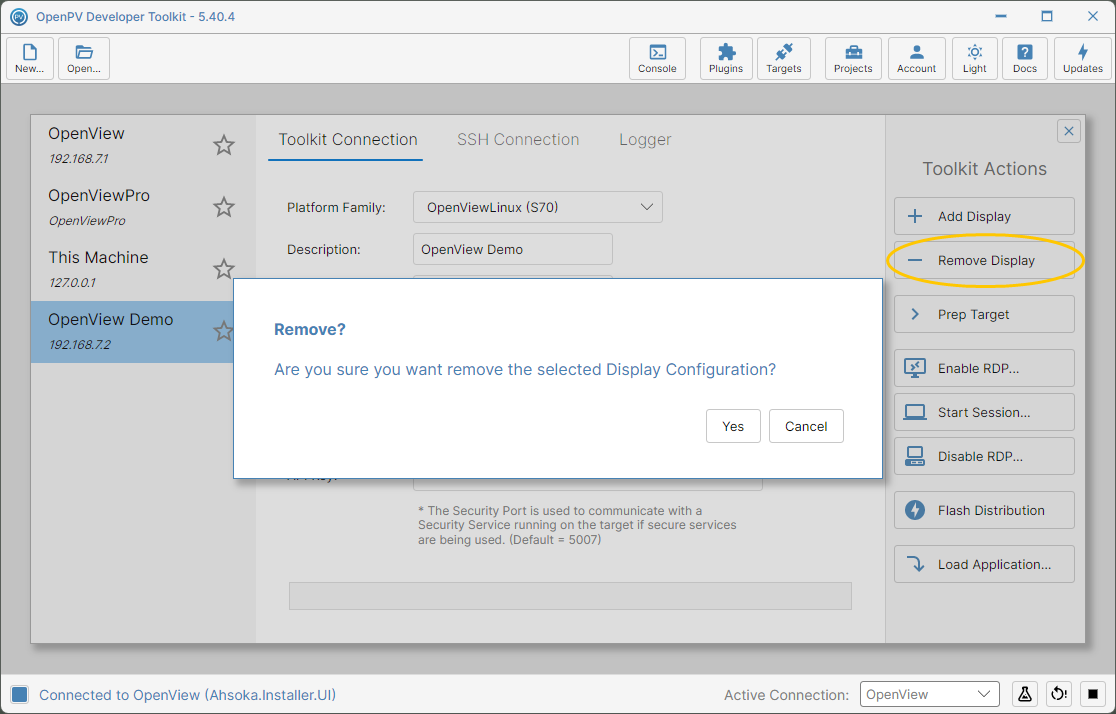
The Remove confirmation dialog -
Click Yes. The connection is removed from the list immediately.
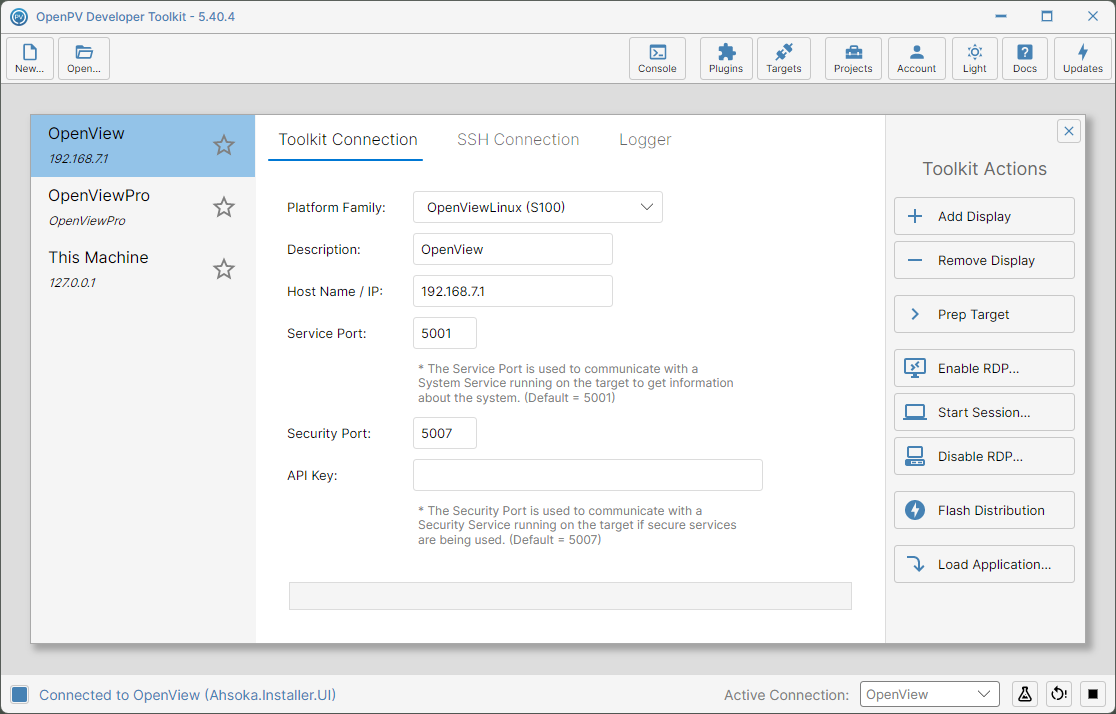
Back to the original connection list after removing OpenView Demo