Manage Members
Utilities Projects Requires: internet connection
Add and remove a project's online team members, and configure their access role.
Add Member
-
On the toolbar, click Projects. Then, on the Project Members card, click MANAGE MEMBERS.
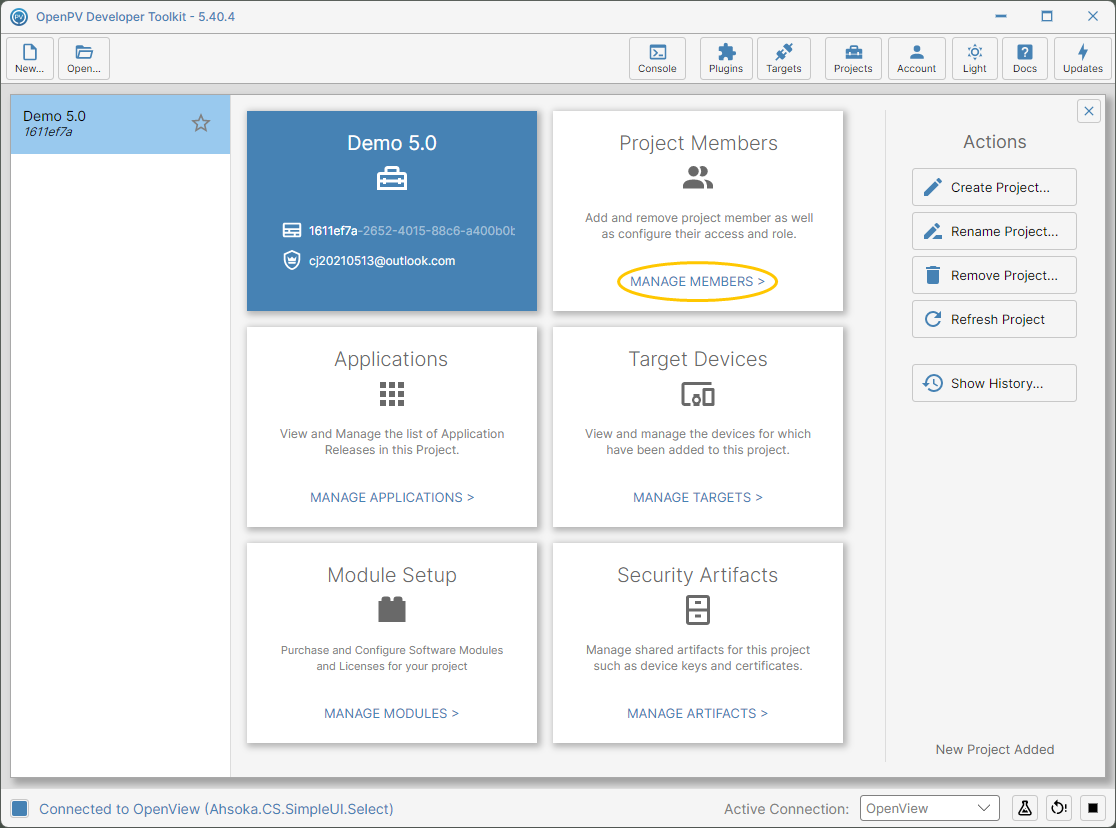
The MANAGE MEMBERS link on the Project Members card -
The Project Members panel lists everyone with access — at first, just the project's owner. Click Add Member....
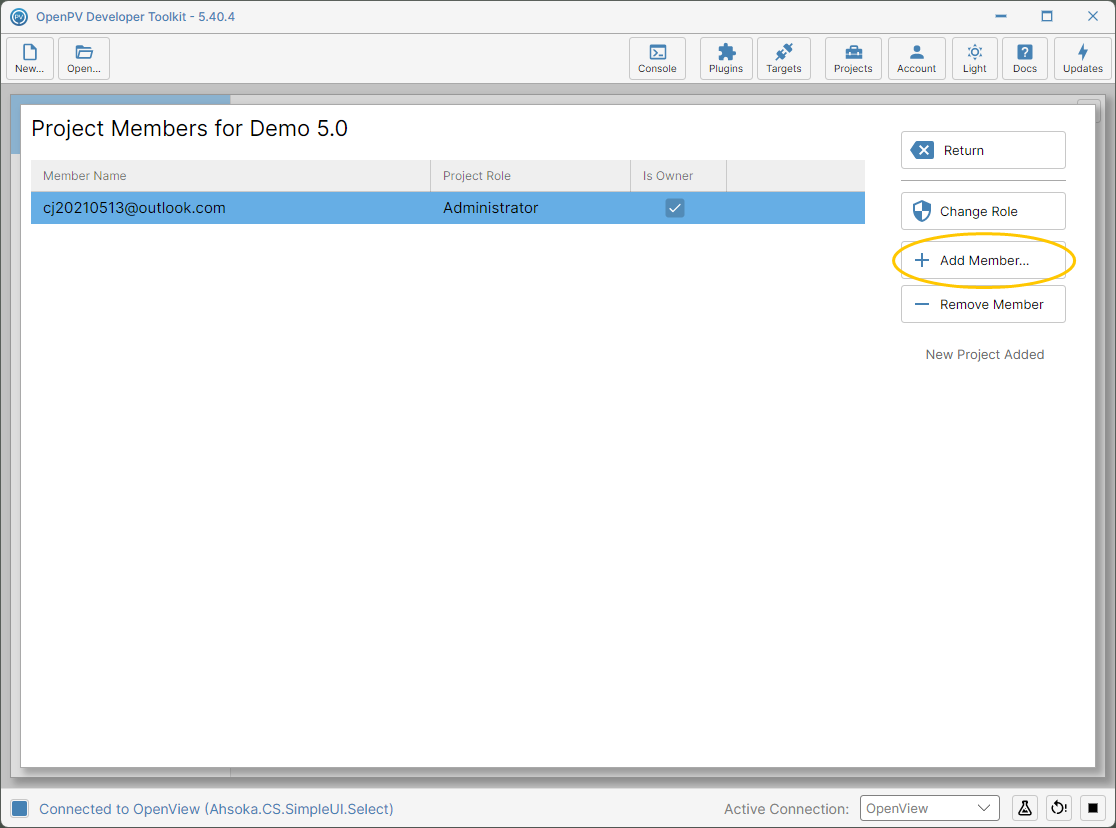
The Project Members panel, owner only -
The Add Team Member dialog opens. As its note says, team members can also create and manage apps and devices.
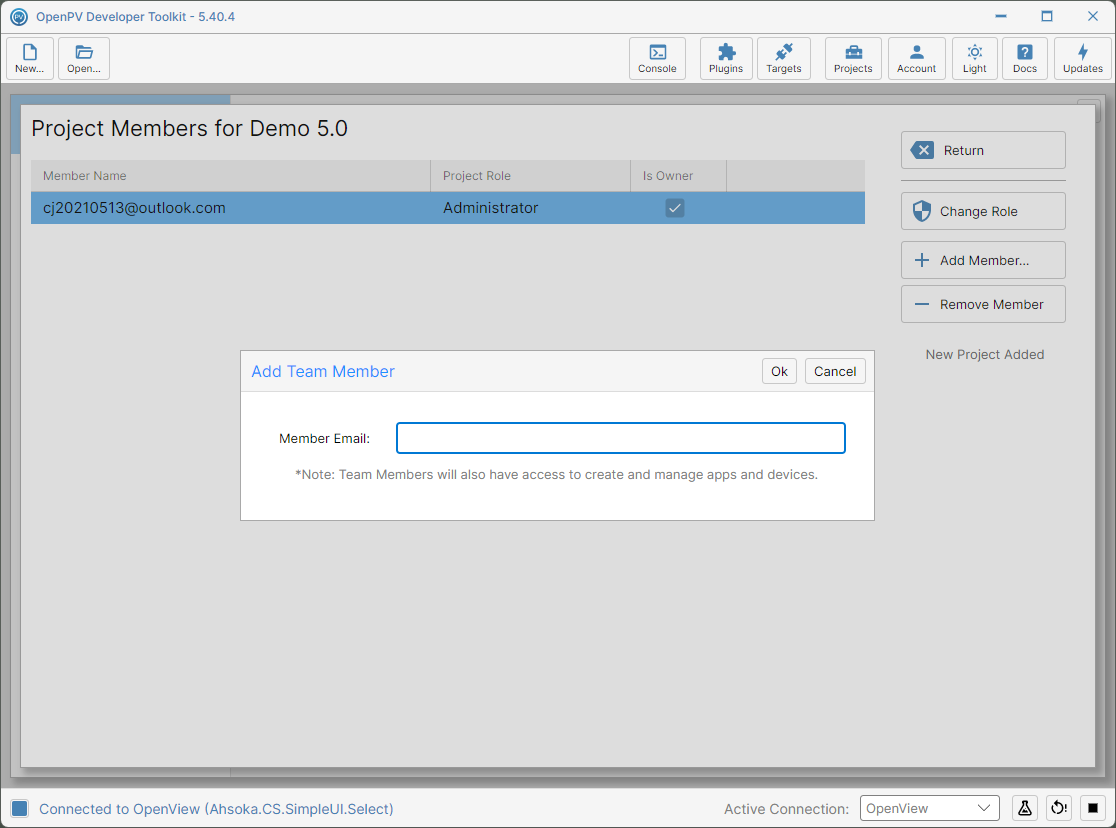
The Add Team Member dialog -
Type the person's email in Member Email — here, ms20210513@outlook.com — then click Ok.
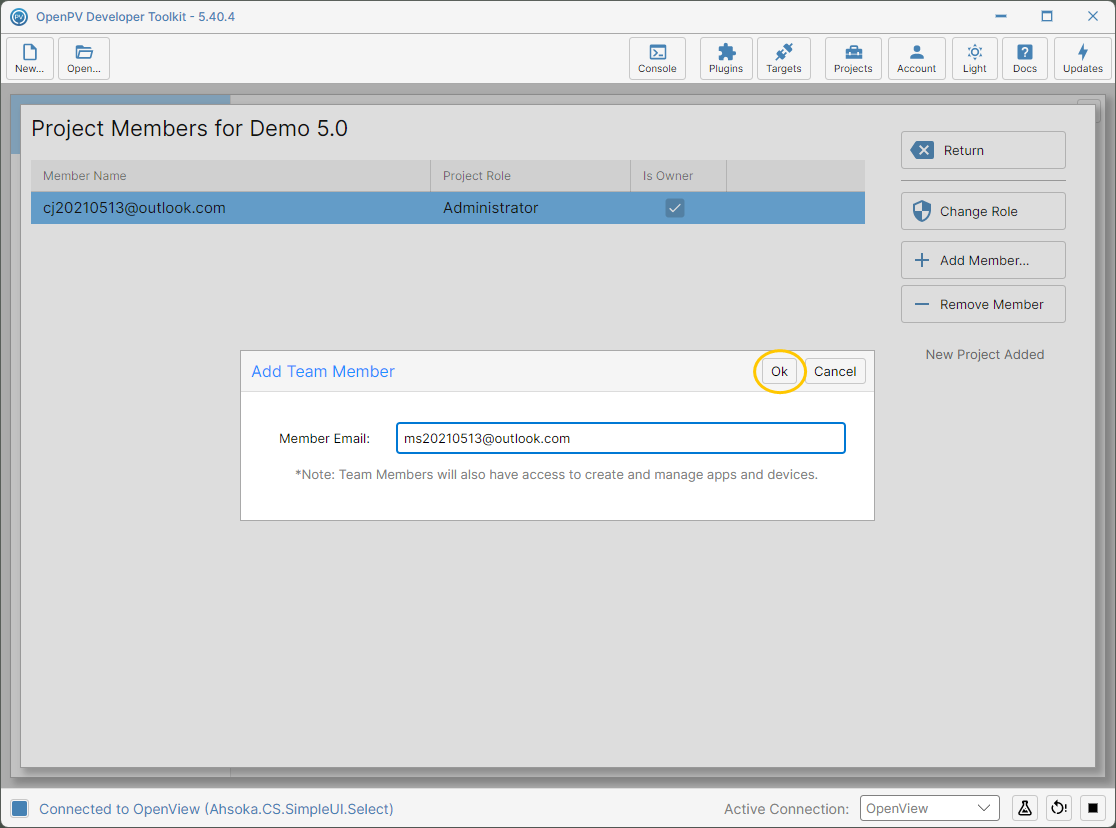
The member's email entered -
The member is added straight away, with the default Member role, and the status shows Member Added.
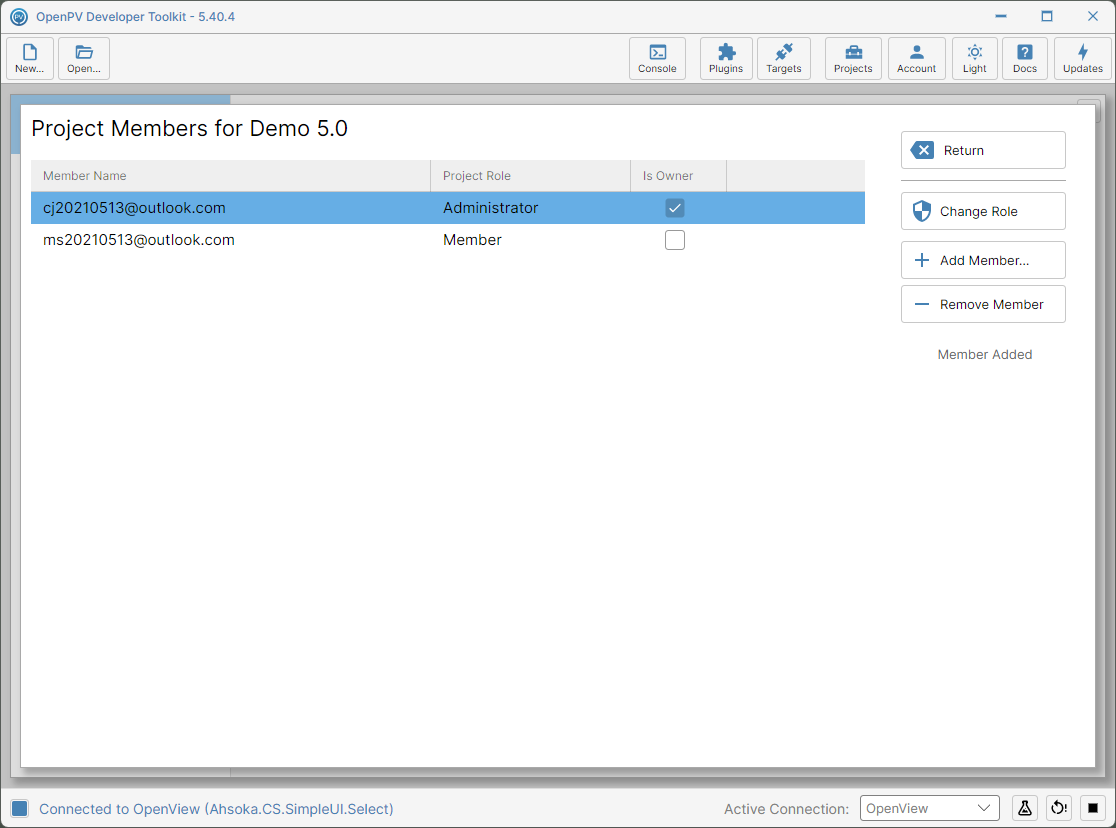
The new member added with the Member role
Change Role
-
Click a member's row to select it — here, the member just added — then click Change Role.
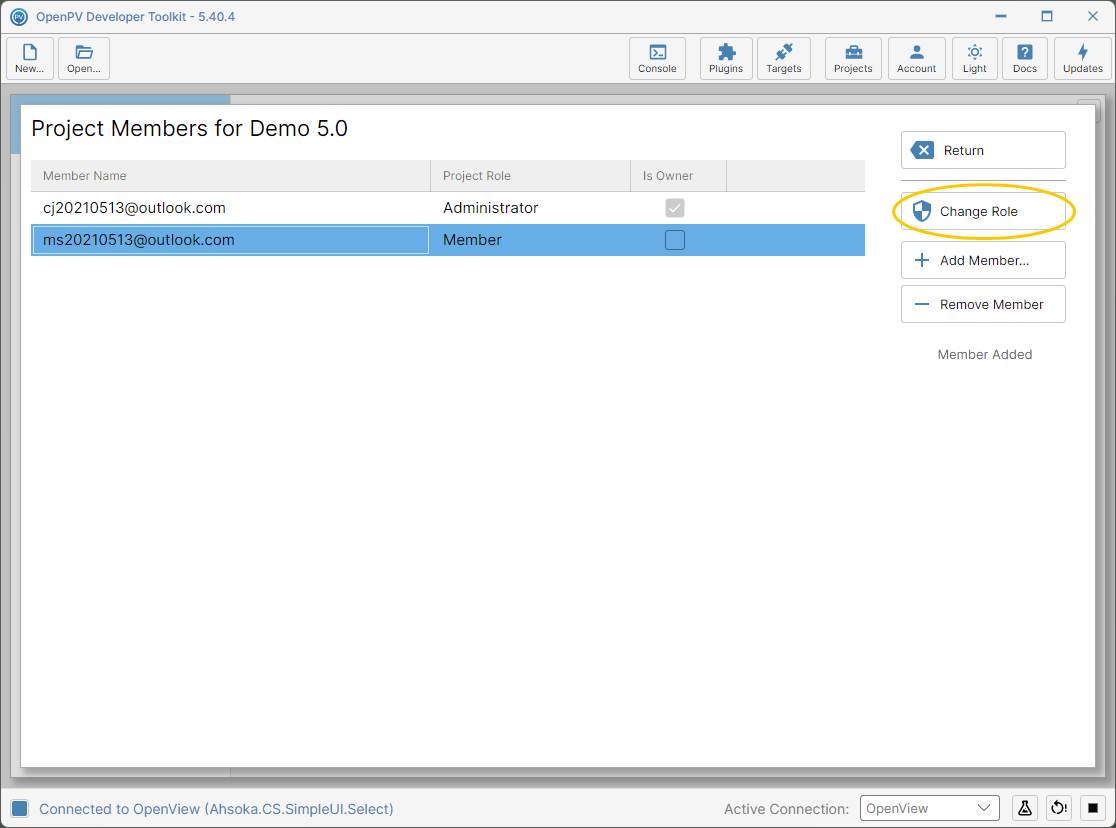
The new member selected, and the Change Role button -
A menu lists the four roles. Click the one you want — here, Project Administrator.
- Project Administrator — full control, including managing members and adding and removing projects.
- Project Member — can manage modules, devices, application releases and artifacts.
- Project Viewer — can view project information, but not change it.
- Production Login — can view project information and add devices.
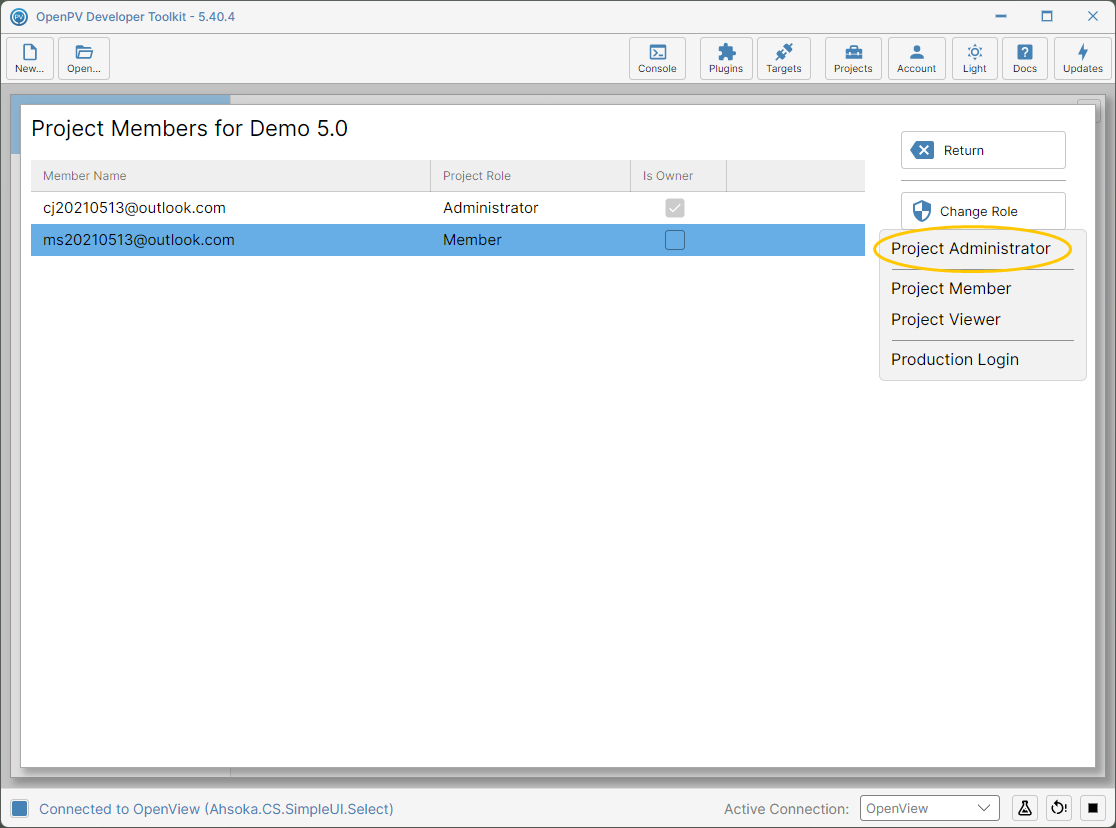
The Change Role menu -
The change applies straight away — there's no confirmation — and the member's Project Role now reads Administrator.
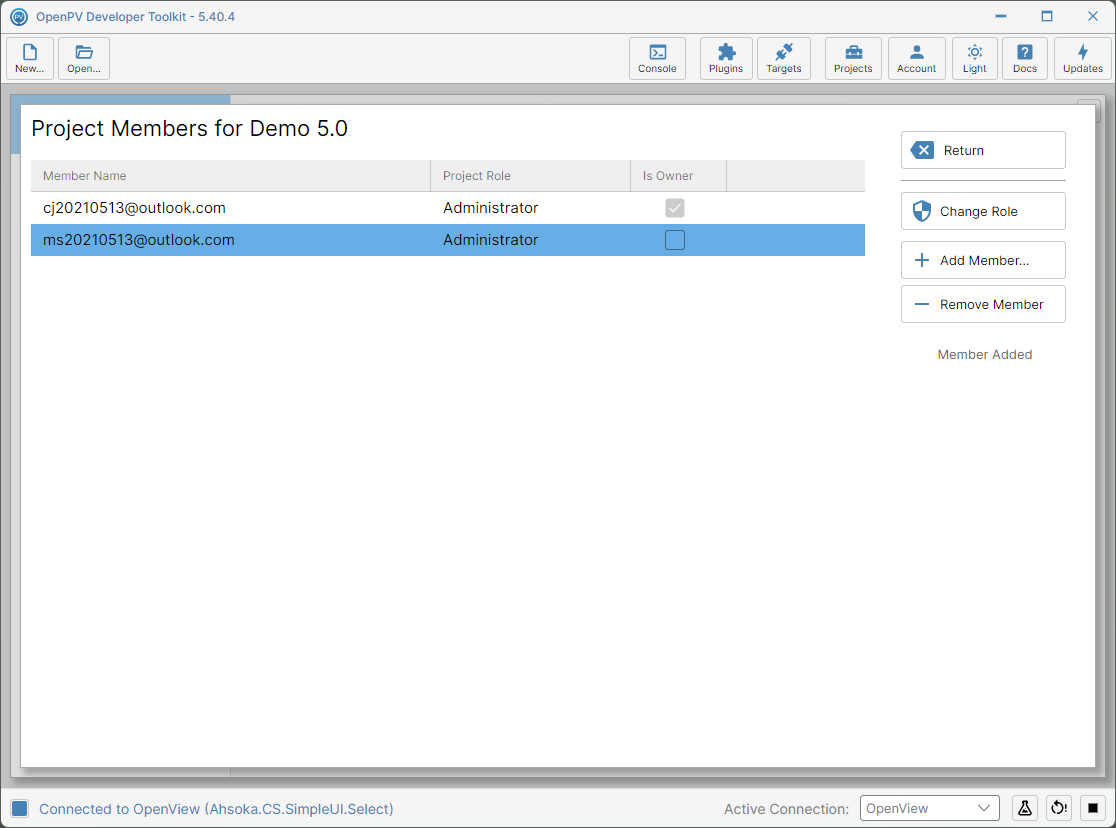
The member's role changed to Administrator
Remove Member
-
With the member still selected, click Remove Member.
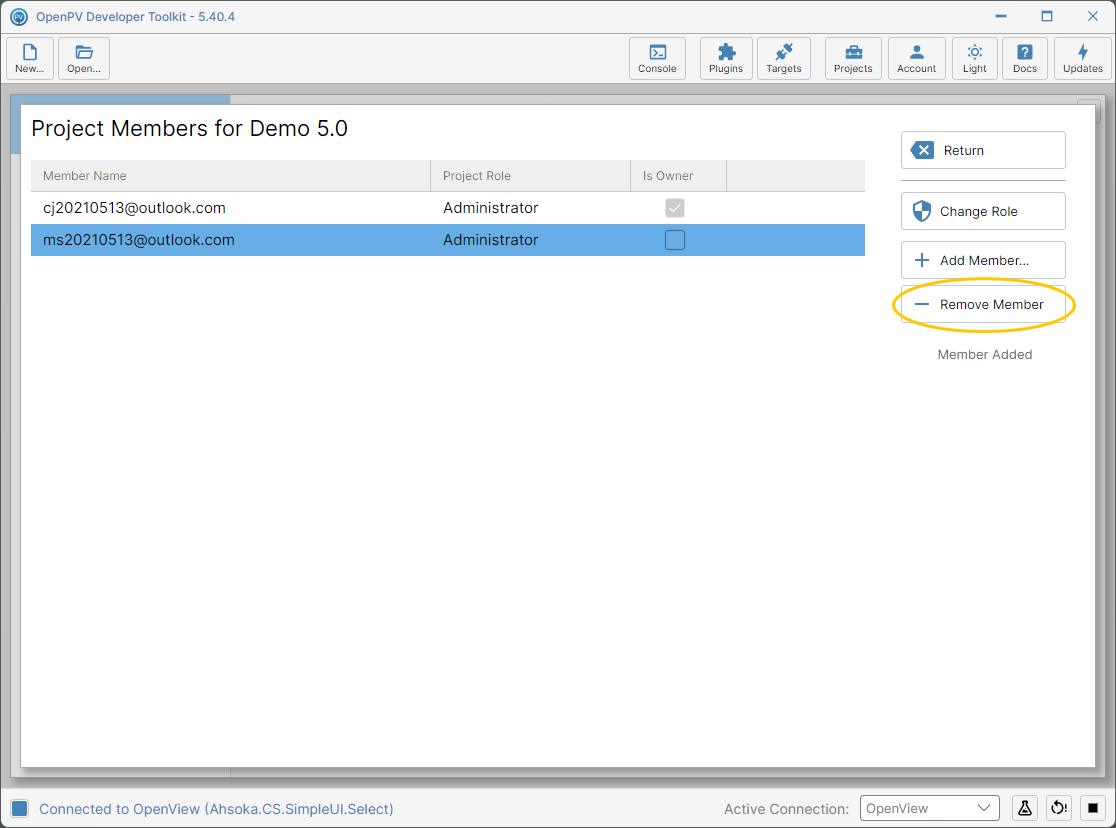
The Remove Member button -
A Remove? dialog asks you to confirm. Click Yes.
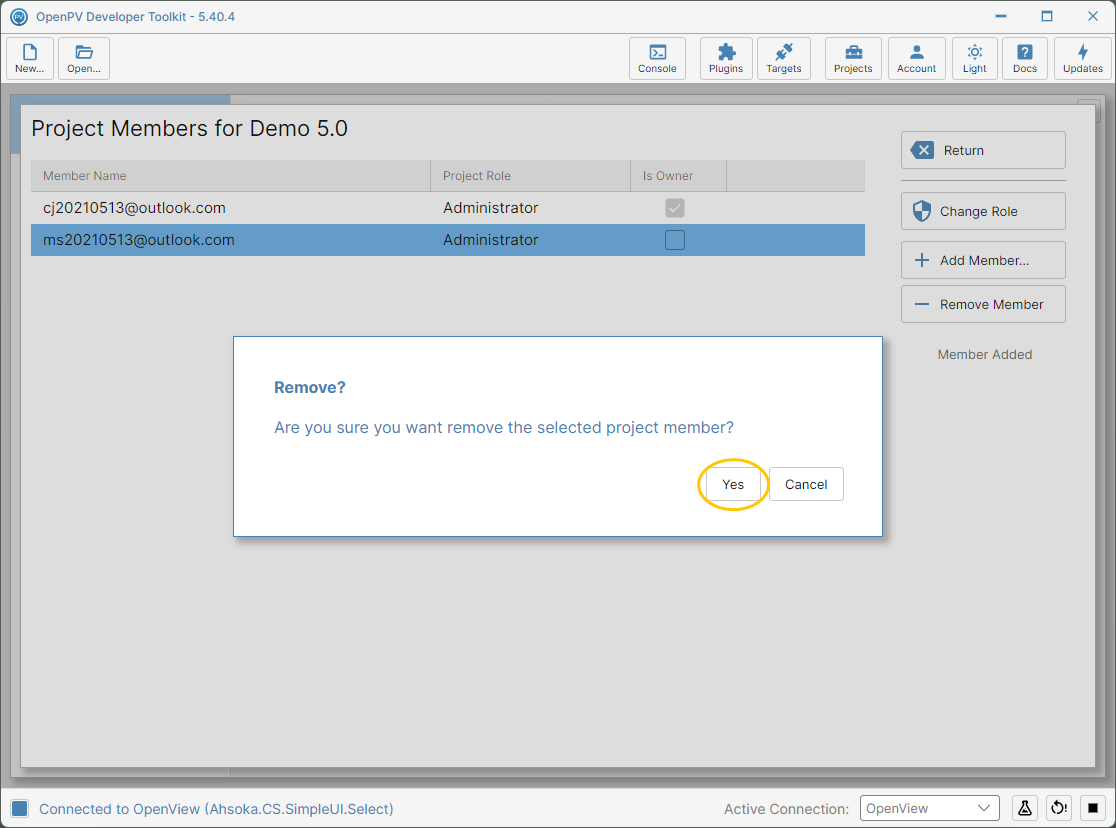
The Remove? confirmation dialog -
The member is removed straight away, leaving just the project's owner, and the status shows Member Removed.
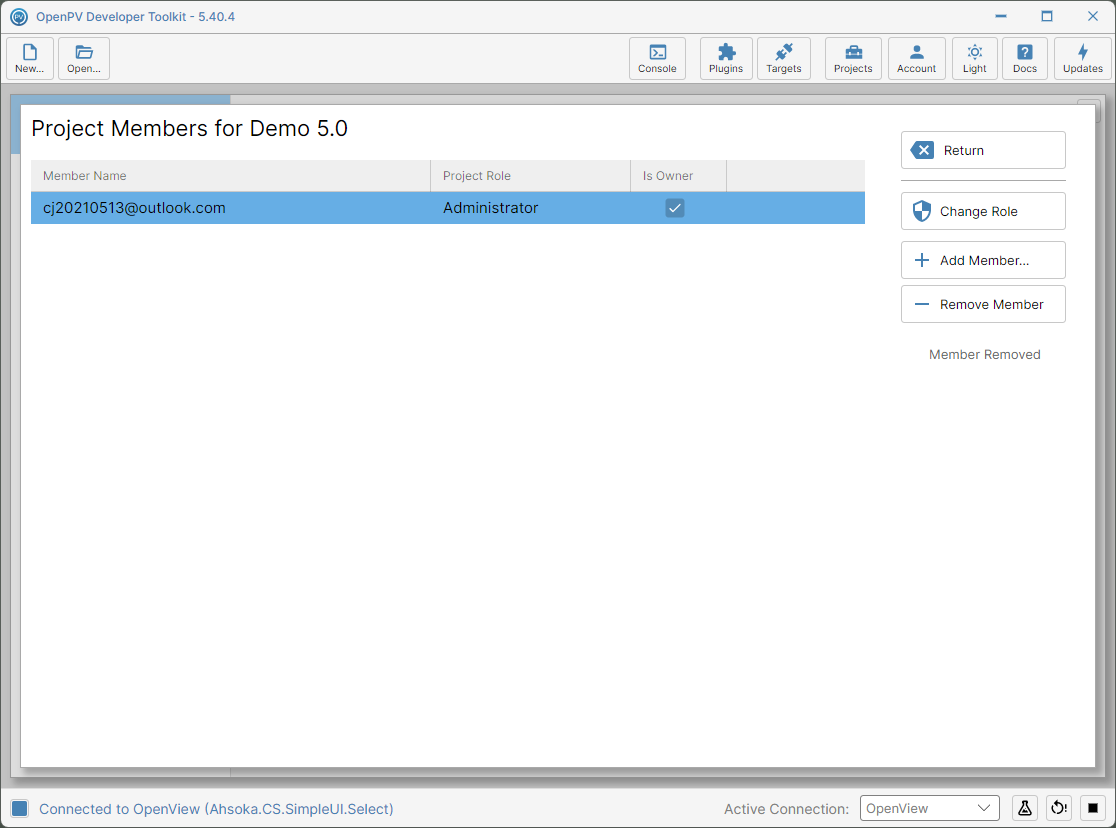
Back to the owner only, after removing the member