Service Manager
Packaging Tools Requires: project open
Choose which OpenPV services ship in your app, how and when each one starts, and how callers authenticate against them.
Configure which OpenPV services are included in your application and how each one starts. Tick a service to include it — a Start Order field and an Options... button appear next to it. An unticked service isn't started automatically. Unticking a Core service discards its settings, and ticking it again brings back the defaults; an extension service ticked again keeps its other options, but its Start Order and Auto Start Delay go back to 0. Services provided by extensions appear in the same list, labeled with the extension they come from, and can be ticked or unticked like any other service.
A service's checkbox and its Auto Start setting are two different switches. The checkbox decides whether the service is configured in your package at all. Auto Start, set in Options..., decides whether a configured service starts automatically when your app launches; if it's off, your app can still start the service later in code by calling StartService on a DeviceServiceClient, passing a ServiceStartInfo with the service's name, port and addresses. DeviceService must be running for this to work.
Start Order controls the sequence services start in. Services are grouped by their Start Order number and the groups start one at a time, lowest number first; each group finishes starting before the next one begins. Services with the same Start Order — the default for every service is 0 — start together, in parallel, in no particular order. In the screenshot below, ToolkitService has been set to Start Order 1, so it starts after every Start Order 0 service instead of alongside them.
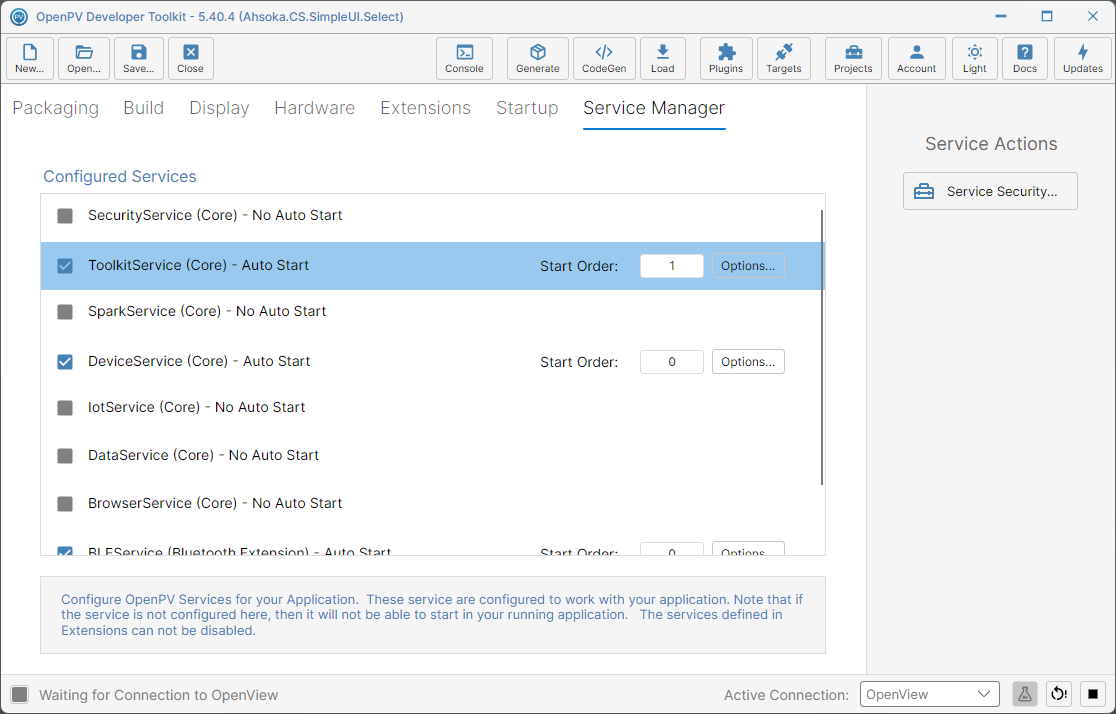
What each service does:
- SecurityService (default port 4999) — issues the tokens other services use to check that a caller is allowed to connect, and can pass each request to your app on the display to accept or reject. Set up with Service Security... below.
- ToolkitService (default port 5001) — the connection point for the Developer Toolkit itself: loading applications onto the device, reading hardware information, Spark subscription settings, license updates and logging configuration.
- SparkService (default port 5002) — manages over-the-air (OTA) updates through the Spark cloud.
- DeviceService (default port 5003) — manages USB device events, power modes and other system features of the hardware (Windows, Ubuntu, macOS, or the OpenView display).
- IotService (default port 5005) — manages MQTT client connections, for publishing or subscribing to MQTT messages.
- DataService (default port 5012) — a shared, in-memory key/value cache: services publish values into it, and clients (including your app's UI data bindings) are notified when a value changes.
- BrowserService (default port 5006) — launches and controls a browser (a desktop browser on Windows, Ubuntu or macOS, or the embedded browser on the OpenView display) to open web content from your app. On Windows, Ubuntu or macOS it can only open a URL in the default browser; navigating, reloading and closing work only with the embedded browser on the OpenView display.
Adding an extension adds its own services underneath the Core ones — here, BLEService and BluetoothService from Bluetooth Extension. Extension services don't have fixed ports: the toolkit numbers the ticked ones automatically from 7000, in the order they appear in the list, so unticking or removing one renumbers the ones after it. Ports can also change when you add an extension or reopen the project, so don't hard-code extension service ports.
- BLEService (Bluetooth Extension) — manages Bluetooth LE (Low Energy) connections.
- BluetoothService (Bluetooth Extension) — manages the classic Bluetooth adapter and its profiles: discovery, pairing, hands-free calling, media playback, phonebook and message access.
- A2BService (Audio Manager Extension) — manages the A2B (Automotive Audio Bus) node controller for the audio system.
- AudioManagerService (Audio Manager Extension) — manages the platform's audio hardware and output configuration.
- TunerService (Audio Manager Extension) — manages AM, FM, FM HD, DAB and weather-band radio tuner hardware.
- CanService (Control Service Extension) — manages CAN (Controller Area Network) communication with the vehicle or equipment bus, typically through an onboard MCU.
- IOService (Control Service Extension) — manages digital and analog IO, and reports ignition-state changes to connected clients.
- DiagnosticService (Diagnostic Extension) — tracks diagnostic and fault states and broadcasts changes to connected clients.
- VideoService (Video Player Extension) — manages video player instances, including camera and video surfaces.
Service Option
-
Click Options... next to a ticked service — here, ToolkitService — to open Service Setup.
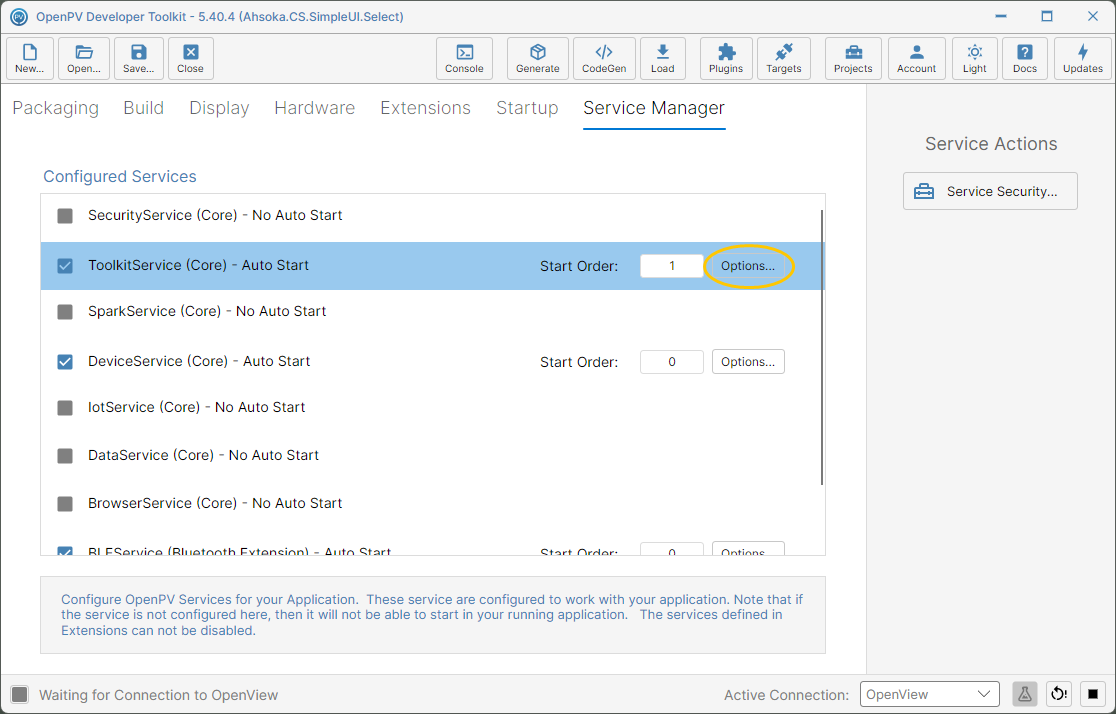
The Options... button for ToolkitService -
Service Setup opens, with five settings for this service:
- Auto Start Service In Service Manager — whether this service starts automatically when your app launches. It's shown as Auto Start or No Auto Start next to the service in the list.
- Require API Key for Service — callers must have a valid API key, set up under Service Security, before this service accepts their requests.
- Allow Access from Local Apps Only — the service only accepts connections from the display itself, not from other machines on the network. It's ticked by default for every Core service except ToolkitService.
- TCP Listen Port — the port this service listens on.
- Auto Start Delay (ms) — how long to wait, in milliseconds, before auto-starting this service when your app launches. Services later in the Start Order wait for this delay too.
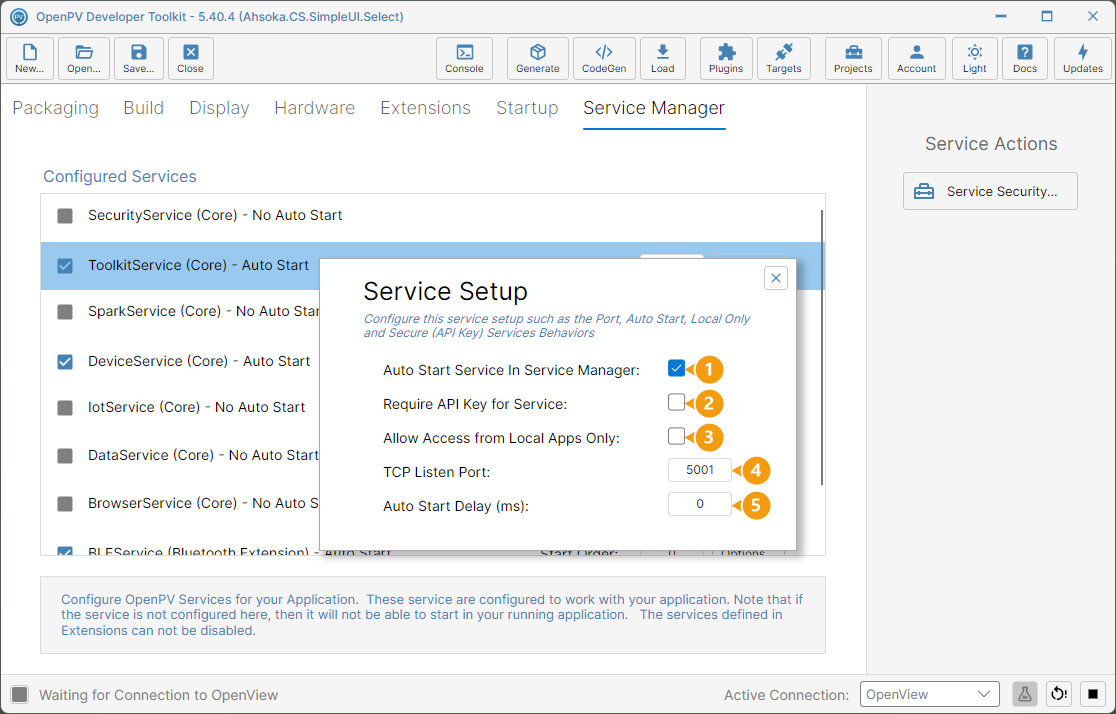
Service Setup, with each field numbered -
Click TCP Listen Port and type a new port — here, 5101.
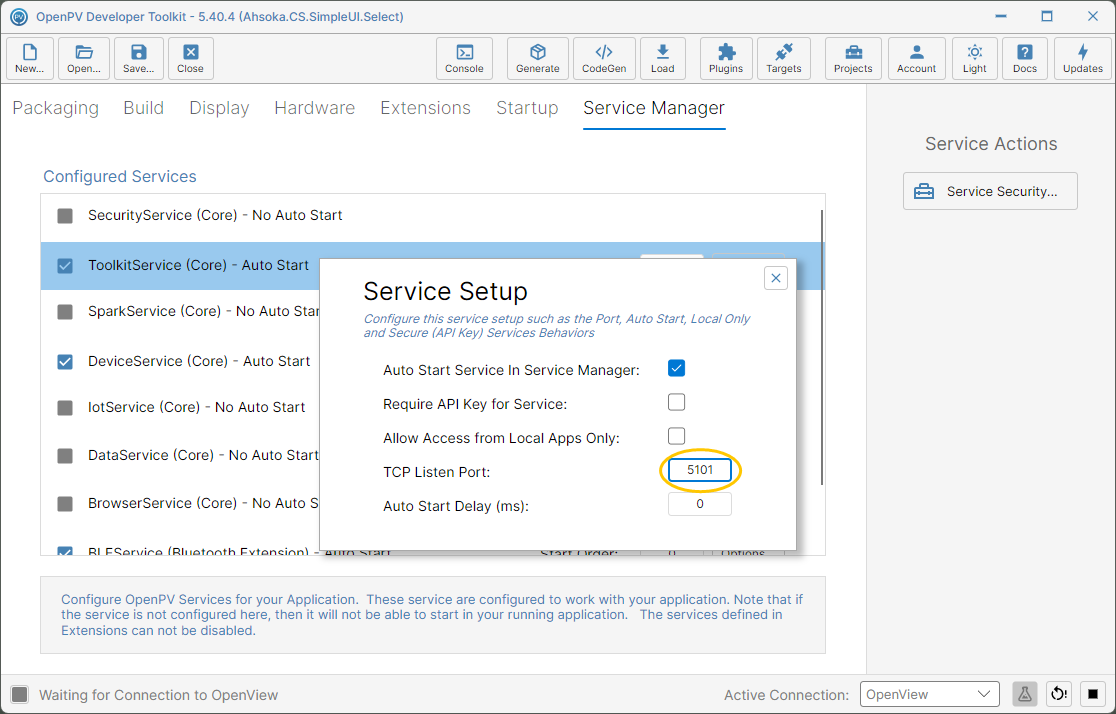
TCP Listen Port changed to 5101 -
Click the X to close Service Setup. There's no OK button — your changes are kept straight away, and saved to the project when you click Save....
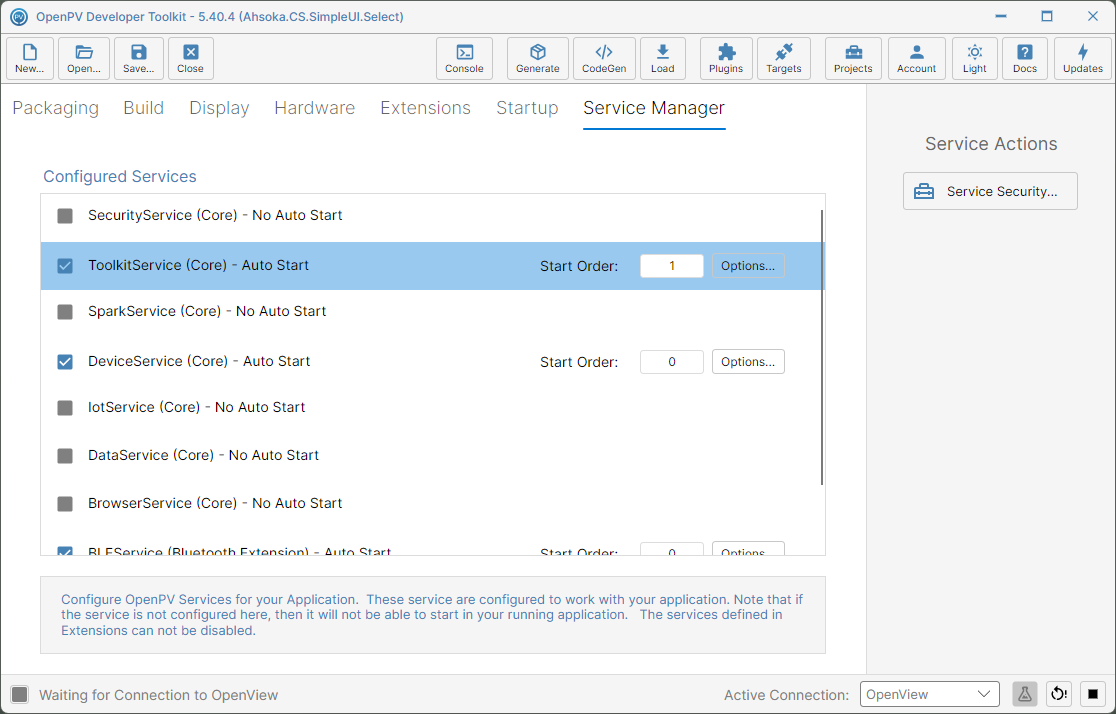
Back at the service list, after closing Service Setup
Service Security
To use the API key in your own app: create a SecurityServiceClient alongside a client for the service you want to call, and start both with AhsokaRuntime.Default.StartEndPoints. Call RequestToken with a TokenRequestInfo holding the API key and the IDs of the clients to unlock, then WaitForToken — if Challenge is set, this is where it waits for the app on the display to accept or reject. When TokenIsValid is true, call SetToken on the service's own client before using it. Calling a secured service without a valid token fails with a SecurityException (the service replies InvalidToken).
For a working example, see the Ahsoka.CS.Security demo. It creates a temporary service key in code, instead of using Security Setup.
-
On the right, click Service Security....
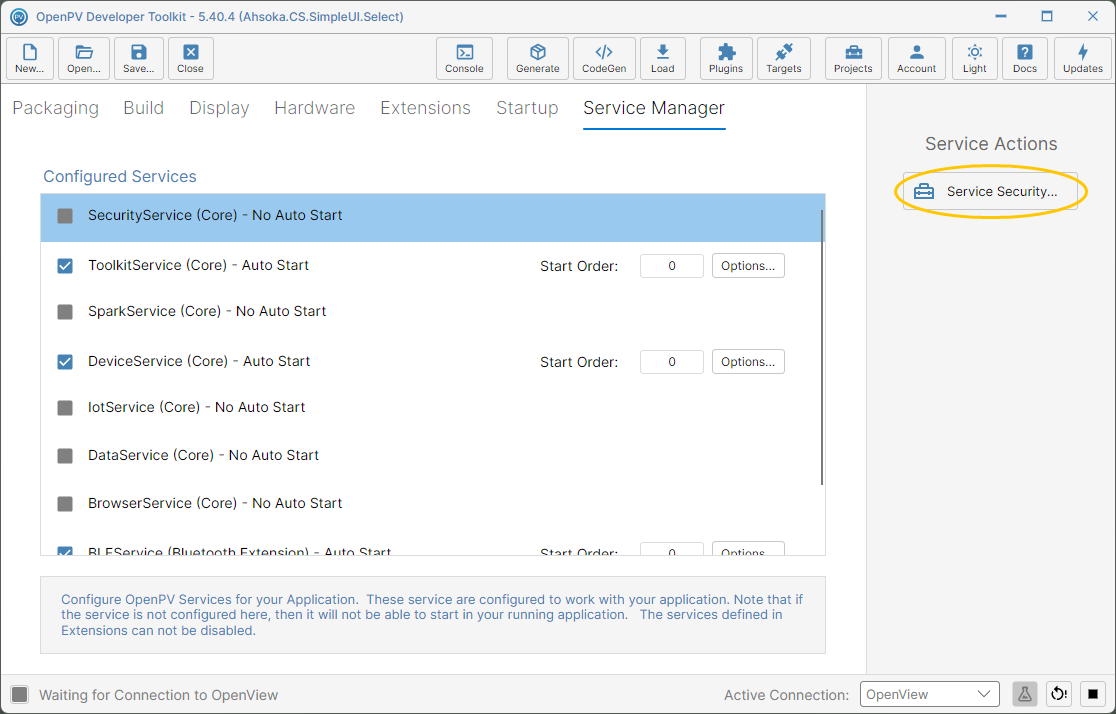
The Service Security... button -
Security Setup opens, with Service Key set to (None) and no API Key yet.
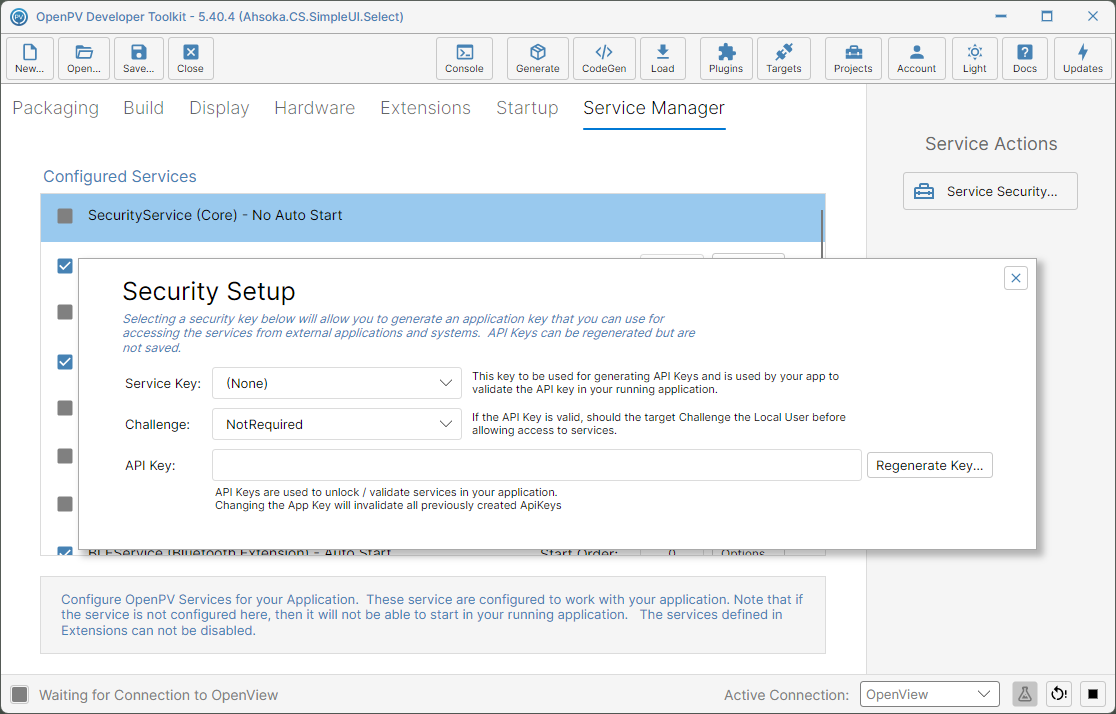
The Security Setup dialog, before a key is chosen -
Choose a Service Key — here, ServiceDemoKey, created under New Service Key. The list shows the service keys created or downloaded on this PC from Security Artifacts on the Projects panel; if a key is missing, download it there first.
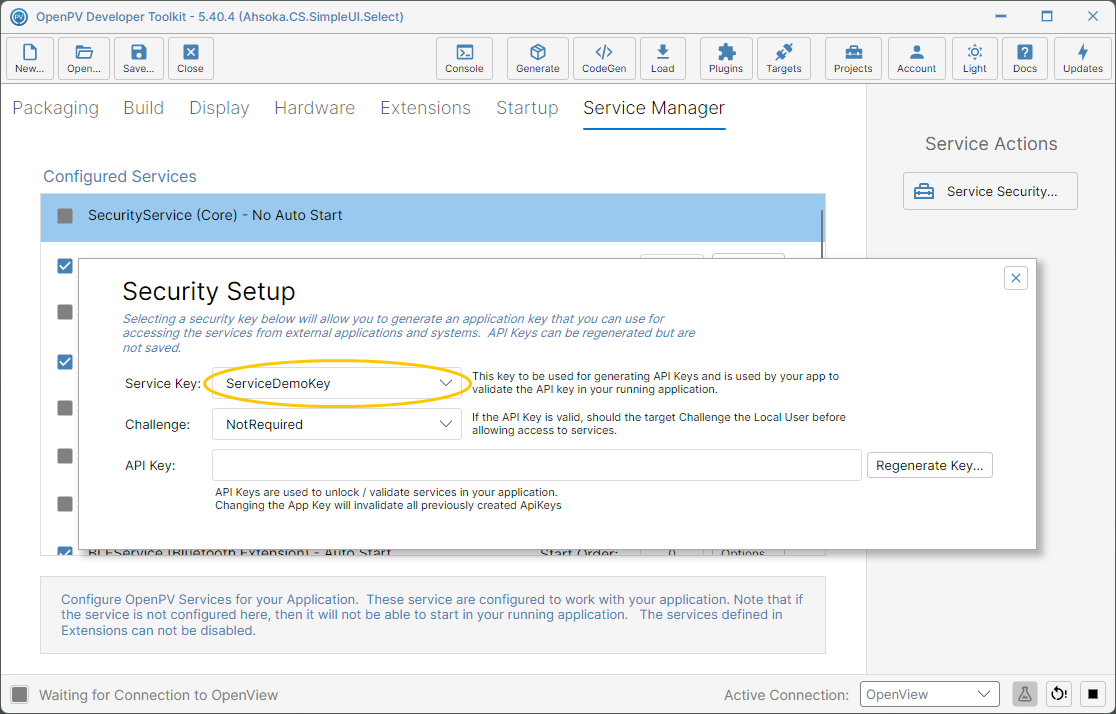
ServiceDemoKey selected as the Service Key -
Choose a Challenge — here, RequireDisplayChallenge. Each token request is then passed to your app on the display, which must accept or reject it — there's no built-in prompt, so your app has to handle this. NotRequired grants access as soon as the API key checks out.
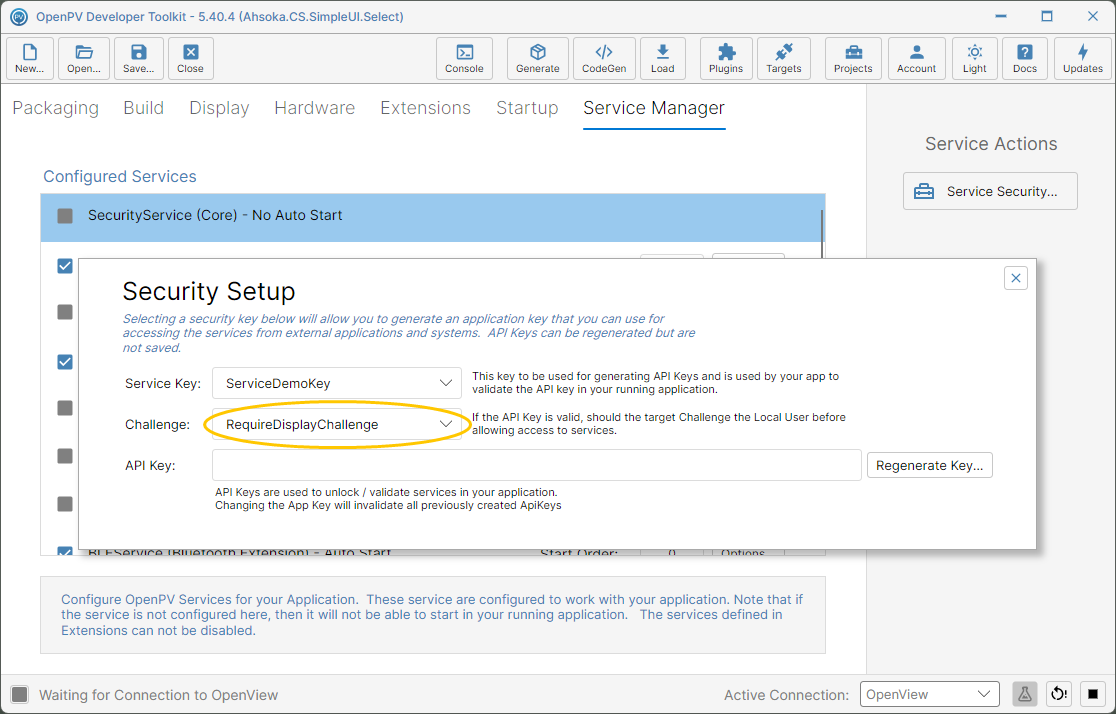
RequireDisplayChallenge selected -
Click Regenerate Key... to create the API Key that callers use to unlock your services. This needs a Provisioning Project set on the Packaging panel, because the key is checked against that project at runtime. Copy the API Key somewhere safe straight away — it isn't saved with the project, and it's gone once you close and reopen the project. If you choose a different Service Key, regenerate — the key on screen still belongs to the old one. If you lose it, regenerate a new one.
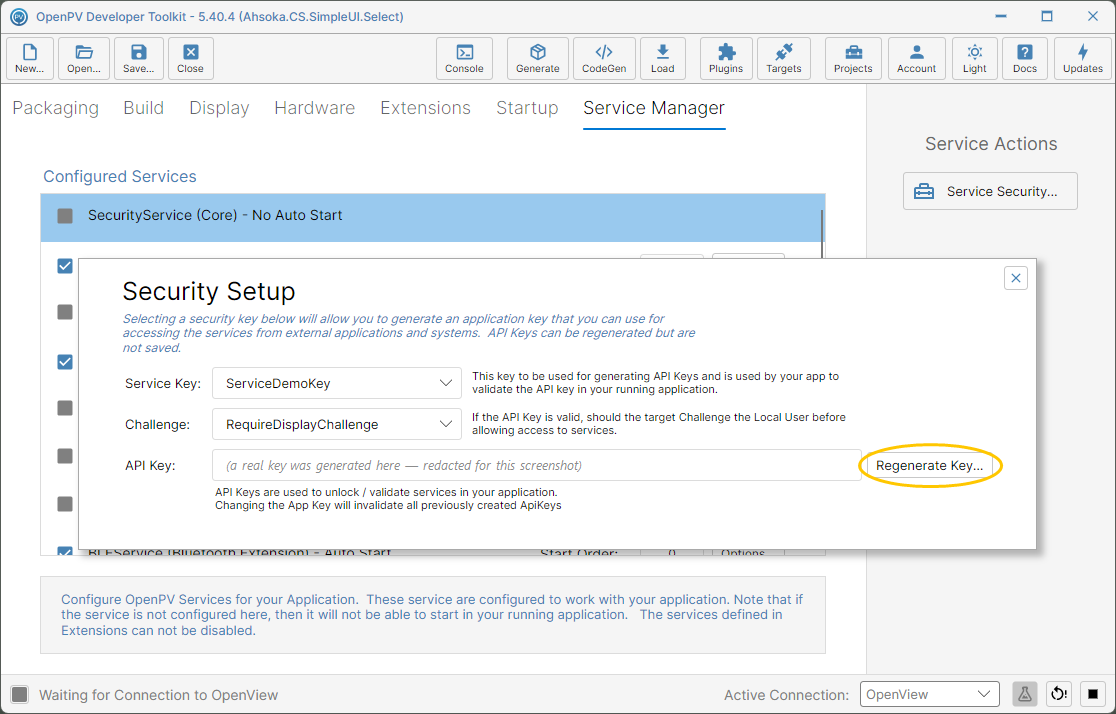
An API Key generated (redacted here) -
Click the X to close Security Setup and return to the service list.
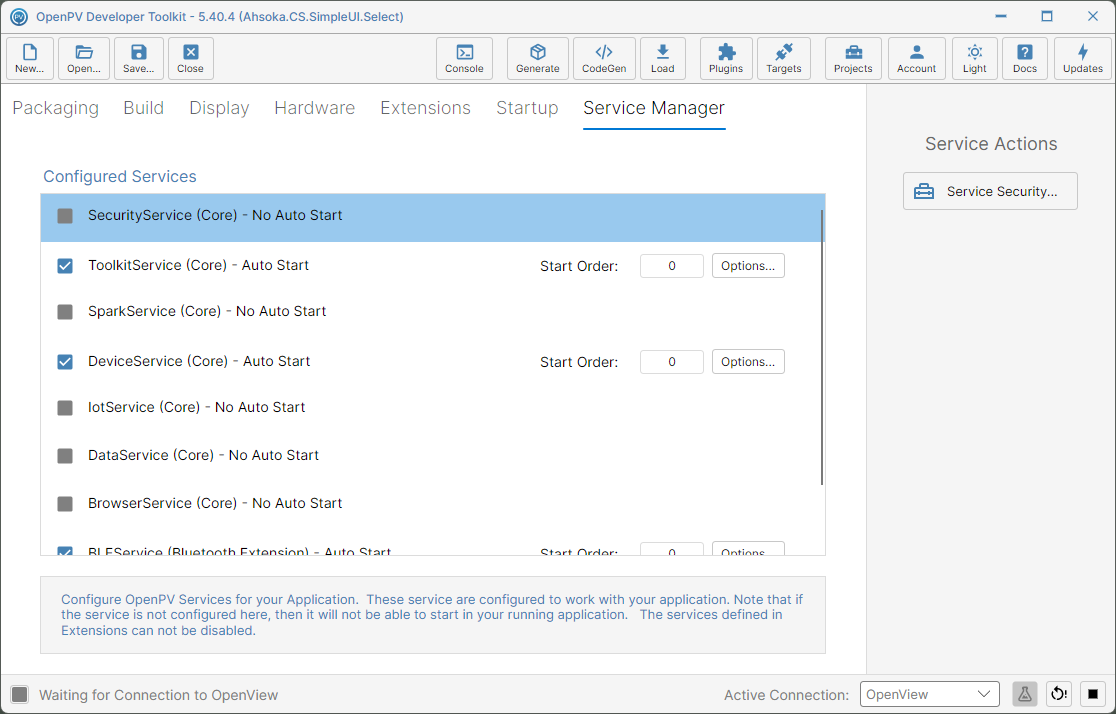
Back at the service list, after closing Security Setup